
CalendarS
Created by: Emma Johnston
Last Updated: August 26, 2025
Create a Calendar
CREATE THE CALENDAR
1. Click on Create Calendar.
2. Select a Calendar Type from the options available (such as Personal Booking or Round Robin). You can also also click on Explore More Types to access Event Calendars and Service Booking.

4. Enter a calendar name and select the required team members. You can add a calendar description by clicking on + Add Description and entering the required information.
5. Add a custom URL (such as businessname/calendarname) and set a meeting duration.
6. Set the booking availability for the calendar and appointment duration.
7. Press Confirm to finish.
To edit further settings, such as calendar location, color, logo, date range, buffer time, etc, click on Edit Calendar to access the Advanced Settings page.
Essential Advanced Settings
Advanced Setting Overview
ADVANCED SETTINGS
To edit further settings, such as calendar location, color, logo, date range, buffer time, etc, click on Edit Calendar to access the Advanced Settings page.
Meeting Details - edit the calendar name, calendar description, custom URL, and calendar group.
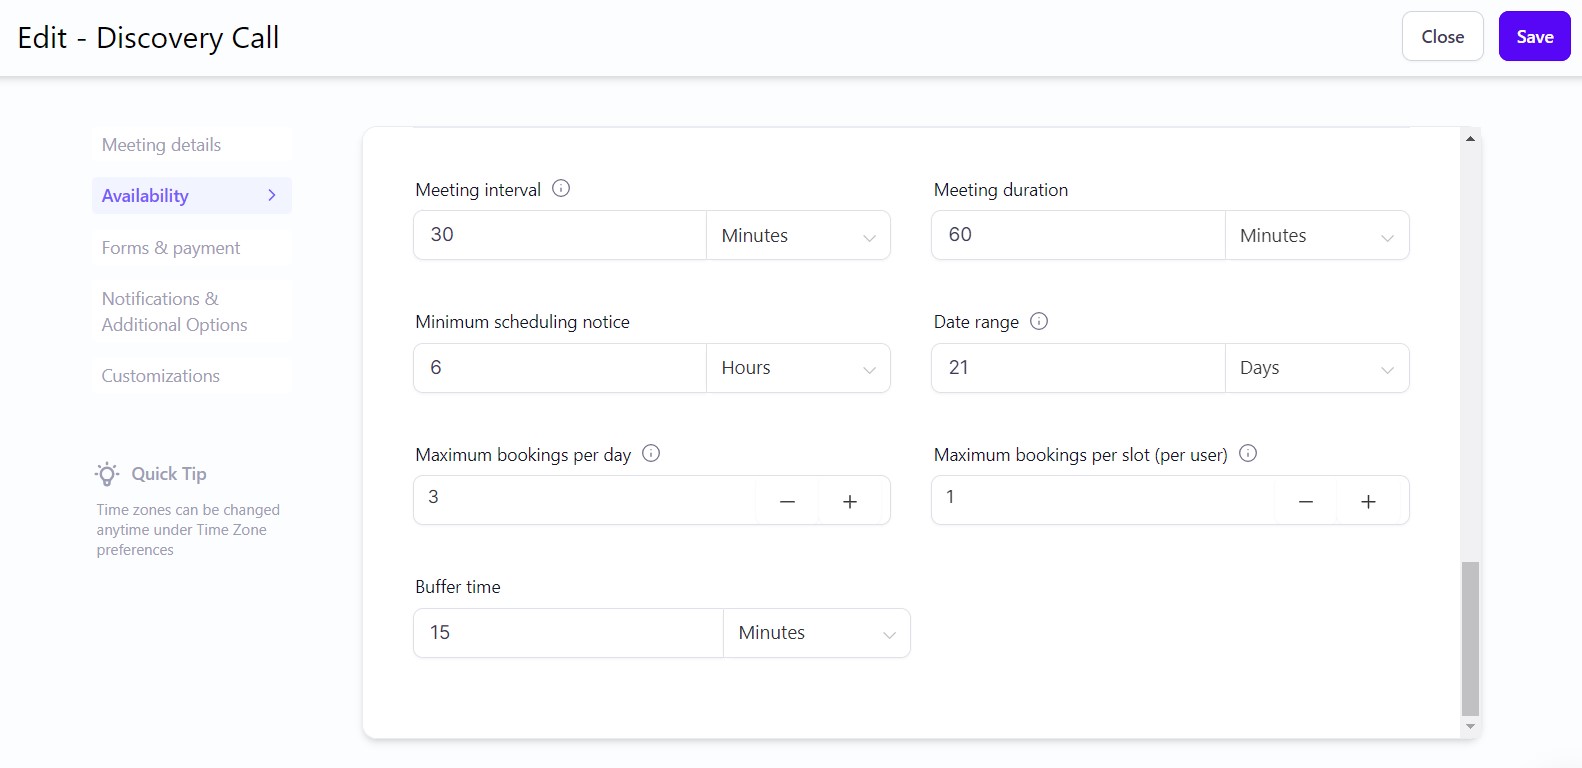
Availability - Set your availability for the calendar, as well as meeting duration and scheduling notice. Note that both the calendar availability and the user availability need to open for the calendar to display appointments.
Click here for more information on setting up user availability.
Forms & Payments - choose the calendar form, add guests and take payment.
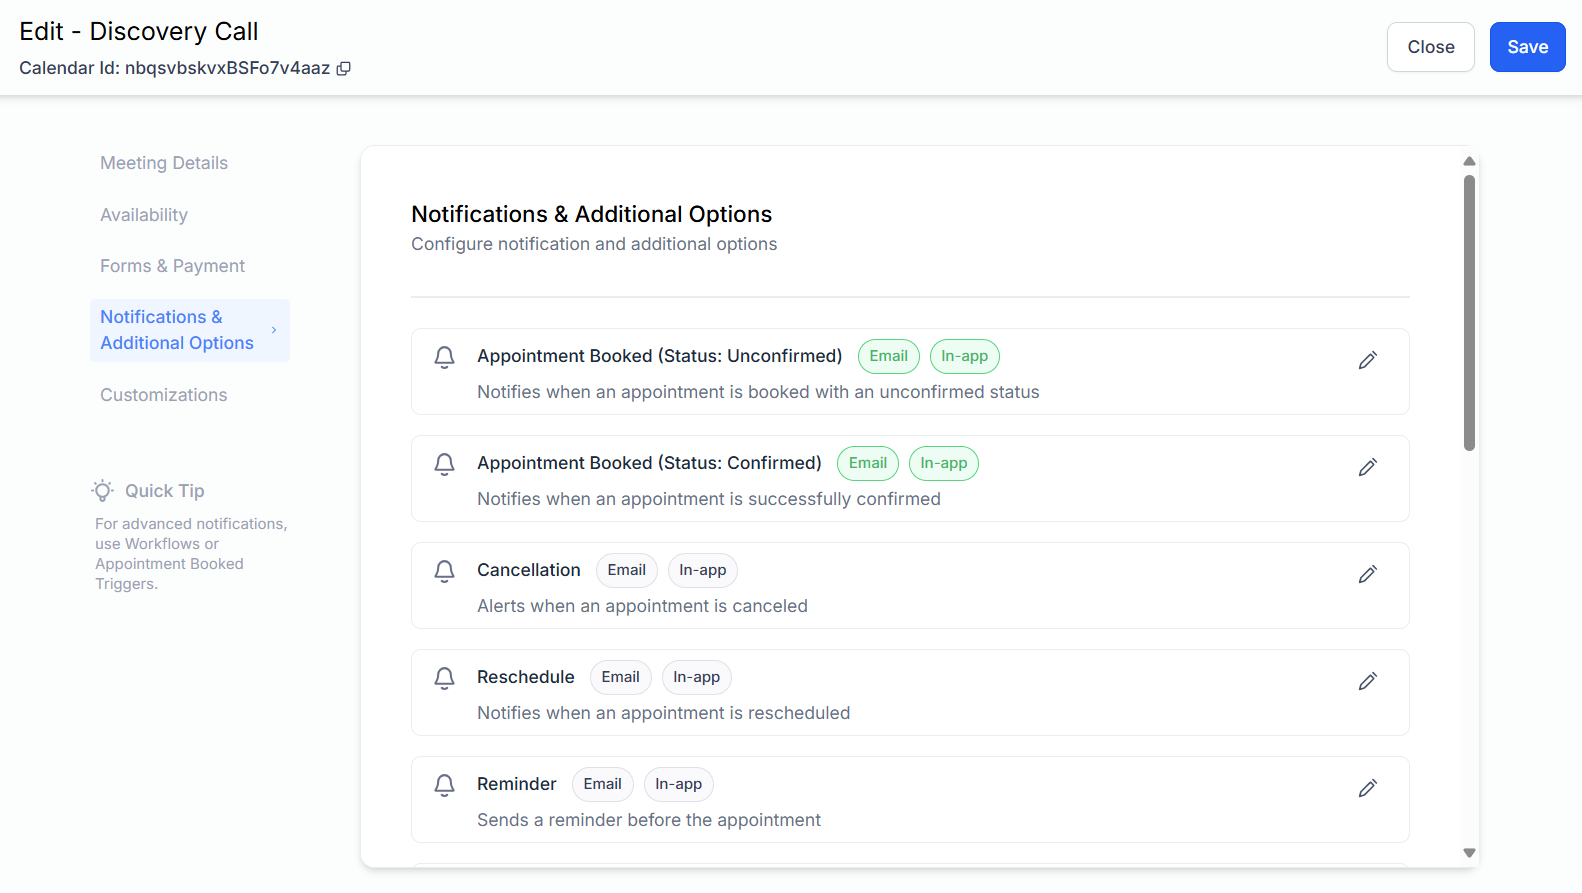
Notifications & Additional Options – manage notifications for bookings, reminders, cancellations, and reschedules.
Customization – adjust widget style, colors, and other display preferences.
In this article, we’ll cover the essential settings you’re most likely to need. For details on additional options — such as appointment distribution, multiple team members, groups, or payment settings — click here for the full Advanced Settings guide.
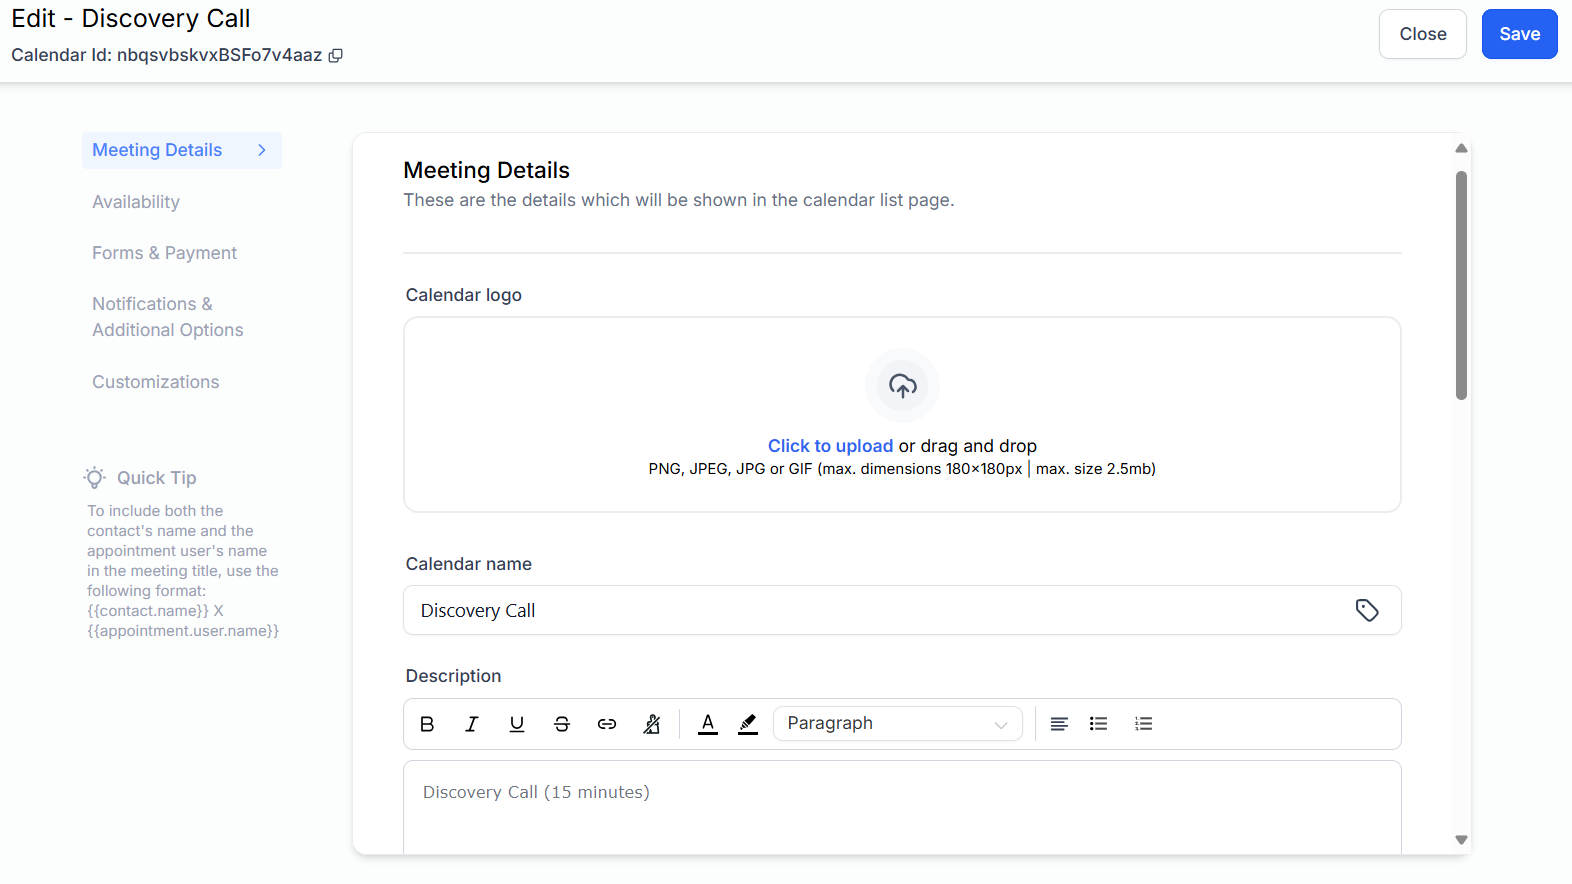
Meeting Details
CALENDAR NAME AND DESCRIPTION
Add a calendar title and more information about the appointment (which will appear on the booking page). Text can be formatted including color, links, and bullet points.
CUSTOM URL
Add or edit the custom URL (such as businessname/calendarname). This is used to form the public facing booking link.
CALENDAR LOGO
Add a logo or photo to your calendar. Either select Click to Upload or drag and drop the image. We recommend uploading an image where the width and height are equal (as in a square image). Once uploaded, you can choose whether the image is displayed as a square or circle. There is also the option to remove the logo.
MEETING INVITE TITLE
This is the title for the Calendar event that shows in your own calendar such as Google Calendar, Outlook, etc. If you enable Google Calendar/Outlook to send an invitation attendees, this is also how it will appear in the calendar of the person making the appointment, so you might want to include your company name.
EVENT COLOR
Choose an event color that the appointment will have in your calendar.
Availability
MY AVAILABILITY
Select the days and times that you want appointments to be available. Press + to add more time intervals within a day. To copy times to other days, press on the Clone icon and select which days to apply the times to. Press the Trashcan icon to delete times.
You can also add Date Specific Hours to adjust your schedule for specific dates. This allows you to override your regular weekly hours by marking additional availability or unavailability for selected dates.
LOOK BUSY
You can hide a percentage of your available appointment slots on the booking widget to appear busier and in high demand. Toggle on Look Busy and choose the percentage of appointments to hide.
MEETING INTERVAL AND DURATION
Set the amount of time the between booking slots that will be shown in the calendar and how long the appointment will be.
MINIMUM SCHEDULING NOTICE AND DATE RANGE
Set minimum scheduling notice (time to be notified before an appointment so you have time to prepare meetings etc) and the date range (select how far ahead the availability shows so clients cant book too far in the future).
MAXIMUM BOOKINGS
Set maximum appointments per slot (how many clients can attend the appointment) and maximum appointments per day. For Class Booking calendars, choose the number of attendees you'd like to have at each class.
BUFFER TIME
Set a buffer time between appointments. Pre-Buffer Time gives you time before an appointment, and Post-Buffer Time gives you time after.
Forms & Payments
SELECT FORM
By default, clients will be asked for their name, email address, and phone number. If you want different information, select a different form from the drop down menu. If you are using the default form, you can choose to toggle on sticky contact.
To create a custom form, go to Sites > Forms > Builder.
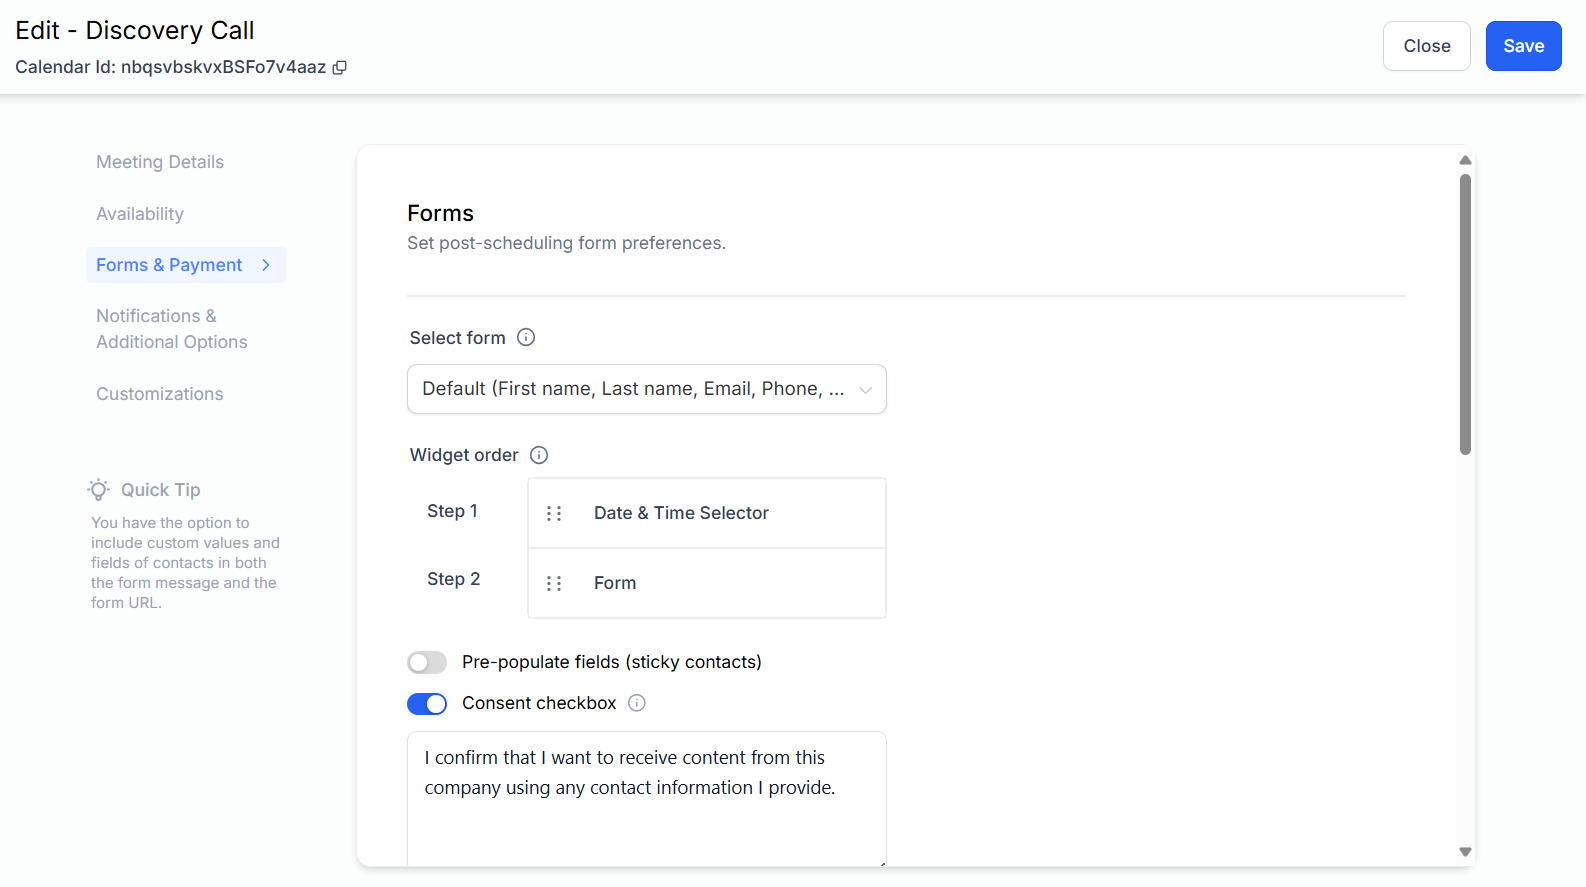
WIDGET ORDER
Rearrange the order of whether contacts choose date and time first and then complete the form, or whether they complete the form first and then choose date and time.
Notifications & Additional Options
EMAIL NOTIFICATIONS & REMINDERS
You can configure the appointment emails and who to send it to. These emails include appointment confirmation, reminder and follow up, as well as cancellation, reschedule emails. You can also enable in-app notifications for staff members.
Click in the Pencil icon to edit each option. Toggle whether you to enable or disable emails for that type, and choose who you want to send them to (contact, assigned user or custom email). Expand the drop down to customize the default template or select a different template (created in Marketing > Emails > Templates).
For Reminder emails, you can also set when to trigger the notification and how many notifications to send.
You can also use Workflows to create a reminder sequences for appointments (where you can also include text message reminders). Click here for more details.
GOOGLE CALENDAR
Choose whether you want Google calendar to send invitation or update emails to attendees.
RESCHEDULE AND CANCELLATION
Choose whether you want attendees to be able to reschedule or cancel, and set whether the link expires a certain time before the meeting.
Customizations
WIDGET TYPE
Choose from Neo or Classic (we recommend Neo). Neo is the only option available for Class Booking calendars and for calendars where Staff Selection is enabled.
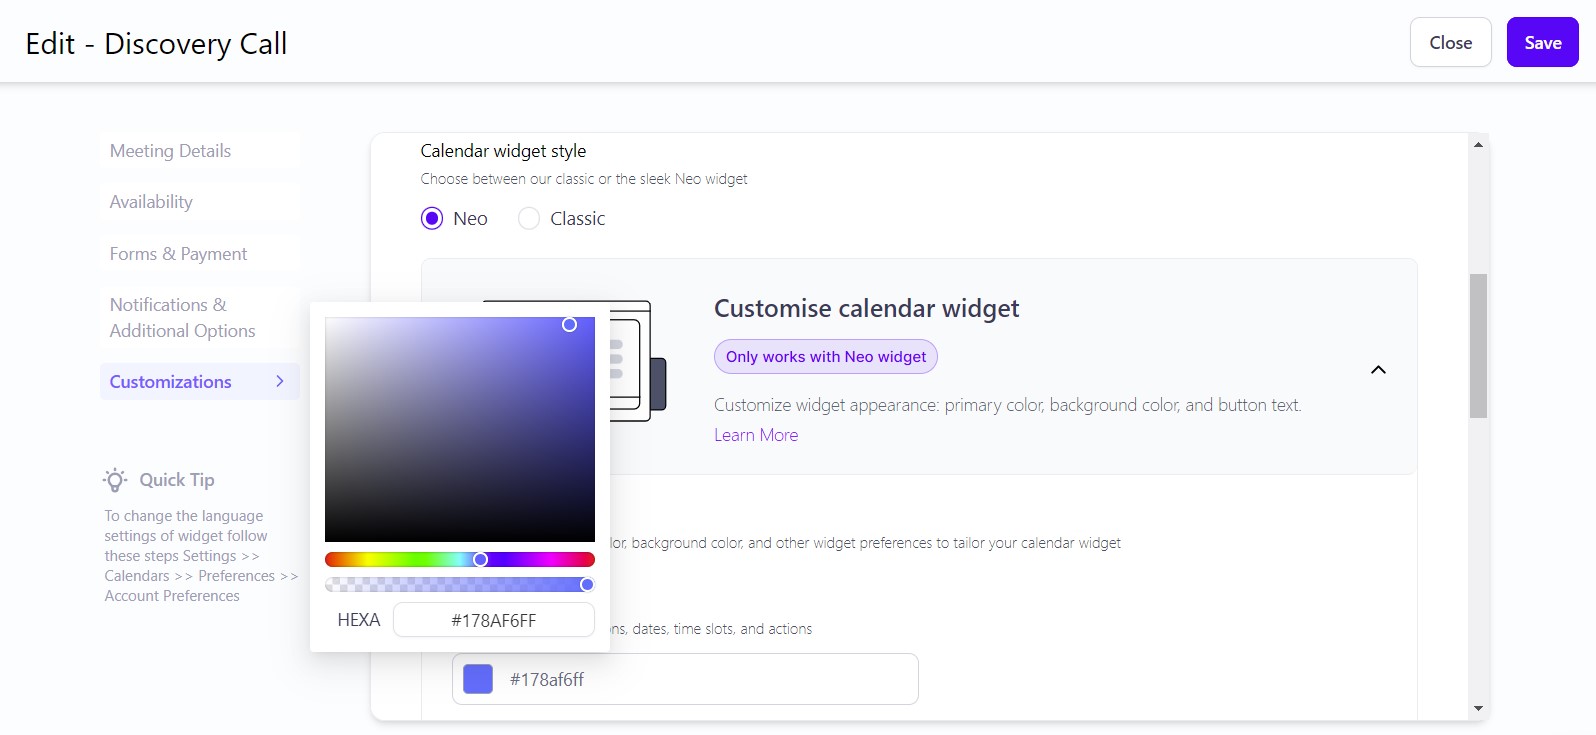
CALENDAR COLORS
Select a Primary Color (for buttons, dates, time slots, and actions) and Background Color.
BUTTON TEXT
Customize the text displayed on the button when booking an appointment.
Sharing a Calendar
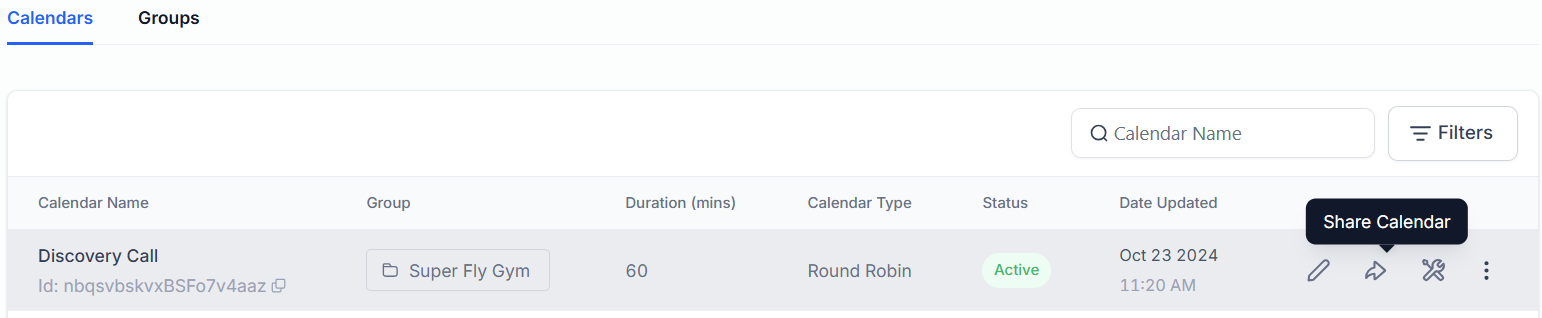
SHARE AN INDIVIDUAL CALENDAR
If you want the calendar URL, click on the Share icon. Select the Scheduling Link tab and press Copy next to either the Scheduling Link or Permanent Link. You can also generate a One Time Link that expires after a booking, ensuring controlled access.
SCHEDULING LINK VS PERMANENT LINK
If you are sharing the link in a message or email, the scheduling link has a more user friendly URL. However, if you update the custom slug in the calendar settings, the previous scheduling link URL will no longer work.
If the link is being added to a button (such as a website or ad), the permanent link can be a better choice as it unaffected by slug changes and remains constant.
CALENDAR Dashboard
Calendar Dashboard
CALENDAR DASHBOARD
Click on Settings > Calendars to view existing calendars and groups. The dashboard shows the calendar name, group, duration, status (active or inactive/draft) and date updated. You can search calendars by name using the Search box. You can filter calendars by Status (all, draft, active), by Group, or Calendar Type. Once filters have been selected, click Apply (or Clear).
You can also access Calendars by going to Calendars > Calendar Settings.
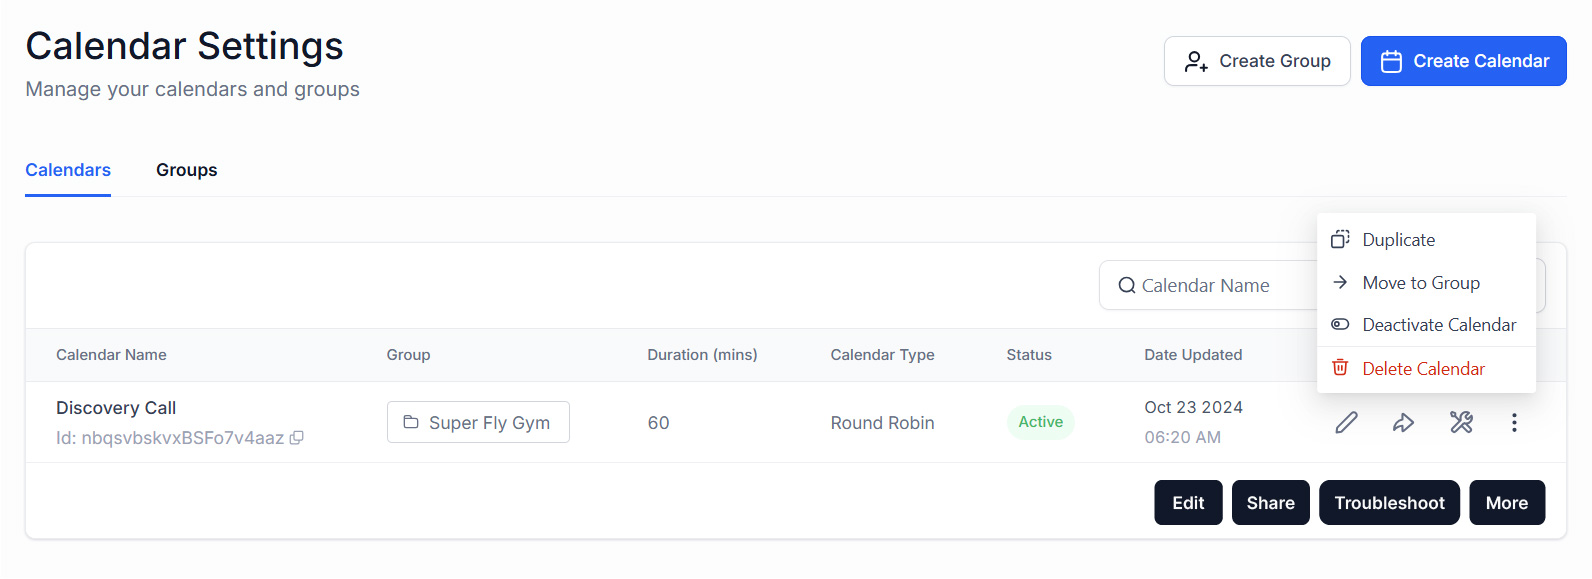
EDIT A CALENDAR
To edit a calendar, click on the Pencil icon. Once the edits are complete for each section, press Save.
ELLIPSIS MENU OPTIONS
Click on the ellipsis menu (three vertical dots) to view available options. These include Duplicate or Clone, Move to Group, Activate/Deactivate Calendar, and Delete. Once you select an option, simply follow the on-screen instructions
DATE TIME SETTINGS
Go to Settings > Calendars > Preferences and click on the Account Preference. There are options to change app start day, widget start day, language, and time format (12 hour or 24 hour). Press Save Preferences when finished.
viewing Appointments
Viewing Your Calendar/Appointments
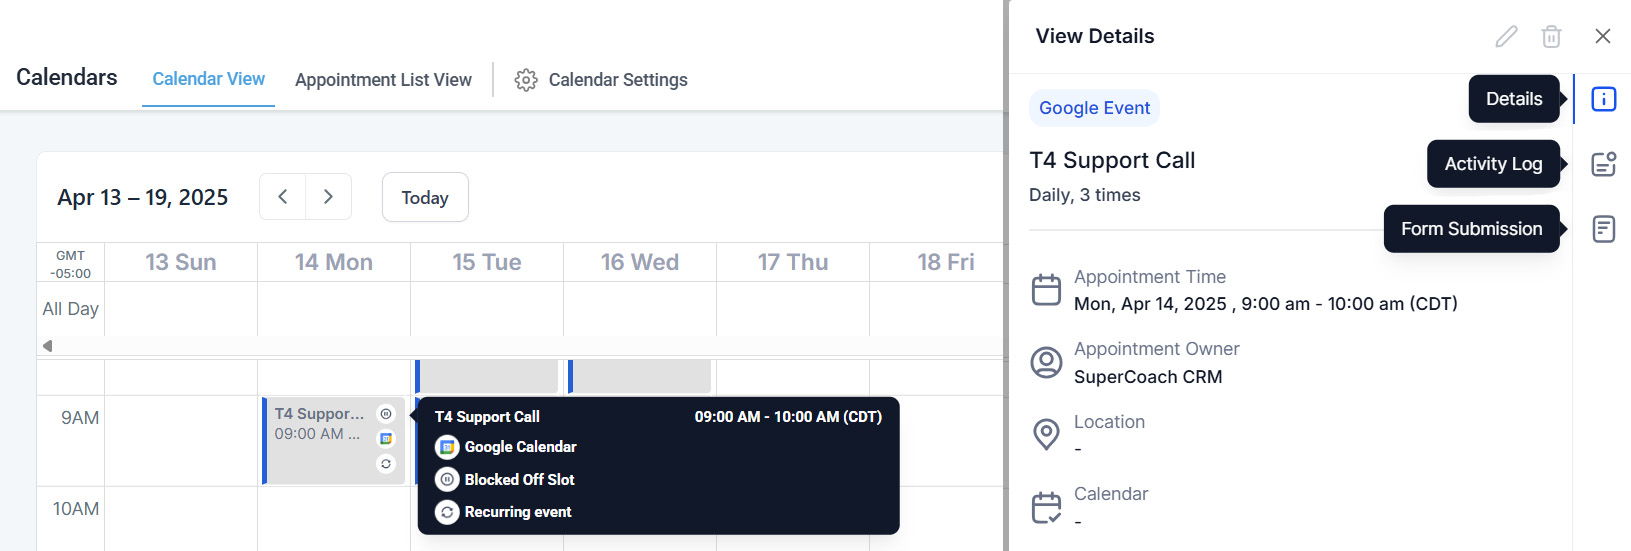
VIEWING CALENDAR
You can view appointments by clicking on Calendars > Calendar View. You can see an overview and summary of appointments by clicking on Calendars > Appointment List View.
You can also view and edit appointments on the Lead Connector app. Click here for more details.
APPOINTMENT INFORMATION
To view more details about an appointment, click on the appointment (which will expand a panel on the right hand side of the screen). Here you can toggle between the Details tab, Activity Log tab, and Form Submission tab.
SYNCING CALENDARS
Appointments will sync from Google to SuperCoach CRM. If you were to move an appointment in your Google calendar, this would update the appointment information in the contact appointment list.
Troubleshooting
CALENDAR AVAILABILITY
For an appointment to show on your calendar, your personal calendar (Google Calendar or Outlook Calendar, etc) must be free, and both your personal availability and calendar availability must be open. To check your personal availability, go to Settings > Calendars > Availability and go to the My Availability section. You can also go to Calendars > Calendar View to see clashing appointments.
CALENDAR TROUBLESHOOTING
You can also click on the Troubleshoot Calendar tool for more detailed information.


If you have a quick, system-specific "how-to" question, you can chat with our L1 Technical Support Team using the purple chat bubble in the bottom corner of the software. This team offers live chat 24/7, giving you instant access to help at any time of day.
If you have a more complex or outcome-specific “how-to” question, or a query about project requests, done-for-you resources, or Coach Catalyst, you can email our L2 Specialist Team at [email protected]. This team is available Monday to Friday, 8:00am – 1:00pm (EDT).
© 2026 SuperCoach CRM