
Sites
Created by: Emma Johnston
Last Updated: March 13, 2023
Google Analytics 4 Tracking
Google Analytics 4 provides enhanced event-tracking capabilities and an advanced view of user behaviour across different platforms, including SuperCoach CRM funnels and website.
SET UP GOOGLE ANALYTICS
Click here for information on how to set up Analytics for a website and/or app.
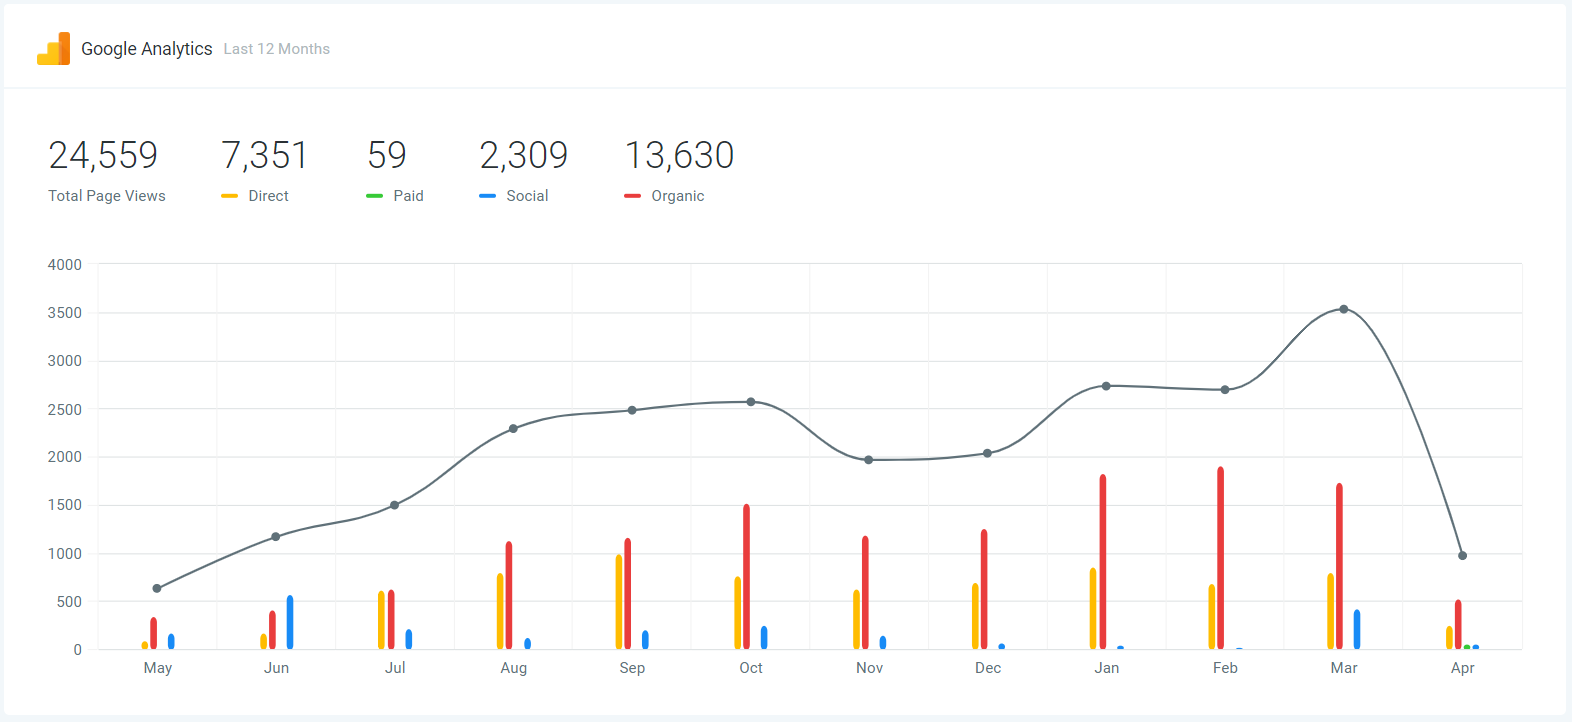
Google Analytics 4 Page Views
GET GOOGLE ANALYTICS MEASUREMENT ID
1. Log in to Google Analytics.
2. Click on Admin in the bottom left hand corner of the dashboard and select Account Settings.
3. In the Property column, click on Data Streams and then select the required data stream.
4. If needed, click Add Stream and select Web. Add the Website URL and Stream Name and press Create Stream.
5. Once created, click on View Tag Instructions and select the Install Manually tab.
6. Copy the code.
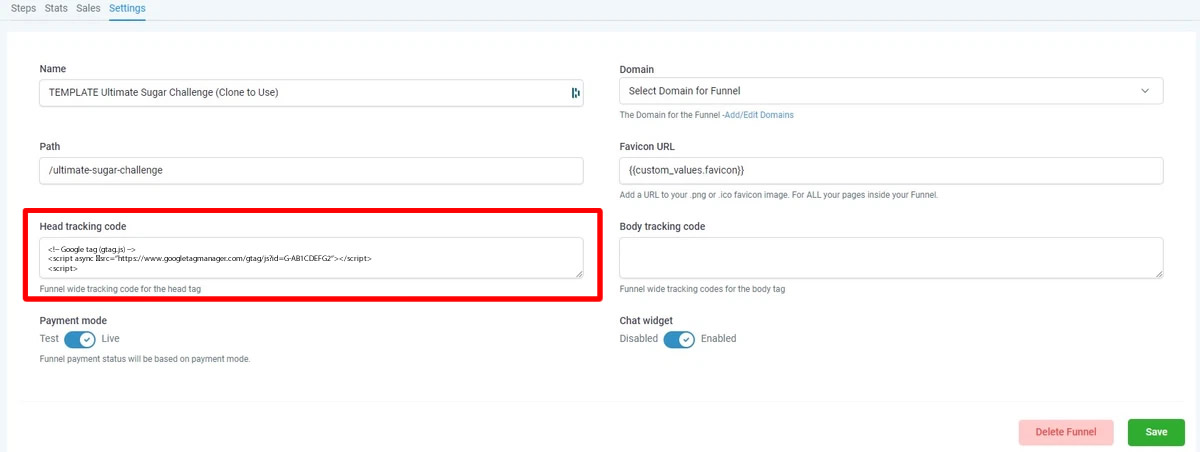
7. In SuperCoach CRM, go to Sites > Funnels and open your funnel. Go to the Settings tab and paste the code into the Heading Tracking Code box.
8. Press Save.
Google Analytics 4 Workflow
GET GOOGLE ANALYTICS MEASUREMENT ID
1. Log in to Google Analytics.
2. Click on Admin in the bottom left hand corner of the dashboard and select Account Settings.
3. In the Property column, click on Data Streams and then select the required data stream.

4. Copy the Measurement ID for your desired data stream ready to paste into your workflow.
GET GOOGLE ANALYTICS API SECRET KEY
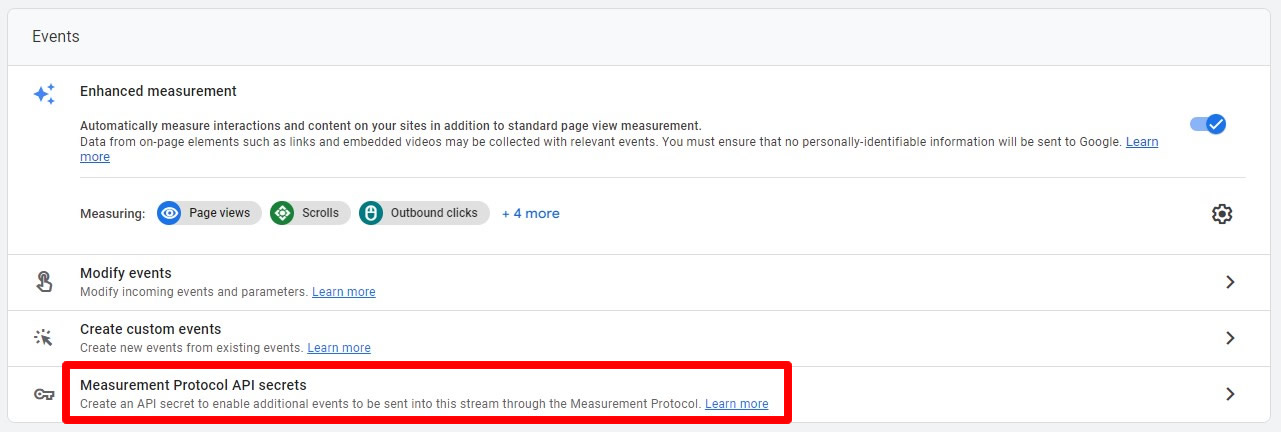
5. Next, on the same data stream page, select Measurement Protocol API Secrets.
6. If there is a blue banner at the top of the page, press the blue Review Terms button to acknowledgement the terms.
7. To create a new API secret key, click the grey Create button. In the popup panel, add a nickname and click Create.
8. Copy the Secret Value ready to paste it into the API Secret field in the Google Analytics action in your Workflow.
GOOGLE ANALYTICS WORKFLOW
1. In SuperCoach CRM, click on Automation > Workflows and click the green + Create New Workflow button in the top right of the screen.
2. Choose an option for the type of Workflow you wish to create, such as Start a Workflow from Scratch, and click the + Create New Workflow button again to enter the builder. Add a workflow name and press Save.
3. Click Add New Workflow Trigger and select the desired trigger (such as Form Submission, Order Form Submission or Appointment Booked).
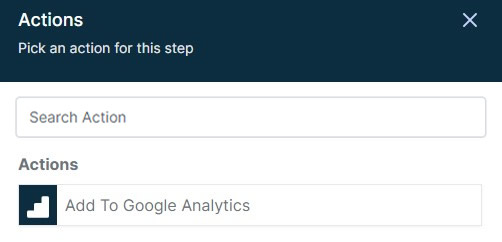
4. Click the + to add a new event to the workflow. Choose Add to Google Analytics from the right-hand menu.
5. In the right-hand panel, change Action Type to Google Analytics 4.
6. Paste the Measurement ID into the Measure ID box
7. Paste the Secret Value in to the API Secret box.
8. Add the Event Name that you wish to track. This event name will show up under the Google Analytics dashboard along with other standard events that are set up.
9. Add any other required steps.
10. Toggle on Publish and press Save.
Further Information
GOOGLE ANALYTICS
For more information, visit the Google Analytics Support Site.
https://support.google.com/analytics/
GOOGLE TAG MANAGER
First, you need to create the tracking code.
1. Log in to Google Tag Manager.
2. Click on Create Account. Add an account name and select a country. In Container Setup, add a name and select Web as your target platform.
3. Click Create, accept the terms and conditions and click Yes in the top right corner.
4. You’ll then be given the container’s installation code snippet to paste into the header and body sections of your website.
5. If your website is hosted on CC+ then you need to paste this into your website settings. Go to Sites > Websites, select your website, and go to Settings. Paste the Google Tag Manager <head> code into the Head Tracking Code box and paste the <body> code into the Body Tracking Code box.
ADD GOOGLE ANALYTICS
Next, you need to tell Google where to send the tracking data.
6. Log in to Google Analytics.
7. Click Start Measuring. In Account Setup, add an account name, check the required Account Data Sharing Settings, and click Next. In Property Setup, add a website name, and click Next. In About Your Business, select an industry (such as Beauty & Fitness or Health), select business size, and check off the usage options.
8. Click Create. Accept terms and conditions and select email preferences.
9. Click on Admin Settings in the bottom left corner. In the Property column, click on < > Tracking Info > Tracking Code. Copy the code from the Global site tag (gtag.js) and paste the code into the <head> section of your website.
SET UP AN ANALYTICS TAG WITH GOOGLE TAG MANAGER
10. Go to your Google Tag Manager dashboard and click on New Tag > Add a New Tag. Enter a name in the top right corner and click on Configuration and select Google Analytics: Universal Analytics.
11. Select New Variable on Google Analytics Settings.
12. In Google Analytics, click on < > Tracking Info > Tracking Code and copy the tracking ID.
13. In Google Tag Manager, paste the Tracking ID into the box. Press Save.
14. Click on Trigger and Select all pages. Press Save.
SET UP GOALS IN GOOGLE ANALYTICS
While you probably know the key performance indicators for your website and business, Google Analytics doesn’t, so you need to tell Google what success looks like for your website.
15. In Google Analytics, click on Admin Settings and select goals. Click the red
16. Click the red + New Goal button in the top-left corner of the popup window.
17. From here, you’ll be able to look through different goal templates to see if one matches your intended goal. You’ll also need to choose the type of goal you want.
For more information, visit the Google Analytics Support Site.
https://support.google.com/analytics/

If you have a quick, system-specific "how-to" question, you can chat with our L1 Technical Support Team using the purple chat bubble in the bottom corner of the software. This team offers live chat 24/7, giving you instant access to help at any time of day.
If you have a more complex or outcome-specific “how-to” question, or a query about project requests, done-for-you resources, or Coach Catalyst, you can email our L2 Specialist Team at [email protected]. This team is available Monday to Friday, 8:00am – 1:00pm (EDT).
© 2026 SuperCoach CRM