
User Profile and Calendars
Created by: Emma Johnston
Last Updated: May 14, 2025
User Profile and Calendars
Each team member will need to configure their user profile, notification settings, availability, calendar, and video conferences. They need to be logged into their own account to do this.
User Profile
MY PROFILE
1. Go to Settings > My Profile > General. Here you can change your password, add a profile picture, set up or change your user signature, and set up 2 way email sync.
2. Click on Settings > My Profile > Notifications to personalize system notifications (such as conversation notifications, tasks notifications, review nonfictions, and alerts if you calendar becomes disconnected).
EMAIL SIGNATURES
Quick note about using email signatures...Email signature custom values only work if the contact is assigned to you. If you want your signature to appear on all emails then checkmark the box choose to include the email signature on all outgoing replies.
User Availability
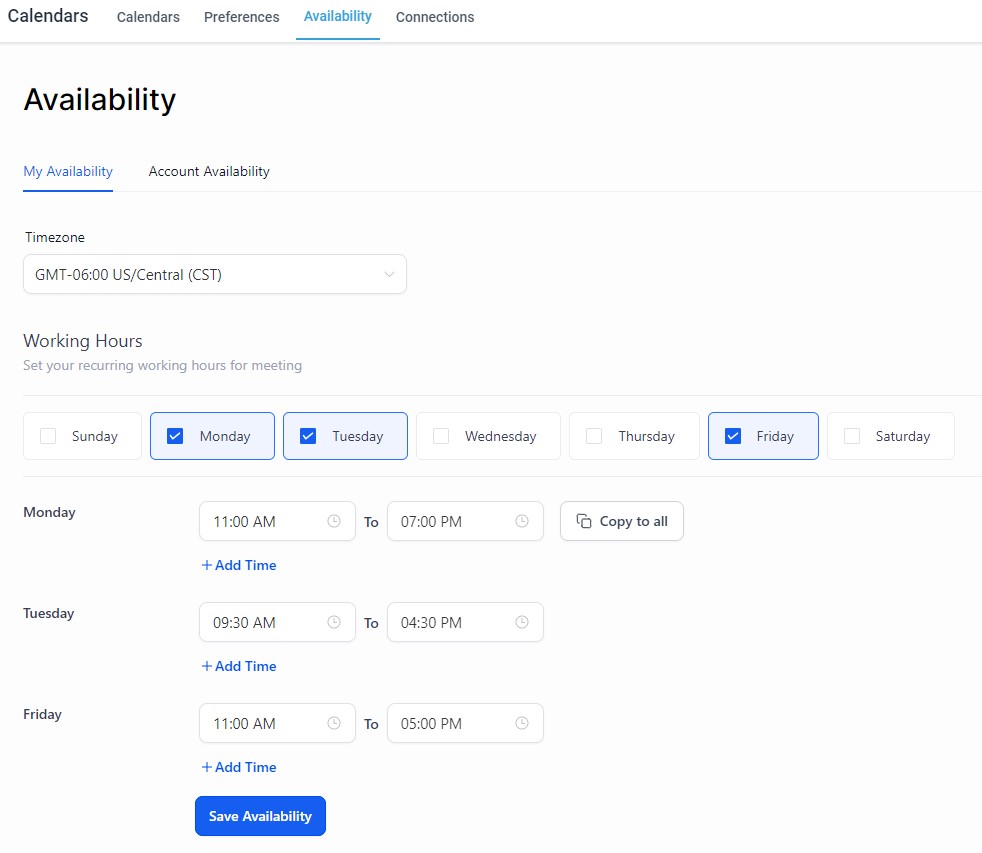
SET USER AVAILABILITY
Set the the general times that you are available. You can set specific times for an individual calendar in calendar settings. The availability set in a user's profile will override times set in a calendar.
1. Click on Settings > Calendar > Availability.
2. Check/update your Time Zone. By default, this will be the same as the time zone in Settings > Business Info.
3. Update the Available Hours. Select the days and times you are available. To add multiple blocks of hours, click + hours.
4. Click Save Availability to save the changes.
Note that both user hours and calendar office hours need to available for appointments to display. Click here for more information of setting up office hours for an individual calendar.
Connected Calendars
CONNECTED CALENDARS
You can connect Google Calendar, Outlook Calendar and iCloud Calendars. Connect the calendar where you want appointments to save, as well as conflict calendars that you want the system to check.
1. Go to Settings > Calendars > Connections.
2. Next, select the Calendars tab and click + Add New.
3. Press Connect for your chosen calendar, and follow the on screen instructions (to enable access for Lead Connector).
DISCONNECT CALENDARS
To disconnect any of your connected calendars, click on the trashcan icon.
Linked and Conflict Calendars
LINKED CALENDAR
Once you have connected your calendars, you will need to choose which calendar your appointments are saved to.
1. Click on Settings > Calendars > Connections and scroll down to Calendar Configuration section.
2. Next to Linked Calendar, click on Add.
3. Choose your calendar from the list of connected calendars and press Save to finish.

CONFLICT CALENDARS
You can then select which other calendars you want the system to check when establishing your availability. For example, your linked calendar might be your work calendar, but you might also want the system to check your personal calendar and family calendar.
1. Click on Settings > Calendars > Connections and scroll down to Calendar Configuration section.
2. Next to Conflict Calendars, click on Edit.
3. Select the additional calendars from the list and press Save.
TWO WAY CALENDARS
By default, when you add a linked calendar, it will be set as one-way sync. Appointments added directly to your calendar will not interactive with the system (and will only be viewed as blocked slots).
If you want to want to turn on two-way sync, click on Advanced Settings and enable this option (choosing which system calendar you wan to assign the created appointments to). If you add an appointment directly to your calendar and invite a guest, this will create a content and link the calendar to a system appointment and relevant workflow.
Connect Zoom, Google Meet, or Microsoft Teams
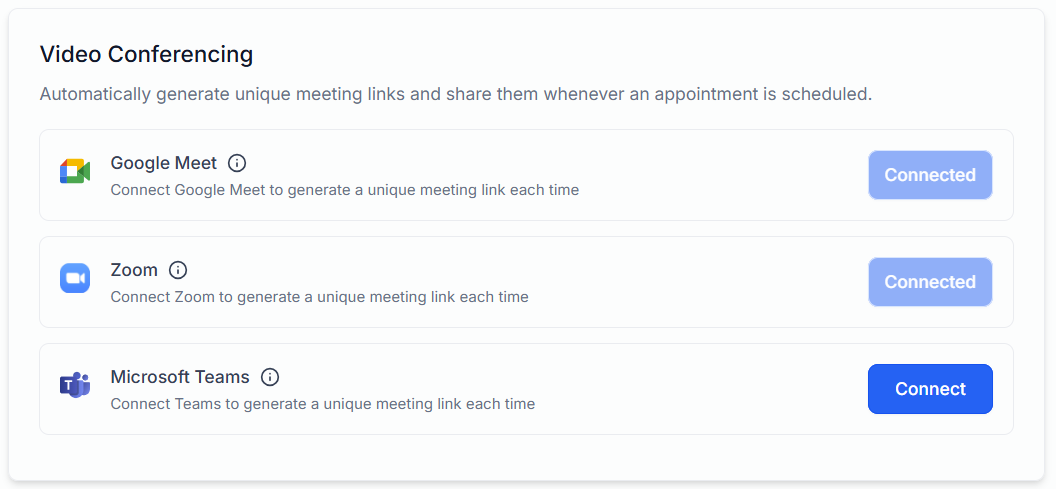
VIDEO CONFERENCING
The Video Conferencing integration feature allows you to generate unique meeting links for your appointments. Choose from Zoom, Google Meet, or Microsoft Teams.
1. Go to Settings > Calendars > Connections.
2. Select the Video Conferencing tab and click + Add New.
3. Click on Connect next to for your chosen platform, and follow the on screen instructions (to enable access for Lead Connector).
DISCONNECT
To disconnect Zoom, Google Meet or Microsoft Team, go to Settings > My Profile and scroll to the Calendar Settings section. Click on the Video Conferencing tab and click on the trashcan icon for the platform that you want to delete.
Location Preferences
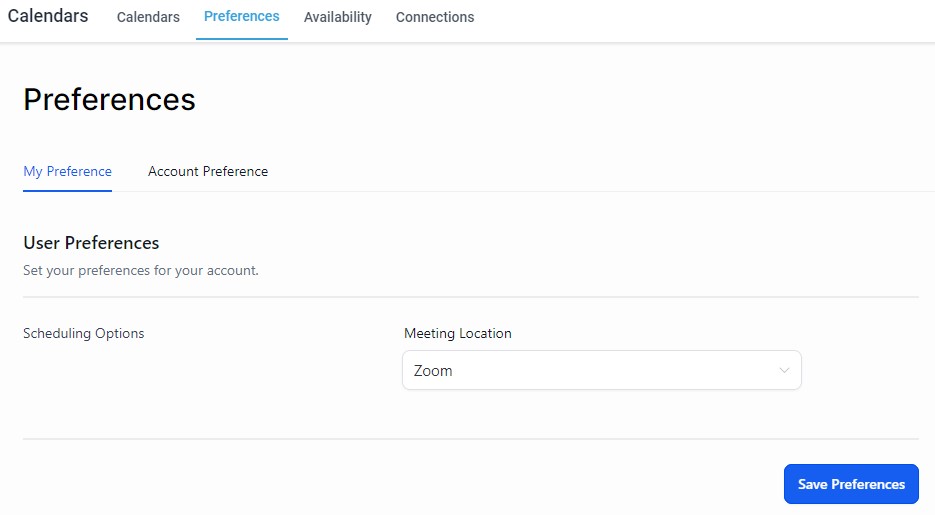
SET LOCATION PREFERENCES
1. Click on Settings > Calendar > Preferences and go to the My Preferences section.
2. Select a preferred meeting location from the drop down menu and press Save Preferences.

If you have a quick, system-specific "how-to" question, you can chat with our L1 Technical Support Team using the purple chat bubble in the bottom corner of the software. This team offers live chat 24/7, giving you instant access to help at any time of day.
If you have a more complex or outcome-specific “how-to” question, or a query about project requests, done-for-you resources, or Coach Catalyst, you can email our L2 Specialist Team at [email protected]. This team is available Monday to Friday, 8:00am – 1:00pm (EDT).
© 2026 SuperCoach CRM