
Contacts
Created by: Emma Johnston
Last Updated: January 25, 2023
Book an Appointment
As well as sending contacts a link to book an appointment themselves, you can also schedule an appointment manually (even if it is outside your normal availability). To book an appointment in a team calendar, you must be an assigned user within that specific calendar. There are a few ways to book an appointment including Quick Add, directly in Calendars, or in Contacts. To book a time slot that doesn't appear on the calendar, you need to do book the appointment in in Calendars.
QUICK ADD
1. Click on the green lightning bolt icon at the top of the main left-hand menu and select Book an Appointment.
2. In the pop-up window, search for the contact (by name, email, phone or company) or click Add New to add a new contact.
3. Change the calendar, team member, and appointment date/time (as required).
4. Select the required time zone (choose either the account time zone, contact time zone or custom time zone). You also have the option to update the time zone for the contact.
5. Add an appointment title and press Book Appointment so save.
To change the meeting location or appointment status, expand the Additional Preferences box.
CREATE AN APPOINTMENT
1. Click on Calendars and choose your calendar, using the dropdown menu at the top left.
2. Either click on the green + Book Appointment Click in the top-right corner or click on the date and time you wish to schedule the appointment (and then choose Book an Appointment).
3. In the pop-up window, search for the contact (by name, email, phone or company) or click Add New to add a new contact.
4. Change the calendar, team member, and appointment date/time (as required).
5. Select the required time zone (choose either the account time zone, contact time zone or custom time zone). You also have the option to update the time zone for the contact.
6. Add an appointment title and press Book Appointment so save.
To change the meeting location or appointment status, expand the Additional Preferences box.
CONTACT CARD
1. Click on Contacts and find the required contact.
2. Open the contact card and, in the panel on the left, select the Appointments tab.
3. Click + Add New. In the pop up window, select the calendar, team member, and appointment date/time (as required).
4. Select the required time zone (choose either the account time zone, contact time zone or custom time zone). You also have the option to update the time zone for the contact.
5. Add an appointment title and press Book Appointment so save.
To change the meeting location or appointment status, expand the Additional Preferences box.
Blocking Off Time
You may want to block time out of your standard availability in your calendar, for a variety of reasons, including being out of the office, being on holiday, or having something outside of your system scheduled during that time.
You can also block off time in a team member's calendar by selecting their calendar from the drop-down list.
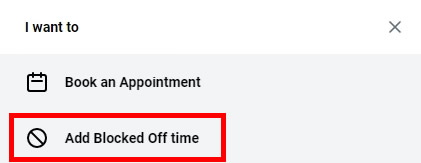
ADD BLOCKED OFF TIME
1. Click on Calendars. and click the date and time you wish to start blocking time as unavailable.
2. Click on Add Blocked Off Time.
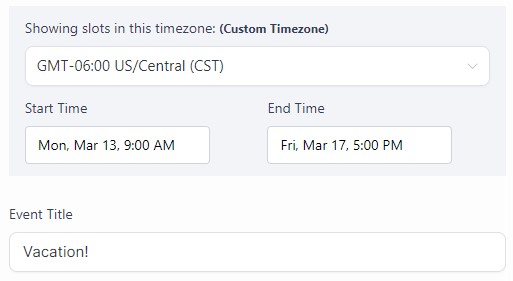
3. Add a start time, end time, event title and event description.
4. Press Save Event to save and exit.
5. Repeat for desired days and times you wish to have the time blocked as unavailable.
Instead of just clicking on the calendar, you can also click and drag across the desired time and the information will automatically populate the event start time and end time in the popup window.
If you have a quick, system-specific "how-to" question, you can chat with our L1 Technical Support Team using the purple chat bubble in the bottom corner of the software. This team offers live chat 24/7, giving you instant access to help at any time of day.
If you have a more complex or outcome-specific “how-to” question, or a query about project requests, done-for-you resources, you can email our L2 Specialist Team at [email protected]. This team is available Monday to Friday, 8:00am – 1:00pm (EDT).
For Coach Catalyst questions, email [email protected].
© 2026 Growth Catalyst CRM