
Email Campaigns
Created by: Emma Johnston
Last Updated: August 19, 2025
Email Campaigns and Newsletters
If you want to send or schedule a newsletter type emails, then you would use Email Campaigns. If you want to use an email in a workflow or in an automated nurture, then you would use Email Templates.
Creating a campaign
Create an Email Campaign
CREATE A NEW CAMPAIGN
1. To create a new email campaign, click on the + New button in the top right corner of the dashboard.
2. Select either Blank Template (to design a blank email from scratch) or Your Templates to select one your existing email templates.
3. Once you are within the email editing screen, click the pencil icon to rename the email.
4. Drag and drop the elements you need into the middle of the screen, such as text, images, or buttons (see below for more details on elements).
5. As you complete your email, remember to Save regularly using the button in the top-right corner. This will keep your work saved as a draft.
6. When your email is ready, click Send or Schedule (see below for more details).
If you have selected Your Templates, on the next screen, select the require template from the list (or search for a specific template name using the search box). Hover over a template to bring up options to preview or select the template.

CAMPAIGN FROM TEMPLATE
You can also click Marketing > Emails > Templates and click on the ellipsis menu (three vertical dots) and select Create Campaign.
Email Builder Menu
EMAIL CAMPAIGN OPTIONS MENU
Once the email editor is open, click on the ellipsis menu (three vertical dots) in the top right-hand corner for further options to Test Email, Preview Template, See Version History, and access File Attachments (maximum total file size for attachments is 10MB)

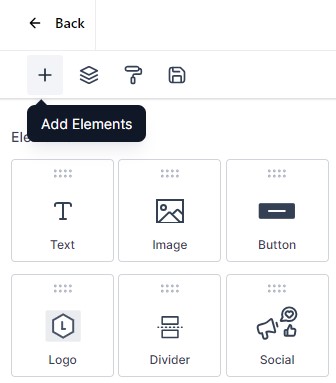
Adding Elements
ADD NEW ELEMENTS
When building an email, whether it’s a campaign or a template, the editor works on a simple drag-and-drop system. From the left-hand menu, you can drag in any elements you need directly into the main email body. You can choose from elements such as a text, image, button, logo, divider, video, and more. You can also choose from a range of layouts including text and image, one column, and two column.
If you don’t see the options, just click the Add Elements icon in the top menu bar to open them.
EDITING ELEMENTS
Clicking on a section or element will bring up the settings menu on the left-hand side, allowing to completing customize that element. You could also hover over that section or element and click the Edit (pencil) icon. Depending on what has been selected, there will be will give you customization options for size, alignment, padding, color, fonts, and more.
TEXT
You can add text to emails using the Text element. Clicking on the text will bring up an additional toolbar with text formatting options. If you are adding text, we recommend using 1.5 for line height.
You can use Custom Values to personalize emails. Click here for more information about custom values.

IMAGES
Whenever you are adding images to an email, define the width attribute only (and delete the height). This will prevent images from distorting on mobile.
One thing to note: you can’t drop an image directly in the middle of a text block. If you want an image between two parts of your text, you’ll need to split the text into separate boxes first, then place the image in between.
ADD SAVED ELEMENTS AND SECTIONS
To add a saved element or section, click the Saved Items icon in the top menu bar and drag and drop the required elements into the middle. To rename or delete saved items, click on the ellipsis menu (three vertical dots).
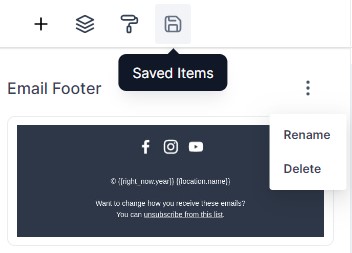
EMAIL COMPLIANCE
If you are sending a newsletter email or marketing email, you must add an unsubscribe click to your emails. We also recommend adding social icons and your company details (such as address and phone number). We have already created a complaint email footer for you, which you can find in your Saved Items.
IMAGE SLIDER
You can add an image carousel to you emails but using the Image Slider element. You can add images (with the option of adding a hyperlink). Press the trashcan icon to remove images and the + Add Item button to add additional image. You can choose whether to enable the thumbnail (and customize the appearance) and whether to include arrows.
LOGO ELEMENT
You can add your logo to emails using the Logo element. Initially, this will pull the image from Settings > Business Info > Business Logo. If you want to change the image, you can click the pencil icon. After this, the system will automatically populate the Logo element with this new image. Once added, change the sizing and alignment as necessary.
Managing Elements and Sections
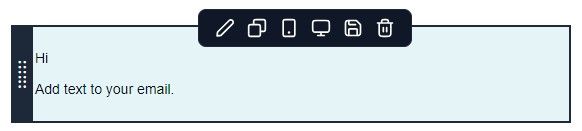
ELEMENT/SECTION TOOLBAR
When you hover over an element or section in an email template or campaign, a toolbar appears with quick options. From left to right, you can Edit the content, Clone the element or section, toggle Mobile/Desktop visibility to optimize layout for different devices, Save the element or section for reuse, or Delete it if you no longer need it.
REARRANGE SECTIONS OR ELEMENTS
To rearrange sections or elements, hover over that section or element, hold down the grip bar on the left and side and drag the object to its new location.
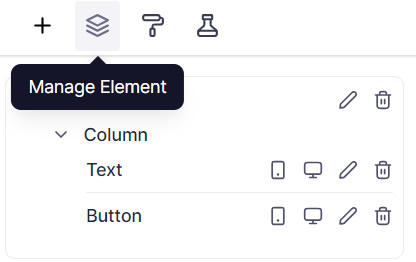
MANAGE ELEMENTS
You can also click on the Manage Elements icon in the menu bar to Edit, Rearrange, Clone, Delete and Hide elements.
Sending a Campaign Email
TEST THE EMAIL
Even though previewing does give you a good idea of what the email will look like, we do still recommend that you send yourself a test email to check the appearance of the final email. To send a test email, click the ellipsis menu (three vertical dots) in the top-right corner of the email editor and select Test Email.
SEND OR SCHEDULE A CAMPAIGN
1. When your campaign is ready to send, click Send or Schedule in the top-right corner.
2. Choose a Sending Options.
- Send Now – this sends immediately and cannot be undone.
- Schedule for later – select the exact date and time for delivery. This is best if you want all contacts to receive the email at the same time.
- Batch Schedule – also known as a “drip send.” Here you set a start date, define how many contacts should receive the email in each batch, and choose how often those batches repeat (for example, every hour). This helps to spread sending across a longer period, which can be useful for larger lists.
3. Choose your recipients. You have several options including Choose Contacts where you can either click All Contacts (you must click to confirm this) or select specific individual contacts, Smart Lists, Tags, or Segments.
If you select Send to Smart List, you choose whether to send then email to contacts added to that smart list between the email being scheduled and the email sending. Click here for information about smart lists.
4. Configure additional options as needed such as enable Click Tracking, add UTM Tracking, assign Tags based on engagement, or toggle Resend to Unopens. If using the resend option, configure the timing and update the subject line to increase engagement.
5. When finished, click Send (or Schedule) to confirm.
SCHEDULED CAMPAIGNS
You can edit the content or reschedule an email one hour before the scheduled campaign is due to send from the Campaigns dashboard. After this time, the servers start preparing it for delivery. Scheduled actions also appear in your bulk actions section. To edit or delete the scheduled action, go to Contacts > Bulk Actions. Under your list of scheduled actions, you can click the X to delete an action or the pencil icon to edit.
IMPORTANT: No more than 24 email campaigns can be queued up at any one time. Having 25 campaigns scheduled will block you from being able to send any further campaigns. You can have an unlimited number of campaigns saved as draft.
Content AI
Content AI
CONTENT AI
You can use the inbuilt AI tools to create or improve content. For text, click on the AI button in the toolbar. The system will guide you through options like generating text, improving grammar, adjusting tone, or changing length. Just click on the option you want and follow the on-screen prompts. You’ll be asked to provide any details needed to refine the output.
If you’d like to go further, you can set a custom brand voice under Marketing > Brand Board > Brand Voice.
IMAGE AI
If you want to revisit text or images created with AI, go to AI Agents > Content AI. From there, you can toggle between text and image to view your previously generated content.
CONTENT AI COSTS
Content AI and Image AI are premium features that are charged based on usage. The first 500 words of text are free, and after that the price is $0.15 per 1,000 words generated. Image AI is $0.096 per image generated. For reference, $10 will give you about 105 images or more than 65,000 words.
Dashboard and FOlders
Email Campaigns Dashboard
EMAIL CAMPAIGNS DASHBOARD
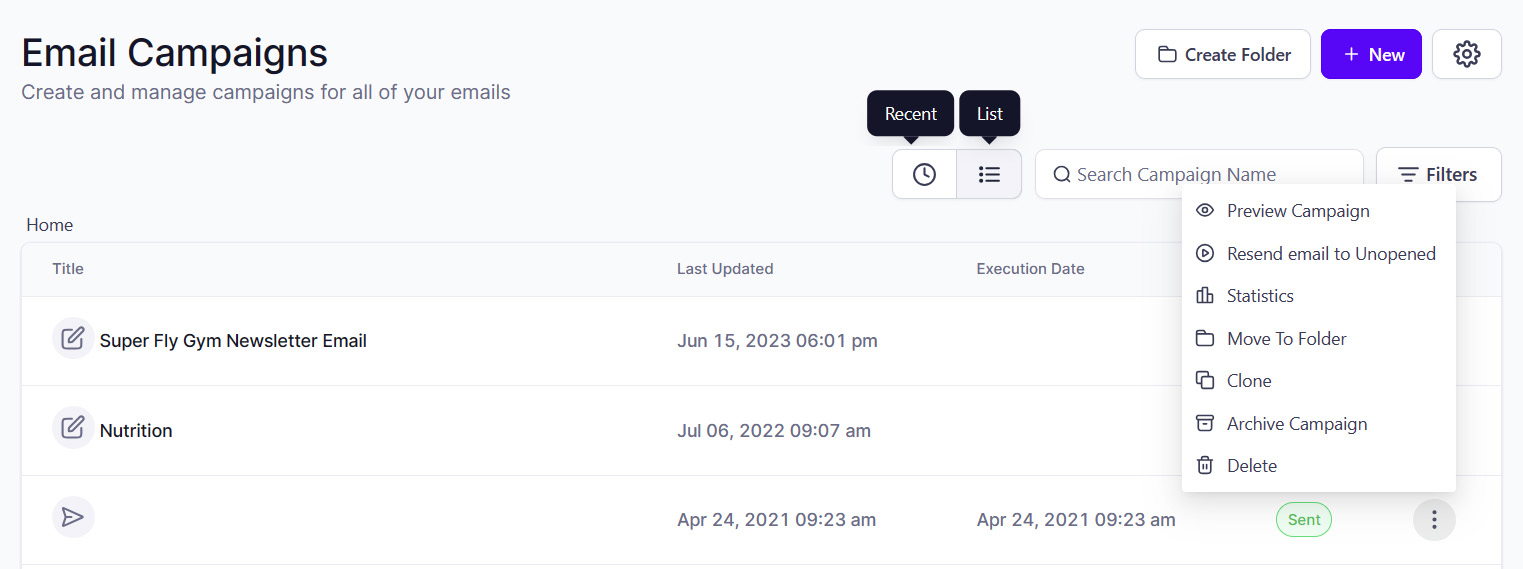
Click on Marketing > Emails > Campaigns to view existing campaigns. You can search forms by name using the Search Box. You can change page in the bottom right corner. You can also toggle between List view or Recent view by clicking the options to the left of the search box.
You can see the scheduled date and execution date and view the status of the campaign (sent, draft, or failed). You can also click Filters to filter by status. Once a campaign has been sent, it can not be edited. If a campaign is still Draft, you can click the pencil icon to make changes.
ELLIPSIS MENU
Click on the ellipsis menu (three vertical dots) to view available options. These include Preview, Resend to Unopened, Statistics, Move to Folder, Clone, Archive, or Delete. Once you select an option, simply follow the on-screen instructions. To toggle between active and archived templates, click on Filters.
You can also preview a template from within the email editor page by clicking on the ellipsis menu next to the Save Template button.
EDITING DRAFT EMAILS
When working in the Campaigns dashboard, the way an email behaves depends on its status. If an email is in Draft, you can click on it to open and continue working.
EDITING SCHEDULED EMAILS
If it is Scheduled, clicking on it won’t open it — you’ll need to use the ellipsis menu (three vertical dots) to select Update Email Content. From the same menu, you can also Reschedule, Pause, or Cancel.
EDITING SENT EMAILS
You can’t open sent emails directly, but when you click on them you’ll see the same Statistics panel along with a preview. From there, you can also clone the email to send again, or use Send to Reopens if you want to resend to anyone who didn’t open it the first time.
Email Campaign Folders
You can use folders to keep your email campaigns organized.
EMAIL CAMPAIGN FOLDERS
You can use folders to keep your email campaigns organized.
1. From the email campaign dashboard, click Create Folder.
2. Give the folder a name and press Create.
RENAME, ARCHIVE OR DELETE A FOLDER
To rename, archive, or delete a folder, click on the ellipsis menu (three vertical dots), select Rename, Archive or Delete as required, and follow the on screen instructions.
To toggle between active and archived folders, click on the Filters menu next to the search box.
MOVE A EMAIL CAMPAIGN TO A FOLDER
To move a campaign to a folder, click on the ellipsis menu (three vertical dots) and select Move to Folder. Select the folder that you want to move the template to and press Move. If no folder is selected, the template will be moved back to the root folder.
Statistics and Resends
Email Statistics
You can find email statistics in several places, depending on the level of detail you need.
CAMPAIGN STATISTICS OVERVIEW
If you want to view your overall email performance, go to Marketing > Emails and open the Statistics tab. By default, this shows the last seven days, though you can change the date range as needed. You’ll see delivered, opened, total clicks, and performance analysis, along with a list of your top-performing emails. Use the dropdown menu to select Email Campaigns.
INDIVIDUAL CAMPAIGN STATISTICS
To see the overview of a specific campaign, click on the ellipsis menu (three vertical dots) next to the email and select Statistics. This will give you a breakdown of how that individual email performed.
BULK ACTION EMAIL STATS
If you want to see the email statistics for a specific round of emails sent via bulk actions, go to Contacts > Bulk Actions and click on Show Stats in the fifth column. This includes the usual engagement data and also allows you to download the results. Click here for more information about Bulk Actions.

EMAIL SUMMARY
You can also see a summary for all emails that you have sent. For a system-wide view, go to Settings > Email Services > Email Analytics. This gives you an overall picture across all sources, with filters available to refine the results.
Resend to Unopened
RESEND EMAIL TO UNOPENED
To resend your email campaign to people who didn't open it, click on the ellipsis menu (three vertical dots) and select Resend Email to Unopened. Select a date and time, enter a new subject line and press Confirm to finish. Emails can be sent to non-openers 12 hours - 10 days after the original send date.
ADVANCED OPTIONS
A/B Testing
A/B TESTING
Once your campaign has been created, if you want to, you have the option to test email subject titles or click rates. This option is only available for Send Now and Schedule (not Batch Schedule or RSS Schedule).
1. Click on the A/B Testing tab in the left-hand panel and toggle on Enable A/B Testing.
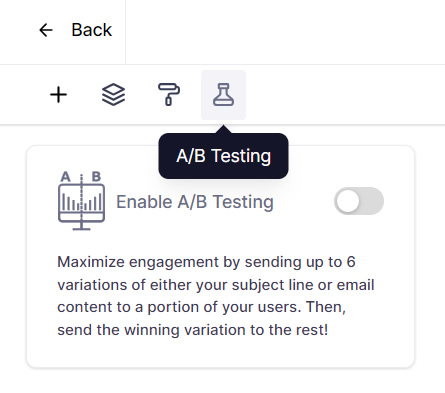
2. Under the Test Type Settings, choose either Email Subject Lines or Email Content.
Email Subject Line (Optimize Open Rates) - Email subject lines are the first thing the recipients will see when receiving an email campaign since subject lines are visible to them before they even open your campaign. Factors you could adjust include changing the length of the subject, the copy or adding personalization.
Email Content (Optimize Click Rates) - You can test different elements in the campaign content that could influence the conversion or action from the recipients, such as different section titles, article length, call-to-action buttons, images, videos, and more.
3. In the left-hand panel, edit the test duration time, number of variations, test size and winning criteria.
Test duration time - Choose from 30mins to 24 hours. Consider how long it will take for customers to recognize, read, and act on emails when determining the duration time frame, as this can impact your results.
Number of variations - You can test up to six variations for each (called A - F).
Test Size - This is the sample size of recipients for the test. A minimum of 10 contacts are needed for each variation.
Wining Criteria - Choose from open rate or click rate.
4. For Email Subject, add the subject variations in the left-hand panel. For Email Content, toggle between the variations in the top panel.

If you have a quick, system-specific "how-to" question, you can chat with our L1 Technical Support Team using the purple chat bubble in the bottom corner of the software. This team offers live chat 24/7, giving you instant access to help at any time of day.
If you have a more complex or outcome-specific “how-to” question, or a query about project requests, done-for-you resources, or Coach Catalyst, you can email our L2 Specialist Team at [email protected]. This team is available Monday to Friday, 8:00am – 1:00pm (EDT).
© 2026 SuperCoach CRM