
Communities
Created by: Emma Johnston
Last Updated: July 09, 2023
Client Portal / Kollab App / Communities Dashboard / Create a Group / Group Dashboard / Posts / Group Members
Client Portal
PORTAL BRANDING
To brand the client portal, go to Sites > Client Portal > Branding. Here you can add a portal name and description, a primary and secondar color, favicon, portal image, logo, support email and copyright information. The primary and secondary colors create a gradient on the portal log in page. Once you made changes, press Save to finish.
DOMAIN SETUP
To customize the default domain, go to Sites > Client Portal > Domain Setup. Enter your choice of domain and press Update Domain to finish.
CUSTOM DOMAIN
If you like a custom domain for your communities page, email us at [email protected] and we will set up the domain records for you.
Communities Dashboard
GROUPS DASHBOARD
Go to Memberships > Communities > Groups to access your Groups dashboard and see your active groups. You can change to inactive groups using the dropdown.
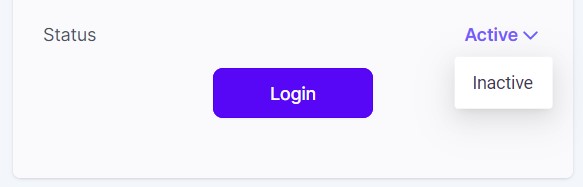
DELETE/ARCHIVE A GROUP
A community group cannot be deleted, but it can be archived/deactivated.
1. From the Groups dashboard, find the group you want to deactivate.
2. From the group thumbnail, open the Status drop-down menu and select Inactive.
3. Press Confirm to finish.
UNARCHIVE A GROUP
1. From the Groups dashboard, use the drop down in the top right corner to change the page filter from Inactive to Active.
2. From the group thumbnail, open the Status drop-down menu and select Inactive.
3. Press Confirm to finish.

Creating a Community Group
CREATE A GROUP
1. From the Groups dashboard, click on Create Group.
2. Enter a group name, slug and description. Next add a brand color, favicon, cover image and logo.
3. Click Create Group to finish.
4. Once your group has been created, click Login to access the group.
NOTE: The individual who initiates the group creation process automatically becomes the owner of that group, assuming administrative responsibilities and privileges within the group.
Group Dashboard
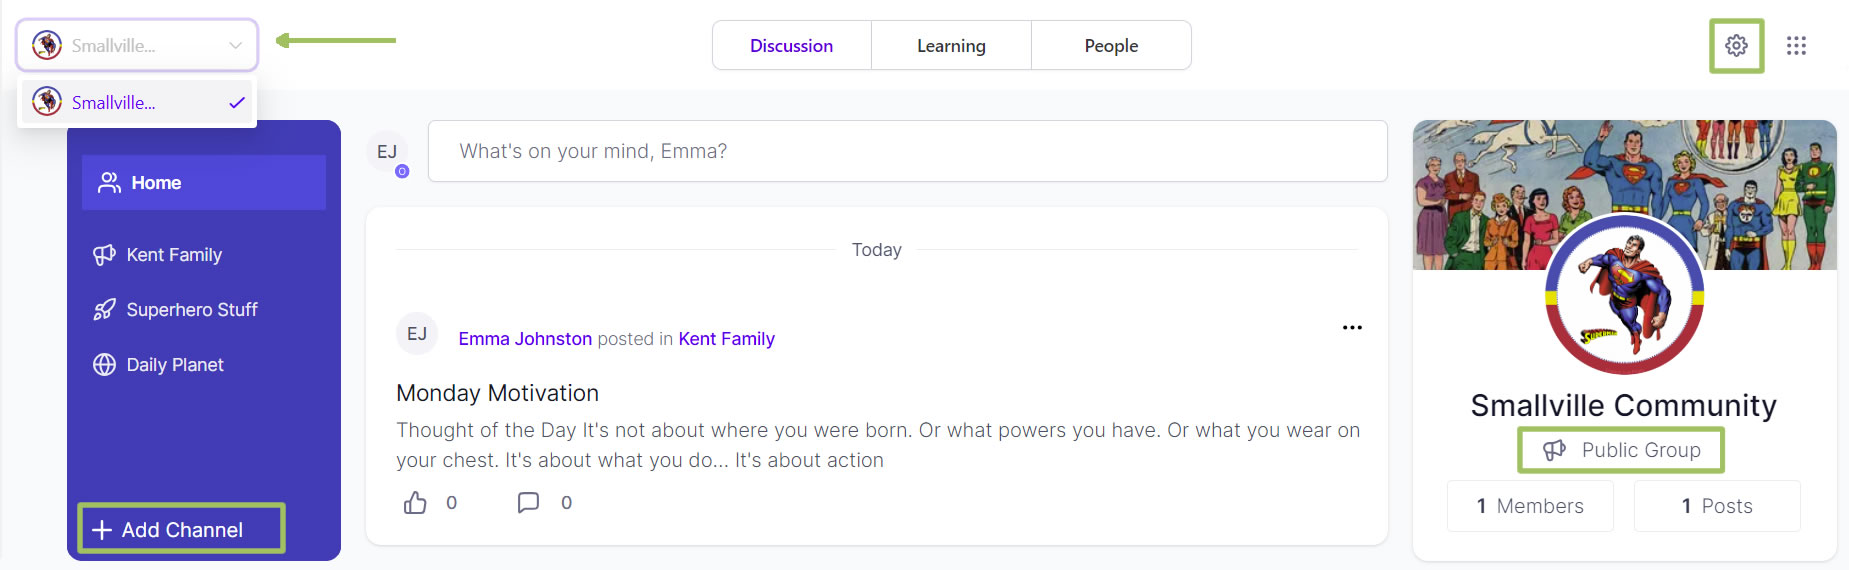
GROUP DASHBOARD
Once you have logged into the group, in Discussion, the center section will show the feed for all group activity. On the left, you can toggle between different channels to see posts that relate to just that channel. On the right, you will see a group details summary where you can see the group type (public or private), the number of members and posts, the group description and promotional links. To change between different groups, click on the group switcher drop-down in the top left corner.
GROUP SETTINGS
To edit the group settings, click on the Settings icon in the top right corner. There are four menus where you can change/view the groups details (name, url and description), branding (color, favicon and logo), the group type (public or private) and whether the group is accessible from the switcher, and promotional links (where you can create promotional links for your group). Once you have made changes, press Save to finish.
ADD A CHANNEL
1. To create channels for your posts, click + Add Channel in the bottom left hand corner.
2. Enter a channel name (maximum 15 characters) and a channel description (if required).
3. Choose a channel icon and press Create Channel to finish.
To edit a channel, click on the channel and then click the Settings icon in the top right corner of the channel. You can also create a new channel when are you creating a new post.
Group Posts
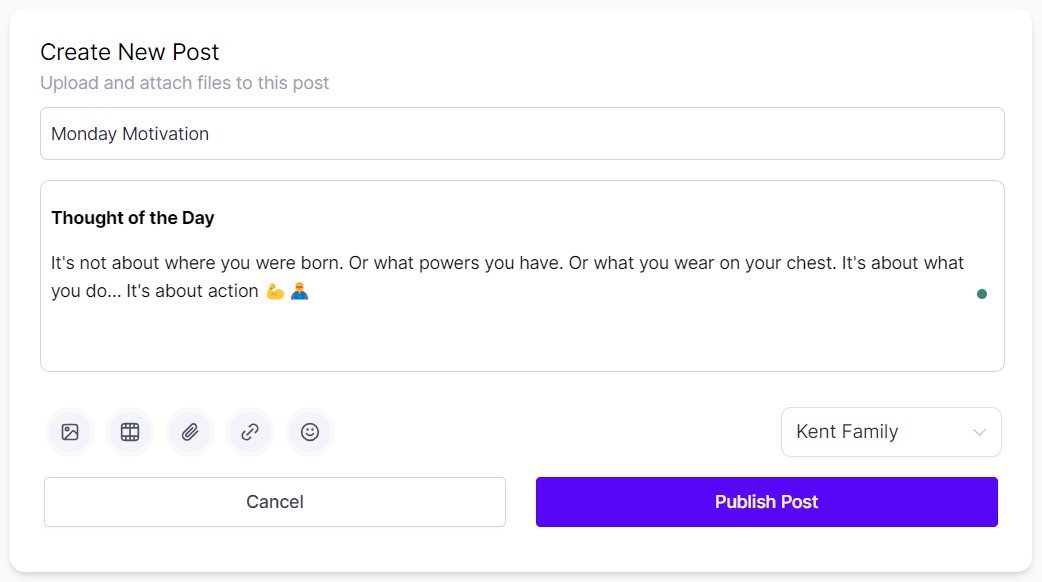
CREATE NEW POST
1. To create a new post, click on the top box in the center panel where it asks 'What's on Your Mind?'.
2. First, add a post title and then write your post. You can add images, video, attachments, links and emojis using the icons at the bottom of the post editor. You can use keyboard shortcuts to make the text bold or italic.
3. Choose the channel you want to post to from the drop-down menu.
4. Press Publish Post to finish.
PINNED POSTS
To pin a post to the top of the page, click on the ellipsis menu (three horizontal dots) in the top corner of the post and select Pin. Posts can be pinned in Home or in their channel. To unpin a post, click on the ellipsis menu (three horizontal dots) in the top corner of the post and select Unpin.
DELETE A POST
Once posted, to delete a post, click on the ellipsis menu (three horizontal dots) in the top corner of the post and select Delete Post. Press Confirm to delete. Note that it is not currently possible to edit posts.
LIKES AND COMMENTS
Group members can like and comment on posts within the group by clicking on the thumb and comment icons.
Group Members
ADD MEMBERS
To allow members to join your group, you must provide them with a unique URL specific to the group within your community. This URL will direct them to a customized page where they can sign up and create a profile shared across all the groups within the community.
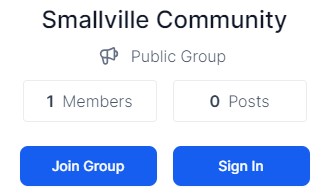
Once they sign up or log in, they gain access to the client portal and can choose to participate in any of the available groups within the community. Members can join multiple groups within the community.
VIEW GROUP MEMBERS
To view group members, click on People. You can see group members, role type, when they became a member and their status. You can toggle between All members, Contributor, Moderator and Admin. You can search for a member by name and filter the list by All, Active, Requested and Invited.

PRIVATE GROUP APPROVAL
For private groups, you will need to Approve (or Decline) user requests to join. Click on the vertical ellipsis menu (three dots), select Request and then choose Approve.
CHANGE ROLE
To change a member role, click on the ellipsis menu (three vertical dots), select Change Role and choose the role type.
REMOVE FROM GROUP
To remove a member from the group, click on the ellipsis menu (three vertical dots) and select Remove from Group.
MEMBER ACCOUNT SETTINGS
Users can access their account settings by click on their initials/photo in the top right corner of their dashboard. In the Profile tab, they can change their name, add a profile picture and profile cover, add a title and bio and change their location and time zone. In the Account tab, they can change their password. In Social Media, they can add a phone number, email and social handles.

If you have a quick, system-specific "how-to" question, you can chat with our L1 Technical Support Team using the purple chat bubble in the bottom corner of the software. This team offers live chat 24/7, giving you instant access to help at any time of day.
If you have a more complex or outcome-specific “how-to” question, or a query about project requests, done-for-you resources, or Coach Catalyst, you can email our L2 Specialist Team at [email protected]. This team is available Monday to Friday, 8:00am – 1:00pm (EDT).
© 2026 SuperCoach CRM