
Domains
Created by: Emma Johnston
Last Updated: August 29, 2025
Add a Domain
Once you have added us as a delegate/contributor to your domain account (such as GoDaddy, Cloudflare, Squarespace, etc) and we have set up the correct DNS record, you can add subdomains directly in SuperCoach CRM.
ADD A SUBDOMAIN
We recommend adding the subdomain after you have created your funnel, as you can connect the domain to the funnel and set the default funnel step at the same time.
1. Go to Settings > Domains & URL Redirects > Domains and click on the + Connect a Domain button in the top right corner.
2. On the next page, choose Funnel/Website and press Connect.
3. Enter the subdomain address in the Domain URL box and click Add Record Manually to continue.
4. In the next window, click Verify Records to continue. There may be up to a 30 second delay while this processes.
5. On the final screen, if you have already created the funnel you want to link the domain to, select it from the dropdown list. In the box that appears, set default funnel step. If haven't already created the funnel yet or don't want to connect that subdomain to a funnel, press cancel to close the window. You can also set a default 404/error page.
MULTIPLE DOMAINS
You can point more than one domain at a funnel. Use the steps above to link the main domain to the funnel. Next you can add additional domain but press cancel. You can then use the edit button to set the default page for the additional domains to the funnel.
Domain Dashboard
DOMAIN DASHBOARD
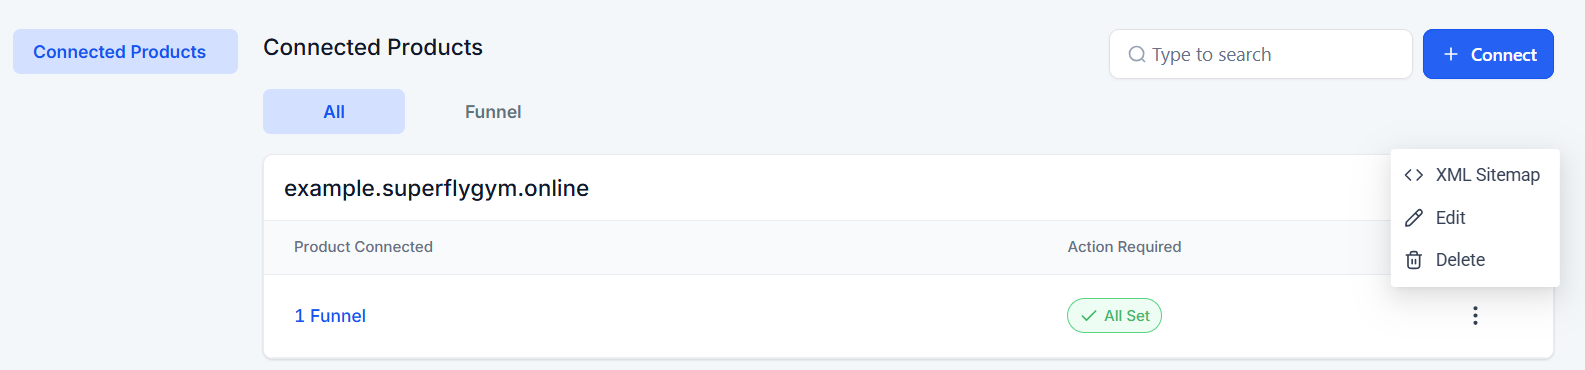
Click on Settings > Domains & URL Redirects > Domains to view existing domains (and their subdomains and connected products). Subdomains will be grouped together. You can search domains by name using the Search Box.

ELLIPSIS MENU OPTIONS
Click on the ellipsis menu (three vertical dots) to view available options. These include to Edit and Delete. Once you select an option, simply follow the on-screen instructions.
Purchase a Domain
INTERNAL DOMAINS
You can purchase new or additional domains through SuperCoach CRM. The system can connect to internal domains very easily and eliminates the need to set up any system-specific DNS records. The domain remains fully functional, and you can still add external DNS records (such as for Gmail).
Depending on the domain type, costs typically range from $8 to $13 per year. Once a domain is purchased, transactions are considered final and non-refundable.
PURCHASE A DOMAIN
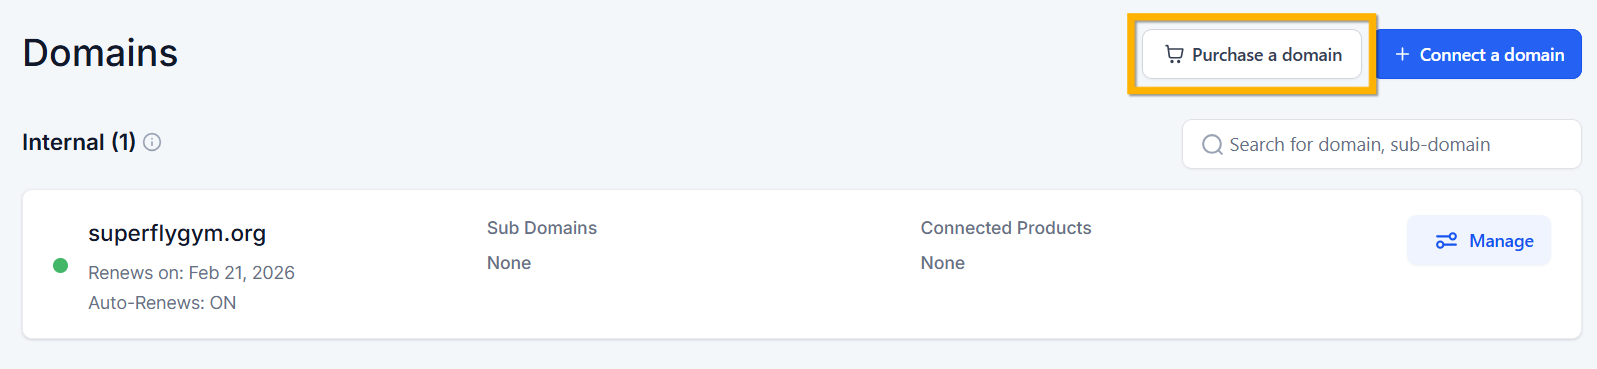
1. Go to Settings > Domains & URL Redirects > Domains and click on Purchase a Domain.
2. Enter the domain name you are hoping to use and press Search. If your desired domain name is not available, repeat the search using a different term.
3. Once you have found the desired domain, click Buy.
4. In the pop up window, check the Terms and Conditions box, and click Buy to finalize your purchase.
MANAGING YOUR DOMAIN
Once you have purchased your domain, you will be able to access it from the Internal domains list. Click Manage for more information. Here you can change between Connected Products and DNS records as needed.
AUTO RENEWAL
By default, the domain will set to auto-renew each year. If you would like to turn off auto-renewal, please email us at [email protected] with at least 14 days’ notice before the renewal date. You can find your renewal date in the Domains Dashboard.
TRANSFERRING YOUR DOMAIN
If you need to transfer your domain, just send an email request to [email protected]. We will then create an EPP code/Auth Code for you to use with your new provider. Please allow 3-5 working days for this process to be completed.
URL Redirects
URL Redirects
URL REDIRECTS
If you want to change the URL for a path, you can create a URL redirect. A redirect allows you to send traffic from a path that no longer exists to another location. You can point it to another URL, to a Funnel, or to a Website, or you can choose All, which redirects the entire domain.
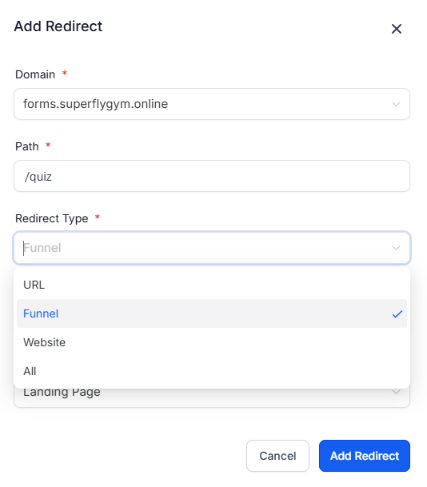
1. Go to Sites > Domains & URL Redirects > URL Redirects and click on the blue + Add a Redirect Button.
2. Select the domain from the dropdown menu and enter the new path that you want to create.
3. Next, select the Redirect Type (URL, Funnel, Website, or All).
4. Once selected, enter the required details and press Add Redirect to finish.
You can only create URL redirects for paths that no longer exist. If the path you want to redirect is already in use, you will need to update or delete that path first before setting up the redirect.
URL Redirects can used to mask long addresses (such as PDFs, forms, calendars, and external links). This can create 'pretty' URLs for social media or create URLs that you can use in text messages.
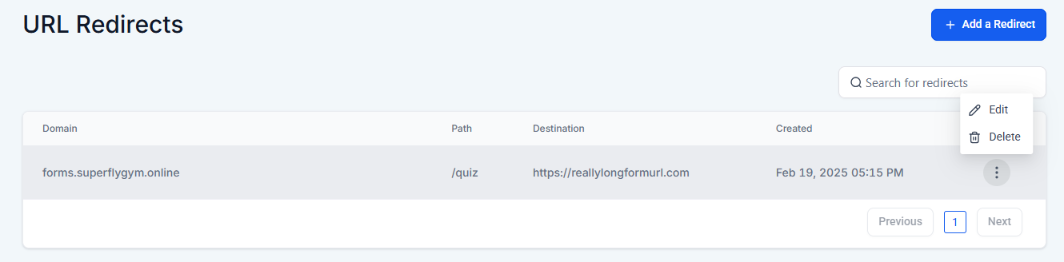
URL REDIRECTS DASHBOARD
From Sites > URL Redirects, you can view existing redirects, their previous path and their new destination (as well as the date created). You can click on the ellipsis menu (the three vertical dots) to edit or delete.
CNAME Records
Wix Users
WIX USERS
If your domain provider is Wix, you will need to add a CNAME record to your account first before adding subdomain.
1. Click here to access your Wix Domains dashboard.
2. Click on the ellipsis menu (three dots) next to your domain and select Manage DNS Records.

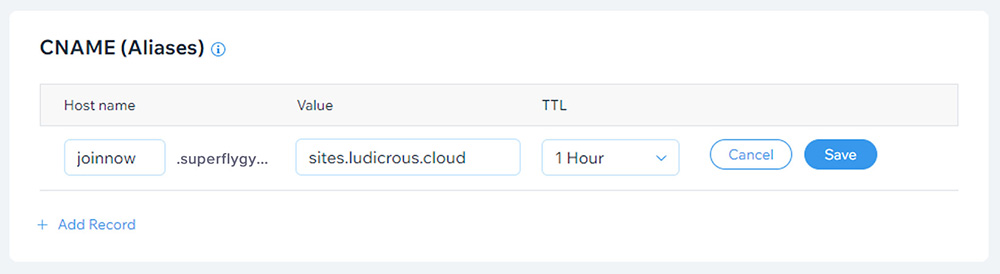
3. Click + Add Record at the bottom of the CNAME (Aliases) section.
4. Enter your chosen subdomain word in the Host Name column and enter sites.ludicrous.cloud in the Value column.
SiteGround Users
SITEGROUND USERS
If your domain provider is SiteGround, you will need to add a CNAME record to your account first before adding subdomain.
1. Click here to access your SiteGround dashboard.
2. In the left hand panel, click on the Domain and select DNS Zone Editor.
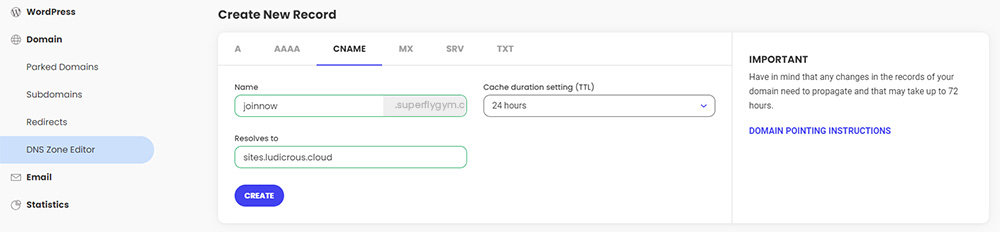
3. Select the CNAME tab.
4. Enter your chosen subdomain word in the Name field and enter sites.ludicrous.cloud in the Resolves to field.
5. Click Create to finish.
Wordpress
WordPress
WORDPRESS PLUGIN
If you have a WordPress website, you can use the Lead Connector plugin to connect your pages to your website.
1. Download the Lead Connector plugin to your WordPress account.
2. In SuperCoach CRM, go to Settings > Business Info > Company Data and copy the API key.
3. In WordPress, click on Lead Connector in the left menu panel, copy the API key information, and press Save. Press refresh.
4. Click on Funnels > Add New. Select your funnel from the drop-down menu and select the landing page step. Enter a custom slug, such as /programname (this would create mygymname.com/programname).
5. Press Save Page.
6. Repeat step 4 and step 5 for the other funnel steps.
SUBDOMAIN FOR PAYMENTS
If you’re using the WordPress plugin for a funnel that takes payments, you will need to create and attach a subdomain to that funnel. The funnel page is displayed inside your WordPress site via an iframe. Stripe requires the domain, subdomain, and payment setup to all match, otherwise it can throw a fingerprint error and block the payment.
You can use the same subdomain across all funnels (for example, programs.mygymname.com). Visitors won’t see it or interact with it — it’s just there to keep Stripe happy and ensure payments process correctly.
If you’re only embedding an opt-in form (no payments), you don’t need to attach a subdomain.

If you have a quick, system-specific "how-to" question, you can chat with our L1 Technical Support Team using the purple chat bubble in the bottom corner of the software. This team offers live chat 24/7, giving you instant access to help at any time of day.
If you have a more complex or outcome-specific “how-to” question, or a query about project requests, done-for-you resources, or Coach Catalyst, you can email our L2 Specialist Team at [email protected]. This team is available Monday to Friday, 8:00am – 1:00pm (EDT).
© 2026 SuperCoach CRM