Payments
Created by: Emma Johnston
Last Updated: September 03, 2023
Invoice Dashboard
INVOICE DASHBOARD
To access the invoice dashboard, go to Payments > Invoices > All Invoices. The dashboard displays invoice information on the number of payments (listed in draft, due, received and overdue) and the payment totals.
You can search for an invoice by name using the Search Box. You can also filter invoices by date by click on the Date bar and select a Start Date and End Date.
FILTERS
You can filter invoices by Status (all, draft, sent, overdue, paid, void) and by Payment Mode (all, live mode, test mode). Once filters have been selected, click Apply (or Clear).


EDIT AN INVOICE
To edit an invoice, click on the ellipsis menu (three vertical dots) and select Edit. Once the edits are complete, press Save or Send.
DELETE AN INVOICE
To delete an invoice, click on the ellipsis menu (three vertical dots) and select Delete. Press Delete to confirm (or Cancel).
CLONE AN INVOICE
To clone an invoice, click on the ellipsis menu (three vertical dots) and select Clone. The cloned invoiced will open ready for you to edit. You can rename the invoice at the top of the page, click on wording in the dark blue bar across the top of the page. Press Save or Send once complete.
Settings
INVOICE SETTINGS
To access invoice settings, click the Gear icon in the top right corner of the Invoice dashboard. You can edit Business Information, Invoice Title and Terms, Due Date Settings, and Notifications. You can also view/add custom fields.

BUSINESS INFO
If any business information for invoices differs from the business profile information in Settings, you can change that in Invoice Settings. Click on the Business Information tab, make the changes as necessary and press Save to finish.
INVOICE TITLE AND TERMS
In Invoice Settings, click on the Business Information tab. If any business information for invoices differs from the business profile information in Settings, make the changes as necessary and press Save to finish.
DUE DATE SETTINGS
To define the number of days after which each invoice is due from its date of creation, click on Due Date Settings. Enter the number of days and press Save to finish.
CUSTOM FIELDS
If any of your custom fields are relevant to invoices, you can add them in the Custom Fields section. These can then be used in the invoice editor by selecting Custom Values. Click here for more information about custom fields.

Create an Invoice
CREATE INVOICE
1. Click on Payments > Invoices > All Invoices, press the blue + New button in the top right corner and select New Invoice. This will open an invoice page.

2. Click on wording in the dark blue bar across the top of the page to add an invoice title.
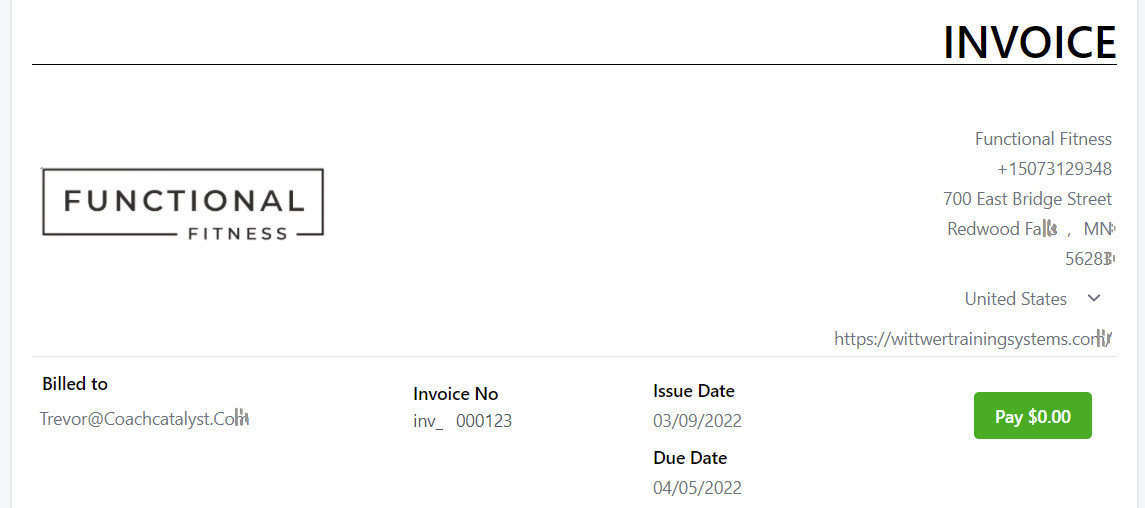
3. The company information at the top of the page is automatically populated from the information found in Settings > Business Info. If you want to change the logo, hover over the image and click on the blue Remove link that appears. Next, click on Select a File and select an image from your Media library. To change the address information, click on the text and type the new information.
4. Click on the white + Add a Client box and search for the contact you want to send the invoice to. Click on the client's name to add them to the invoice. If you accidentally select the wrong contact, hover over their name and click on the blue Remove link that appears. If you need to invoice a new contact, select Add New Client, complete their contact information and press Save.
5. To edit the invoice number, issue date and due date, click on each field and edit the information,

ADD PRODUCT
1. To add a product to the invoice, click on the + Add An Item box that appears when you hover over the Item section.

2. Select the product from the first drop-down menu and select the price from the second drop-down menu. These lists are populated from the information found in Payments > Products. If you need to create a new product, select Add Item, complete the product information and press Add New Item. If you want to, you can then add an item description,
3. Add additional items by repeating Step 2.
4. Press Save (in the top right corner).
If you need to delete an item, click on the red cross at the end of the item line.
SEND INVOICE
Once you have added your contact and products, your invoice is ready to send.
1. If you want to add a message, notes or terms, this can be added to the Add Notes/Terms box at the bottom of the invoice. You also have the option to add tax and/or a discount (see below).
2. Click on Send in the top right corner.
3. Select whether you want to send the invoice link as an email, text, or both. To send an invoice in test mode, click on Additional Options and toggle on Test.
4. Click Send Invoice.
If you need to copy the invoice link at any time, go to Payments > Invoices and select Actions > Copy Link.
PREVIEW AN INVOICE
To preview an invoice, click on the ellipsis menu (the three vertical dots) in the top right corner of the editor and select Preview.
INVOICE PDF
To download a PDF copy of the invoice, first preview the invoice and then select Click Here to download pdf underneath the preview. This PDF can be sent to the contact and contains a hyperlink for the contact to make a payment.
Adding Tax
CREATE TAX SETTING
If you want to add tax to an invoice, you first need to create it as a Tax Setting.
1. Click on Payments > Tax Settings and click on the green Add Tax button.
2. Add the name of the tax, the rate (as a percentage) and a description.
3. Press Save.
You can delete entries by clicking on Actions and then selecting Delete Tax. If the entry doesn't appear immediately after adding it, refresh the page.
ADD TAX
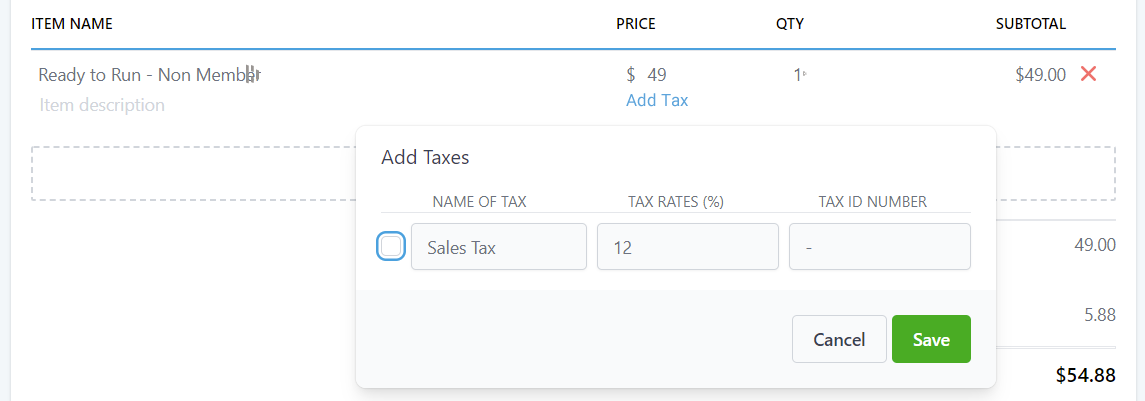
1. On the invoice editing page, click on Add Tax under the item price.
2. Select the tax you want to add from the list and press Save.

Adding a Discount
ADD A DISCOUNT
You can add a percentage discount to the invoice total.
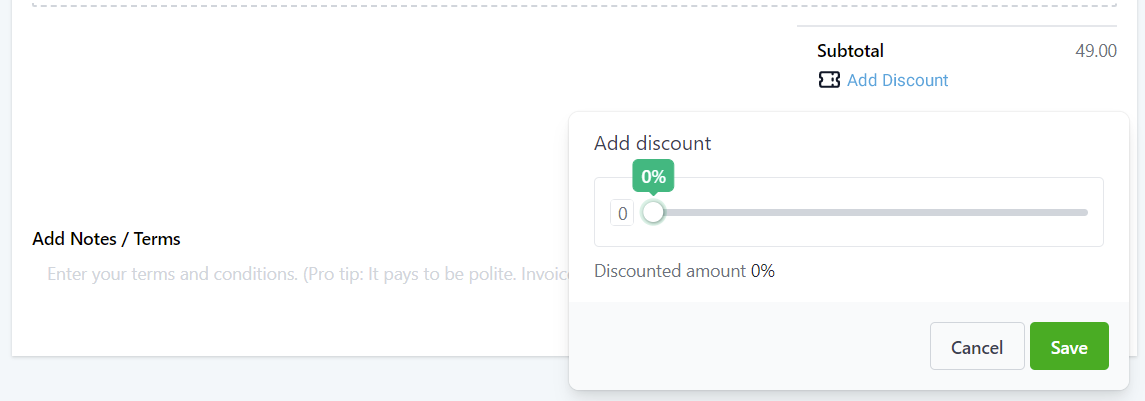
1. On the invoice editing page, click on Add Discount under the subtotal.
2. Either use the slider to select the discount percentage amount or type the value into the box.
3. Press Save.
You can change the discount amount by clicking Change Discount.

Recurring Invoices
RECURRING INVOICES
1. To create a recurring invoice, go to Payments > Invoices > Recurring Invoices, press the green + New button in the top right corner and select New Recurring Template.
2. Edit the Frequency Settings. You set how often the invoice send, the start and end dates, and how far in advance to send the invoice.
3. Edit and send the invoice (see instructions above).
Payment Receipts
AUTOMATIC RECEIPTS
1. To set up an automatic receipt for paid invoices and calendar payments, go to Payments > Settings > Receipts.
2. Toggle on Enable Automatic Sales Receipts.
3. Add a title, receipt prefix and receipt start number.
4. Select an email template (which you have premade in Marketing > Emails > Templates using the relevant Custom Values found listed under invoice and receipt).
5. Press Save to finish.

Invoice Status
STATUS
To check the status of an invoice, click on Payments > Invoices > All Invoices and check the Status column. You can also filter your invoice list by status (options are all, draft, send, overdue and paid).
You can also see invoices in Payments > Transactions by selecting Invoice as the source type. Click on Actions > View Invoice to open the invoice.
RECURRING INVOICES
To check the details and history of any recurring invoices, go to Payments > Invoices > Recurring Invoices and press Details under the required invoice.
To end a recurring invoice, click on the invoice name to open the editor and click the ellipsis menu (three vertical dots).
Manual Payments
MANUAL PAYMENTS
1. To record payments manually, click on Payments > Invoices and open the required invoice.
2. Click on the ellipsis menu (three vertical dots) and select Record Payment.
3. Select the Record Manually option.
4. Choose the mode of payment and enter in the relevant payment details.
5. Press Submit (or cancel) to save and exit.

Notifications and Reminders
CUSTOMER AND TEAM NOTIFICATIONS
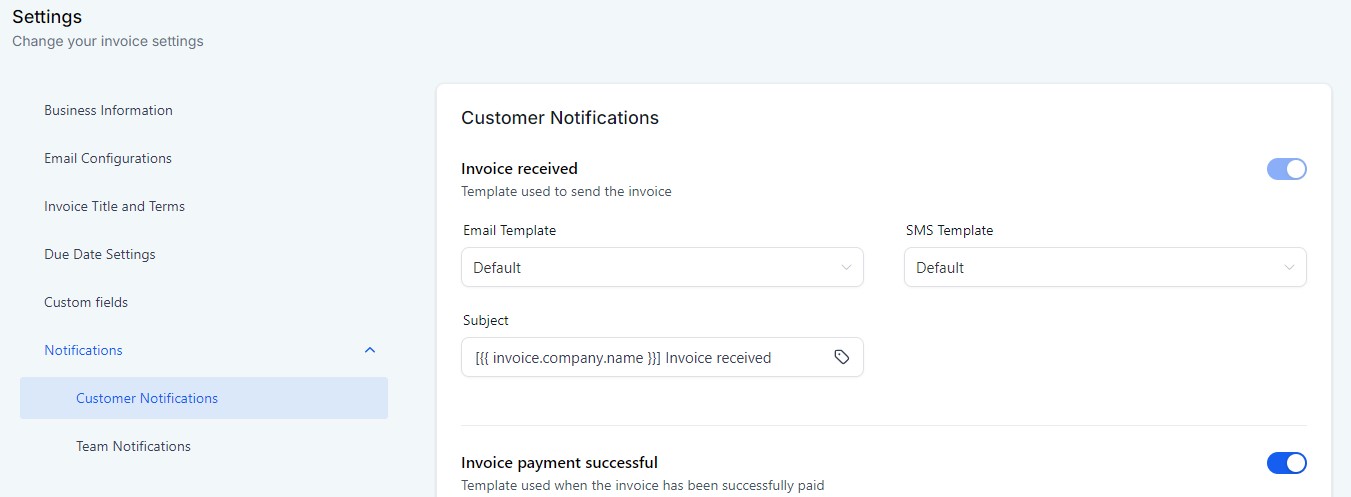
To edit the notifications sent to end customer who is receiving the invoice, click the Gear icon in the top right corner of the Invoice dashboard and open the Notifications section.

From the dropdown, choose whether you want to edit the Customer Notifications or the Team Notifications. In Customer Notifications, there are options for whether invoice received, whether a payment has been successful or failed, and whether an auto payment has been successful or failed. You can also edit the Team Notifications to be alerted when a payment is successful or fails, when an auto payment fails or is skipped, and when an invoice could not be sent.

For each type of notification, you can choose whether to send the default email or SMS template or a custom notification. You can also add a custom subject line, or toggle off the notification all together.
CUSTOM NOTIFICATIONS
Customer/team notification emails first need to be created first in Marketing > Emails > Templates and the text messages (SMS) templates need to be created first in Marketing > Templates. You can access the dynamic fields for invoices in Custom Values.

Once these have been created, you select them as templates in Customer Notifications and Team Notifications.
Invoice Automations
INVOICE WORKFLOWS
1. Click on Automation > Workflows and click the green + Create New Workflow button in the top right of the screen.
2. Choose an option for the type of Workflow you wish to create, such as Start a Workflow from Scratch, and click the + Create New Workflow button again to enter the builder. Add a workflow name and press Save.
3. Click Add New Workflow Trigger and select Invoice. Add filter Invoice Status and select either Sent or Paid.

4. Click the + to add a new event to the workflow. You can add actions such as a Wait step, Send SMS, Send Email or Send Internal Notification.
5. Toggle on Publish and press Save.
OVERDUE REMINDER WORKFLOW
1. Click on Automation > Workflows and click the green + Create New Workflow button in the top right of the screen.
2. Choose an option for the type of Workflow you wish to create, such as Start a Workflow from Scratch, and click the + Create New Workflow button again to enter the builder. Add a workflow name and press Save.
3. Click Add New Workflow Trigger and select Invoice. Add filter Invoice Status and select Sent.

4. Click the + to add a new event to the workflow. Add a Wait step and select Overdue in the Wait For dropdown. Add the timeframe for when you want the workflow to send a reminder (such as seven days overdue, for example). Press Save Action.
5. Add any other required steps such as Send SMS, Send Email or Send Internal Notification.
6. Toggle on Publish and press Save.
DUE DATE WORKFLOW
If you have Invoice used as a workflow trigger, you can also use the IF/ELSE condition to assess invoice properties, such as due date and status.

If you have a quick, system-specific "how-to" question, you can chat with our L1 Technical Support Team using the purple chat bubble in the bottom corner of the software. This team offers live chat 24/7, giving you instant access to help at any time of day.
If you have a more complex or outcome-specific “how-to” question, or a query about project requests, done-for-you resources, or Coach Catalyst, you can email our L2 Specialist Team at [email protected]. This team is available Monday to Friday, 8:00am – 1:00pm (EDT).
© 2026 SuperCoach CRM