
Email Templates
Created by: Emma Johnston
Last Updated: August 29, 2024
Marketing Email Sequence
MARKETING EMAILS
The marketing emails has been set up as a six-day sequence. You can either use a workflow to send these as an automatic sequence, or you can schedule them manually. You will need to edit and adapt the emails so that they are correct for your program information, start date and target audience.
TASK CHECKLIST
Here a quick overview of the tasks you need to complete:
Task 1 - Add your funnel URL to custom values
Task 2 - Check the workflow start date and time
Task 3 - Edit the emails
Task 4 - Add the required contacts to the workflow
Funnel URL Custom Values
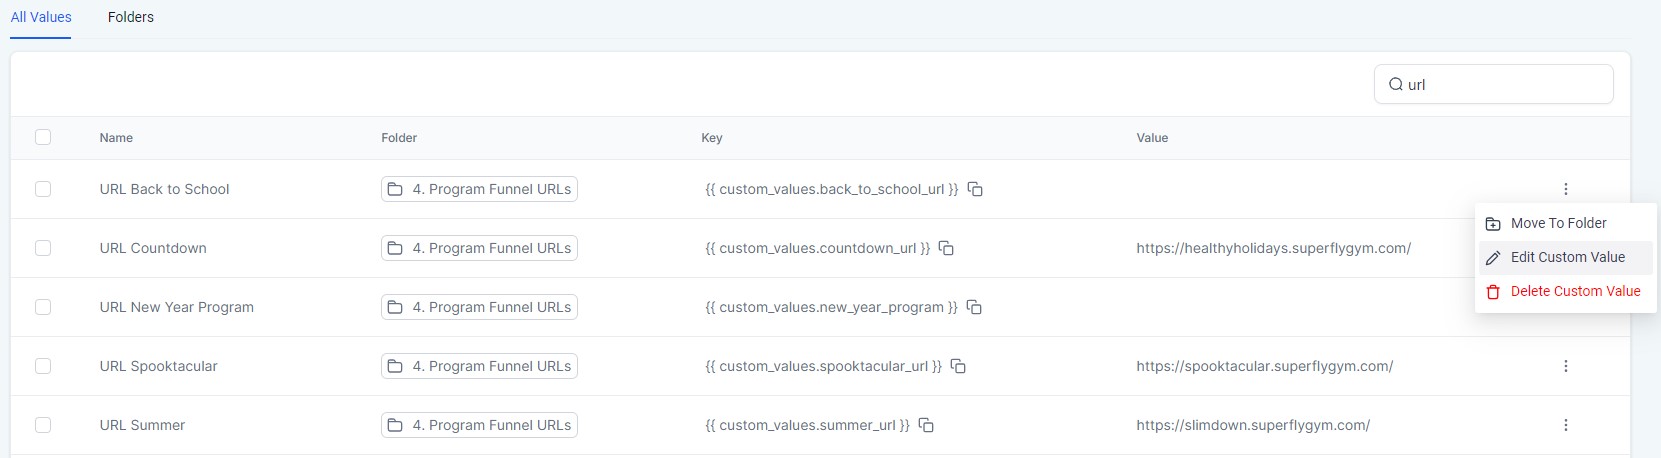
ADD FUNNEL URL TO CUSTOM VALUES (new from September 2024)
1. Go to Settings > Custom Values and search for the term URL in the search box.
2. Find the correct URL for your program, click on the on the ellipsis menu (three vertical dots), and select Edit Custom Value.
3. In the popup window, add the URL for your funnel and press Update to finish.
Marketing Email Workflow Sequence
OPEN WORKFLOW
Click on Automation > Workflows and open on your Marketing Emails workflow. If you can't find the workflow, either click on the Recent tab or use the search box.

CHANGE THE START DATE
1. Open the Event Start [Edit] step at the top of the workflow.
2. In the right-hand panel, change the date/time in the Select Date section and update the Action Name.
3. If you do not want the emails to send every 24 hours, you will need to change the wait steps between emails.
Click here for an editable calendar to help you plan the sequence and determine the start date.
4. Press Save Action when complete.
5. Press the Save button in the top right corner of the workflow.
It is your responsibility to check/change the workflow start date and ensure it is correct.
EDIT THE PRE LAUNCH EMAIL #1
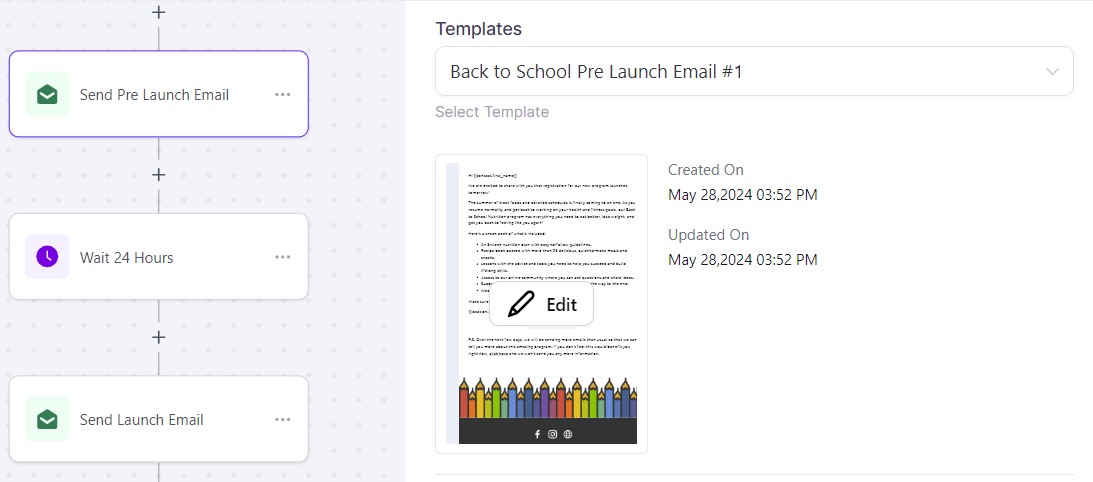
1. Open the Pre-Launch Email [Edit] step. Change the subject line, if needed, and check the correct email template has been added.
2. Hover over the template preview and click on Edit. This will open a pop-up window where you can edit the email.
3. Edit the email as required, such as adapting the copy to match your program or changing the button color. To edit the appearance of the text, click on the text and the editing toolbar will appear at the top.
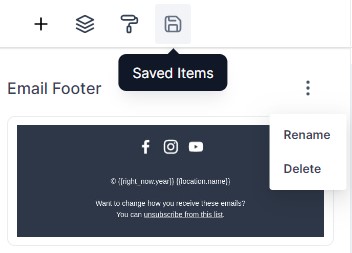
4. Change the color of the footer and update the business information and social icons as required. By default, the emails have been set up to include links to Facebook and Instagram and location address/email/phone number.
We then recommend adding this to Saved Items so that you can use this again in the other emails in the sequence.

5. Press Save when complete and then press the X in the top left corner to close the window.
6. Press Save Action to finish and return to the workflow.
7. Press the Save button in the top right corner of the workflow.
EDIT THE MARKETING EMAILS
1. Open the Launch Email [Edit] step. Change the subject line, if needed, and check the correct email template has been added.
2. Hover over the template preview and click on Edit.
3. Edit the email as required, such as adapting the copy to match your program, updating your start date or changing the button color.
4. Delete the email footer and replace it with your recently saved email footer found in the Saved Items tab in the left hand panel.
5. Press Save when complete and then press the X in the top left corner to close the window.
6. Press Save Action to finish and return to the workflow.
7. Repeat these steps for the remaining emails in the sequence.
8. Save the workflow regularly while making changes. When complete, toggle on Publish.
It may also be beneficial to add a success story spotlight email (featuring testimonials or success stories from past participants to build credibility and showcase result) to the email sequence, or an FAQ email (addressing frequently asked questions and common objections).
PREVIEW THE MARKETING EMAILS
We recommend previewing the emails as you edit them, so that you can see what the emails will look like when viewed on different devices. You can do this by clicking the Preview button at the top of the email editor pop-up.

Once you have completed all of the edits, we also recommend pressing Test Workflow at the top of the workflow to send yourself sequence so that you can check the appearance of the emails. You can then push/walk yourself through the workflow so that you can receive all of the emails without need to wait. Click here for instructions.
NOTE: If you cannot see the Save button when editing emails within the workflow, change the zoom level of your browser to 90% or 80%. You can also access the emails in Marketing > Emails > Templates, which will give you a full window view. If you access the emails through this option, you will need to press Sync Changes to update the emails in the workflow.
Adding Contacts to the Workflow
ADD CONTACTS TO THE MARKETING EMAILS WORKFLOW
You can add the contacts anytime before the first email is scheduled to send.
1. Click Contacts and select the contacts that you want to send the marketing emails to (being careful to choose Select All Records, where appropriate, to select the full list and not just the first page).
2. Click on the Add to Automation icon (play icon). Check the pop-up information and press Proceed.
3. Add an Action Name. This is an internal reference only, so that you distinguish the task in the Bulk Actions list.
4. Next, select the Marketing Emails Workflow from the dropdown menu. You can type in part of the name of the workflow to narrow the search.
5. Press Add to Automation to finish.
CHECK WORKFLOW NAME
Always double-check that you are adding contacts to the marketing emails and not the purchase automations workflow. If you cannot see the marketing emails in the drop-down menu list, go back to the marketing emails workflow and check it is published.
CHECK ASSIGNED CONTACTS
Go to the marketing emails workflow to see the assigned contacts. You will see the contact count above the Wait for Start Date step.

ADDITIONAL EDITS
Even when the contacts have been added to the workflow, you can continue to make edits to any steps that are ahead of where the contacts are in the sequence.
Manually Send/Schedule Emails
MANUAL SEND
If you have missed the start date for the email sequence or want the emails to go out at very specific times, you may prefer to manually schedule the emails.
EDIT THE PRE LAUNCH EMAIL
1. Click on Marketing > Emails > Templates and open the folder.
2. Click on the ellipsis menu (three vertical dots) and select Create Campaign.
3. Edit the email as required, such as adapting the copy to match your program or changing the button color.
4. Change the color of the footer and update the business information and social icons as required. By default, the emails have been set up to include links to Facebook and Instagram and location address/email/phone number.
We then recommend adding this to Saved Items so that you can use this again in the other emails in the sequence.
5. Press Save as you make changes.
6. When you are ready, press Send or Schedule.
7. Choose when you want to send/schedule the email and complete the fields for name, email, subject line and preview text.
8. Select your recipients (you can choose from either All Contacts, Smartlists or Tags). If you want to send the emails to All Contacts, you need to press that option to select it.
9. Toggle on Track Clicks if required.
10. Press Send when complete.
Click here for more information about using Campaigns and Click here for more information on how to schedule emails.
EDIT THE MARKETING EMAILS
Repeat the steps above to create campaigns for the remaining emails. Edit the email as required and replace the email footer with your recently saved email footer found in the Saved Items tab in the left hand panel. When complete, send or schedule the emails.
If you have a quick, system-specific "how-to" question, you can chat with our L1 Technical Support Team using the purple chat bubble in the bottom corner of the software. This team offers live chat 24/7, giving you instant access to help at any time of day.
If you have a more complex or outcome-specific “how-to” question, or a query about project requests, done-for-you resources, you can email our L2 Specialist Team at [email protected]. This team is available Monday to Friday, 8:00am – 1:00pm (EDT).
For Coach Catalyst questions, email [email protected].
© 2026 Growth Catalyst CRM