
Forms
Created by: Emma Johnston
Last updated: August 18, 2025
Creating a Form
CREATE A NEW FORM
1. Click on Sites > Forms > Builder. In the top right corner, click on the blue + Add Form button.
2. Choose from either Start from Scratch or Choose from Template.
3. Once in the form editor, rename your form at the top of the page, using the pencil icon to unlock the name.
4. Press Save in the top right-hand corner regularly.
If you choose to start from scratch, the form will then load with four contact fields, a consent box, a button and privacy policy links to get you started. These are be deleted/edited as required.

UNDO/REDO
To undo or redo an action (for fields, settings and theme changes), click on the Undo and Redo icons in the top toolbar menu.
START FROM TEMPLATE
You can create a new form or you can clone one of the SuperCoach CRM forms in the Templates folder. These are often better formatted that the system forms. Once cloned, move your new form to either the root folder or your own folder.
Adding Questions and Form Elements
ADD A FORM ELEMENTS (FIELDS/QUESTIONS)
To add questions to the form, click on the + Add Form Element button in the top left-hand corner.

QUICK ADD/STANDARD FIELDS
To add standard fields, drag and drop the required questions from the Quick Add tab in the left-hand panel. Quick add elements include contact information, address, text, and images.
CUSTOM FIELDS
To add custom fields (your own questions), click on the Custom Fields tab. To edit or organize a custom field, click on Settings > Custom Fields. See the Custom Fields page for more details/instructions.
EDIT FIELDS WITHIN A FORM
You can edit the field title text or the place holder text by click on the specific field and changing the text in the right menu.
NOTE: You can't make permanent edits to fields, just form by form.
Editing Questions and Form Elements
REQUIRED QUESTIONS
To make a question required, click on the field and change the option in the right-hand menu. Required questions are marked with an asterisk.
REORDER ELEMENTS
You can also reorder questions, fields, and text by click on them and dragging them to their desired spot within the form.
HOW TO DELETE A QUESTION
If you want to delete a question, click on the specific question/field on the form and click the cross in the top right corner of the highlighted box.

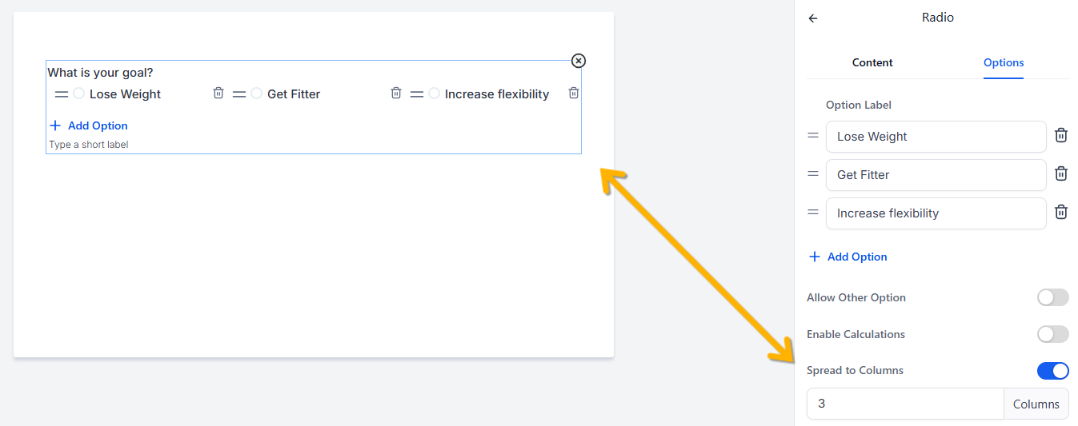
SPREAD TO COLUMNS
To display radio or checkbox options side by side instead of in a vertical list, click on the question, then open the Options tab in the panel on the right. Toggle Spread to Columns on, and enter the number of columns you’d like to use.
Submit Button
ADD A SUBMIT BUTTON
To add questions to the form, click on the + Add Form Element button in the top left-hand corner and drag a Button (from the Quick Add tab) onto the form.
To edit the button, click on the button to see the options in the right-hand pop-up menu to change the button alignment, button text (and subtext), background color, border, corner radius, and button width. There are also options to add a shadow, change the padding, and change the appearance and font of the text.
On Submit Options
ACTION ON SUBMIT
When the contact submits the form, you can either send them to a different webpage (Open URL) or display a message (such as a thank you message). To change the submission settings, click on the Settings tab and go to the On Submit section. Choose from Message or Open URL. Once selected, add the message or URL to the box below.
If the form is embedded in a SuperCoach CRM page, the Redirect Action in the funnel or website builder will supersede the form builder On Submit action.
SUBMIT MESSAGE APPEARANCE
If Message is selected as the On Submit action, there are options to format the text, background color, font family and font size.
Form Styling
Form Styling
STYLE THE FORM
To edit the appearance of the body of the form, click on the Styles and Options icon to display the right hand panel. Click on the Styles tab in the right-hand panel and go to the Form Style section. You can edit the form background color and transparency, border and color, corner radius, form width, padding and shadow.
If you plan to embed to form into a funnel, we recommend going to the Styles tab and change the Border and Shadow values to 0px. We also recommend toggling on Full Screen Mode, changing the Background Opacity color to 0, and reducing the Padding left and right values.
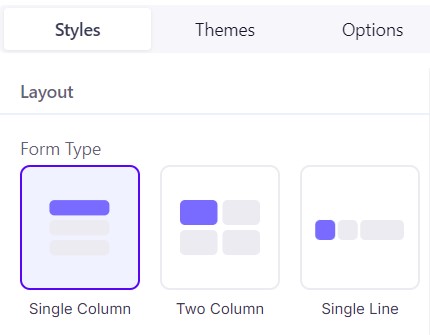
LAYOUT
To change the Layout of the form, click on the Styles tab in the right-hand panel. Choose from Single Column, Two Column and Single Line.
FORMAT FIELD STYLE
To format the field labels and placeholder text, click on the Styles tab in the right-hand panel and scroll down to Field Style. You can edit the background color, border (type, thickness and corner radius), width and padding. There are also options to change the appearance and font of the field label and placeholder text.
BACKGROUND AND HEADER IMAGES
If you are using the form as a stand alone page (and not adding to a funnel or website), you may like to add a background image or a header image. The background image is intended to cover the entire page, providing a visually appealing backdrop for the form and the header image is designed to cover the entire width of the form and remains positioned at the top of the form.
To add a background image or header image, click on the Styles tab in the right-hand panel. You can either drag a file or click to upload one. To view the image, click on the Preview option.
FORMAT FORM LABELS AND PLACEHOLDERS
To format the field labels and placeholder text, click on the Styles tab in the right-hand panel and scroll down to Label and Placeholder. You can edit the color, font family, font size and font weight.
REMOVE FORMS LABELS
To remove the field labels, click on the Styles tab in the right-hand panel and toggle off Show Label in the Layout section.
FULL SCREEN MODE
To remove the field labels, click on the Styles tab in the right-hand panel and toggle off Show Label in the Layout section. Switching this on will cause the form to expand across the entire width of its container, stretching to the edge of the embedding area while adhering to the form's width. This can be helpful when the form is being added to a funnel.
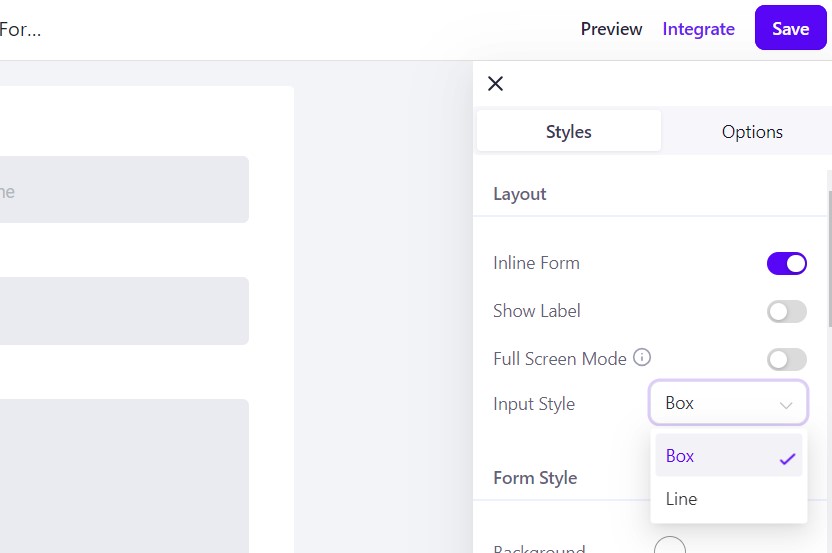
INPUT STYLE
You can select whether you want the input style to be Line or Box. Click on the Styles tab in the right-hand panel and select the Input Style from the drop-down menu.

Sharing and Submissions
Sharing and Using the Form
PREVIEW THE FORM/FORM URL
To share a form, click Preview either within the form itself or from the ellipsis menu (three vertical dots) on the dashboard. This will open the form so you can see how it looks, and you can then copy the URL directly from the address bar to share it.
ADD THE FORM TO A FUNNEL
If you want to embed a form or survey on a SuperCoach CRM funnel or website, you add it directly as an element in the funnel or website builder. Once added, make sure you set the Redirect Action.
Click here for more information on adding forms or surveys an element in funnels.
EMBED OR SHRE THE FORM
If you want to embed the form on an external website, click Integrate in the top right-hand corner of the form and select Copy Embed Code. You can also use the Share option to copy the form URL or post it directly to social media.
Notifications
FORM SUBMISSION NOTIFICATIONS
If you want to be notified when someone completes a form, click on the Bell icon (to show notification settings) and toggle on Email Notification. Press Save to finish.
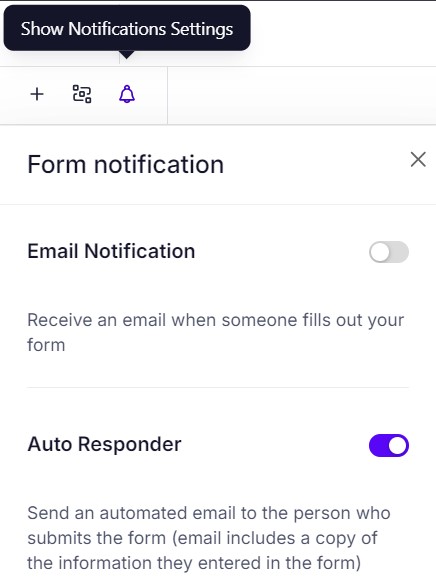
FORM SUBMISSION AUTO RESPONDER
To send an automated email to the person who submits the form (including a copy of the information they entered in the form), click on the Bell icon (to show notification settings) and toggle on Auto Responder. Enter a subject line, reply to email, and a sender name. Press Save to finish.
Form Submissions
VIEW SUBMISSIONS
To view submissions, you have three options.
- You can open a specific form and click on the Submissions tab.
- You can go to the dashboard and click on the ellipsis menu (three vertical dots) to select View Submissions for that form.
- You can go to Sites > Forms > Submissions to see results across all forms.
On all three screens you can filter by date, search for a specific contact, and manage columns to choose which fields are displayed. If you select one or more contacts, you’ll also see additional options to delete submissions or download the results as a CSV file.
FORM ANALYSIS
For form statistics, go to Sites > Forms > Analyze. Here you can see a graph showing Total Submissions. You can change the date range in the dropdown on the top right.
Scroll down to the Forms section and you will see a list of your forms and the number of submissions for each. You can click the View Submissions hyperlink to view the submissions for each form.
FORM SUBMISSION FOR A CONTACT
When a contact completes a form, their answers are stored within their contact record. You can look within specific contact records under Additional Information on the left side of their contact page in Contacts.
Form Submission Automations
FORM SUBMISSION AUTOMATIONS
When someone submits a form, you may want to trigger an automated action, such as adding a contact tag or sending a confirmation email.
1. Go to Automations > Workflows and create a new workflow (or open an existing one).
2. Click Add Trigger, and choose Form Submitted, then add a filter to select the relevant form
3. Add any action steps you want to happen next, such as Add Contact Tag or Send Email.
4. Finally, toggle on Publish and press Save.
Dashboard and Folders
Form Builder Dashboard
FORMS DASHBOARD
The Forms dashboard shows all the forms you’ve created. From here, you can organize them into folders and use the ellipsis menu (three vertical dots) to manage each one.
Click on Sites > Forms > Builder to view existing forms and folders (including information on when the form was last updated and who by). You can search forms by name using the Search Box. You can also toggle between List view or Recent view by clicking the options to the left of the search box.
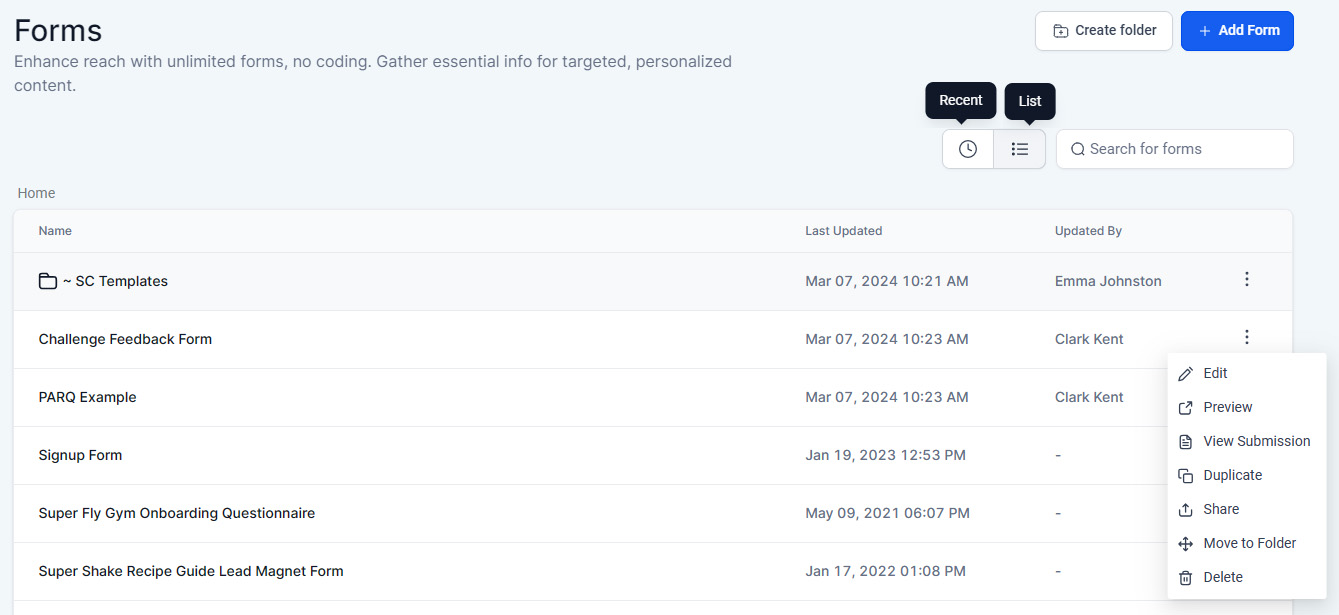
ELLIPSIS MENU OPTIONS
Click on the ellipsis menu (three vertical dots) to view available options. These include to Edit, Preview, View Submissions, Duplicate or Clone, Delete, or Move to Folder. Once you select an option, simply follow the on-screen instructions.
Form Folders
CREATING A FOLDER
Click on the Create Folder button in the top right corner. Enter a folder name and press Confirm (or cancel).
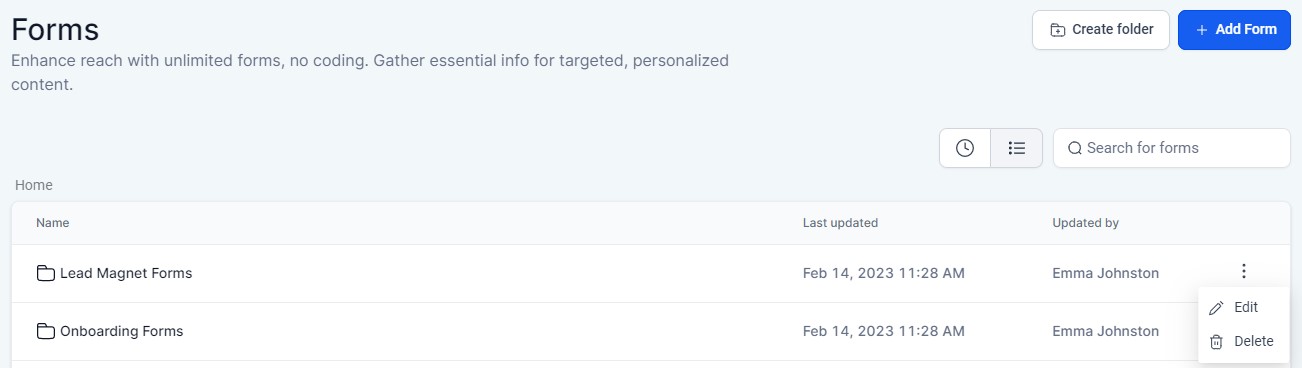
EDIT OR DELETE A FOLDER
To edit or delete a folder, click on the ellipsis menu (three vertical dots), select Edit or Delete as required, and follow the on screen instructions.
MOVING A FORM TO A FOLDER
To move an existing form, click on the ellipsis menu (three vertical dots) next to the form and select Move to Folder. Select the folder from the dropdown menu and press Confirm to exit (or cancel).
ADVANCED OPTIONS
Payments
PAYMENTS
You can take payments with in a form, which allows you to add more fields than a funnel order form. Payment forms can be used as a standalone form or as an element within a funnel.
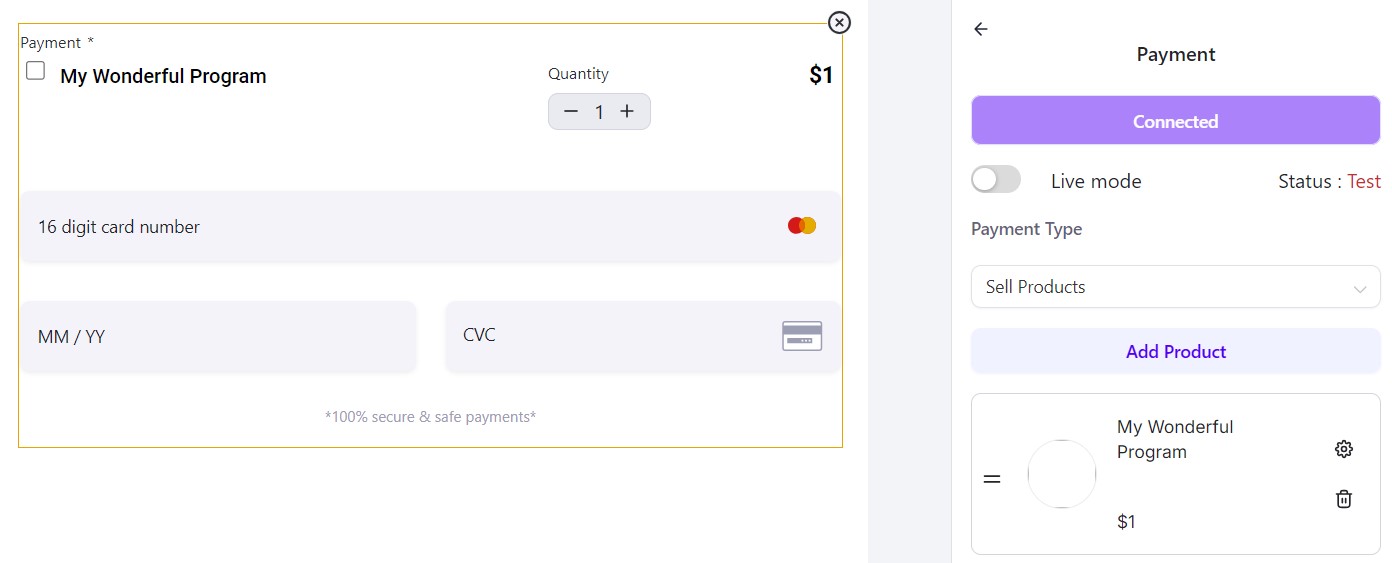
1. To take payments inside a form, click on the + Add Form Element button in the top left-hand corner and drag a Payment field onto the form.
2. Select the Payment Type from the drop down (Sell Products or Custom Amount - for example, where you might take charity donations).
3. To add product(s) to the form, click on the payment field to display the right hand panel. Click Add Product to add a product. Select the product from the drop down menu and choose whether to show the description and/or image. Once complete, press Add Product.
Click here for more information on creating products.
To edit a product, click on the Settings/Gear icon. To delete a product, click on the Trashcan icon.
4. Enter a Label and select whether the field is required.
5. Choose the required Layout Settings and change the Footer Information as needed.
Phone Number Fields and Email Validation
EMAIL VALIDATION
When you add an email field, you have the option of validating a contact's email address before they are able to submit the form. Click on the email field and check the Validate Email box in the right hand panel. Users will then need to verify their email before they can submit the form.

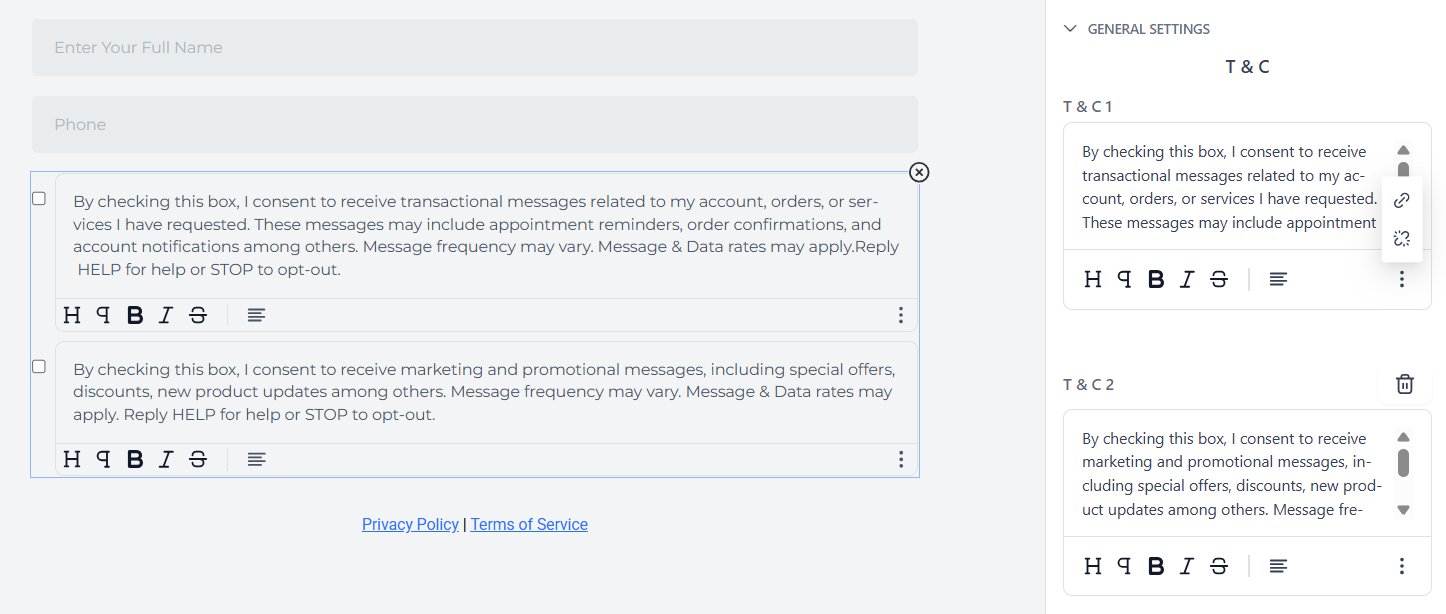
PHONE TERMS AND CONDITIONS
When you add a phone field, it the form will automatically add two Terms and Conditions fields to ensure that you are compliant with A2P 10LDC and GDPR regulations (one to consent to transactional messages and another to consent to marketing messages). To edit the hyperlink, highlight the required text, and click on the ellipsis menu (three vertical dots). You can also customize form the text, and chance the text and link colors.
PHONE COUNTRY PICKER
When you add a phone field, you can also choose whether to enable the Country Picker option. Click on the phone number field to change the option in the right-hand menu. If all of your contacts will have the same country calling code as your account, then you can disable this option. If you work with any contacts that might have a different country calling code, then you will need to enable this option.

Form Settings
STICKY CONTACT
Sticky Contact allows you to save cookie/s from a lead and will autofill information across multiple forms/surveys that they had previously entered so leads don't have to enter it twice if there are multiple steps. This is especially useful, for example, if you have an initial opt-in leading to a calendar/appointment page or an Order Form.
Click on Settings > Sticky Contact. and toggle the option on or off.
IMPORTANT! Sticky contact should not be used if more than one contact is completing a survey from the same device. If a second person accesses a sticky contact survey from the same device, the previous contact's information will populate and the system will add the new information to the wrong contact.
META PIXEL
Click here for more information on adding your Meta pixel to a form or survey.
AGENCY BRANDING
In Styles & Options > Styles, under the Miscellaneous tab, you can toggle on or off Agency Branding to remove the SuperCoach CRM logo. By default, this is toggled off.
To make additional appearance changes to the form, you can add Custom CSS.
ADDITIONAL OPTIONS
To make additional appearance changes to the form, go to Styles & Options > Advanced to add Custom CSS.
Duplicate Contacts
AVOIDING DUPLICATE CONTACTS
Sometimes when you send a contact a form or survey to complete, they use a different email address and it can create a duplicate contact. To avoid this issue, when you email a form link to a contact, you can add their contact id by adding the utm code ?contact_id= to the end of the form link (change the comma to a period to use).
If the contact then uses new contact information, their contact card will update.

If you have a quick, system-specific "how-to" question, you can chat with our L1 Technical Support Team using the purple chat bubble in the bottom corner of the software. This team offers live chat 24/7, giving you instant access to help at any time of day.
If you have a more complex or outcome-specific “how-to” question, or a query about project requests, done-for-you resources, or Coach Catalyst, you can email our L2 Specialist Team at [email protected]. This team is available Monday to Friday, 8:00am – 1:00pm (EDT).
© 2026 SuperCoach CRM