
Email DELIVERABILITY & Compliance
Created by: Emma Johnston
Last Updated: June 06, 2025
Email deliverability and compliance play a huge role in whether your messages actually reach the inbox—or end up in spam or get blocked altogether. Deliverability is influenced by your sender reputation, bounce rates, audience engagement, and whether you're following best practices around list hygiene, unsubscribes, and consent. Using these best practices is essential to building a strong sending reputation—something email platforms rely on to decide whether they trust you enough to deliver your emails.
Email Statistics
OVERALL EMAIL ANALYTICS
Go to Settings > Email Services > Email Analytics to see an overall breakdown of your email performance.
You can filter by date and by email source, such as campaigns, workflows, and booking requests. Within the selected date range, you’ll see statistics for emails sent, delivered, opened, clicked, complained, bounced, unsubscribed, and failed. Clicking on any metric card will show you which contacts are associated with that result, giving you a detailed view of how your emails are performing.
BULK ACTION STATISTICS
You can also see statistics for a specific 'round' of emails by looking at the Bulk Actions information.
1. Go to Contacts > Bulk Actions and click on Show Stats in the Statistics column next to the relevant email.
2. At the bottom of the pop up window, you will see overall statistics for that email. There is also an option to export that data. At the top of the pop up window, you will see tabs to view a list of contacts for each statistic type.

Bounces and sending errors
Bounce Rates
BOUNCE RATES
Our email provider has sending thresholds in place to protect your email reputation (so your emails go to your contact's inbox, not the spam folder). The bounce rate for a bulk email should be less than 3%. If you go over that threshold, your emails will be temporarily suspended for 24 hours so that you can make the necessary changes needed.
DELIVERABILITY ANALYSIS REPORT
When you now import a new list of contacts, the system will assess the email deliverability of that list and create an Contact Import Analysis Report to give you information deliverability and percentage of high risk emails.
Go to Settings > Email Services > Risk Assessment to see your reports.
HARD BOUNCES AND SOFT BOUNCES
A hard bounce occurs when an email cannot be delivered because the recipient's email address is invalid, such as when the domain doesn't exist or the address has been closed. These types of bounces are permanent and indicate a problem that needs to be corrected, like removing invalid addresses from your list.
A soft bounce, on the other hand, is a temporary issue, often caused by a full inbox or a server being temporarily unavailable. Soft bounces may resolve themselves over time, but if they persist, it may indicate a deeper problem that requires attention.
For more information on overall bounce classification, go to Settings > Emails Services > Bounce Classification.
Email Validation
EMAIL VALIDATION
We also offer Email Validation for accounts. The system checks each email address every 90 days to check it is valid - which eliminates bounces, etc. As our email provider charges us, this is a premium service and costs $0.003 per verification (which is would be around 3335 emails per $10).
Email validation validates new contacts when entering the system for the first time (form, survey, calendars, chat widget) or when sending a new email after enabling email validation. You can also validation emails as a Bulk Action.
To enable Email Validation, go to the Settings > Business Profile. Under the General section, enable Verify Email Address.
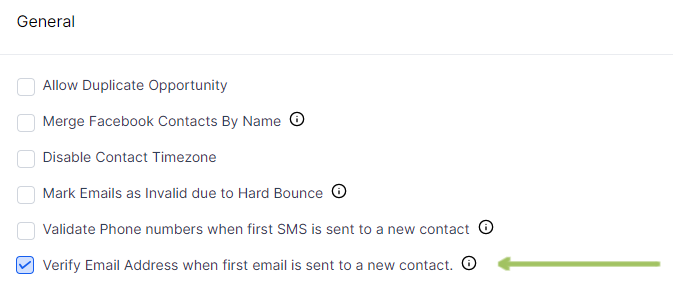
If your account has a temporary suspension in place, turning on email validation will instantly lift that block, as this ensures you will not send emails to addresses that would bounce.
Sending Errors
SENDING ERRORS
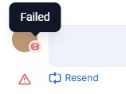
If an email cannot be delivered, the system will report a sending error. To check the status, go to Contacts, open the relevant contact card, and hover over the email icon next to the sender’s initials or profile photo. A red icon means the email has failed.
To view the reason, hover over the red exclamation mark. This will show the specific error message provided by the recipient’s email provider. If you want to resend the email manually, click Resend to send it again to that individual contact.
Most sending errors are rare and self-resolving, but you may occasionally see a message appear in the workflow stats or contact activity log. These messages come directly from the recipient’s email provider and explain why the email was rejected.
HOTMAIL/OUTLOOK
If you experience the following error when viewing email stats or contact activity: “5.7.1 Unfortunately, messages from [IP address] weren't sent. Please contact your internet service provider since part of their network is on our block list.”
This error is being caused by Hotmail's internal filtering system, not by your account or anything within the software. Microsoft (which owns Hotmail, Outlook, Live, and Microsoft 365 emails) occasionally blocks external IP addresses used to send emails, even if the emails themselves are valid and compliant.
This is extremely rare and fully outside of our control, but we do have a fix in place. Our internal monitoring system detects these blocklist errors automatically. As soon as an issue is identified—even if it’s triggered by a single recipient—our system will immediately submit a delisting request and rotate the IP address within 72 hours. Once that’s complete, email deliverability should return to normal.
SENDING reputation
Improving Sending Reputation
SENDING REPUTATION
Your domain reputation is influenced by how your emails are received and interacted with by recipients. High spam complaint rates, frequent bounces, sending to inactive or invalid addresses, and consistently low open rates can all harm your reputation. Sudden spikes or erratic sending patterns may also raise red flags with email providers and reduce your chances of landing in the inbox.
IMPROVING SENDING REPUTATION
To build and maintain a strong domain reputation, it’s important to send to clean, engaged lists. Avoid cold contacts, regularly remove bounced or inactive addresses, and aim for consistent sending behavior. Improving email content to encourage opens and clicks, along with segmenting your list so recipients only receive relevant messages, can significantly improve how mailbox providers view your emails.
Domain reputation is based on recent sending activity rather than long-term history. As a result, improvements usually take a few weeks of consistent, high-quality sending to show up. It’s not instant, but with steady volume, clean lists, and good engagement, providers will start to see you as more trustworthy. Ongoing attention to list quality and audience interaction is the best way to maintain strong deliverability over time.
Reputation Tools
GOOGLE POSTMASTER
Google Postmaster Tools evaluates domain reputation based on how your emails are received and interacted with by recipients. It helps you monitor how Google views your emails, including spam rates, domain and IP reputation, and authentication success. It’s a useful way to identify and fix deliverability issues before they impact your inbox placement.
1. Log in to Google Postmaster Tools (using your Google account).
2. In the pop up window, enter in the Dedicated Sending Domain that you want to authenticate and press Next. You find this information by going to Settings > Email Services > Postmaster Tools > Google.
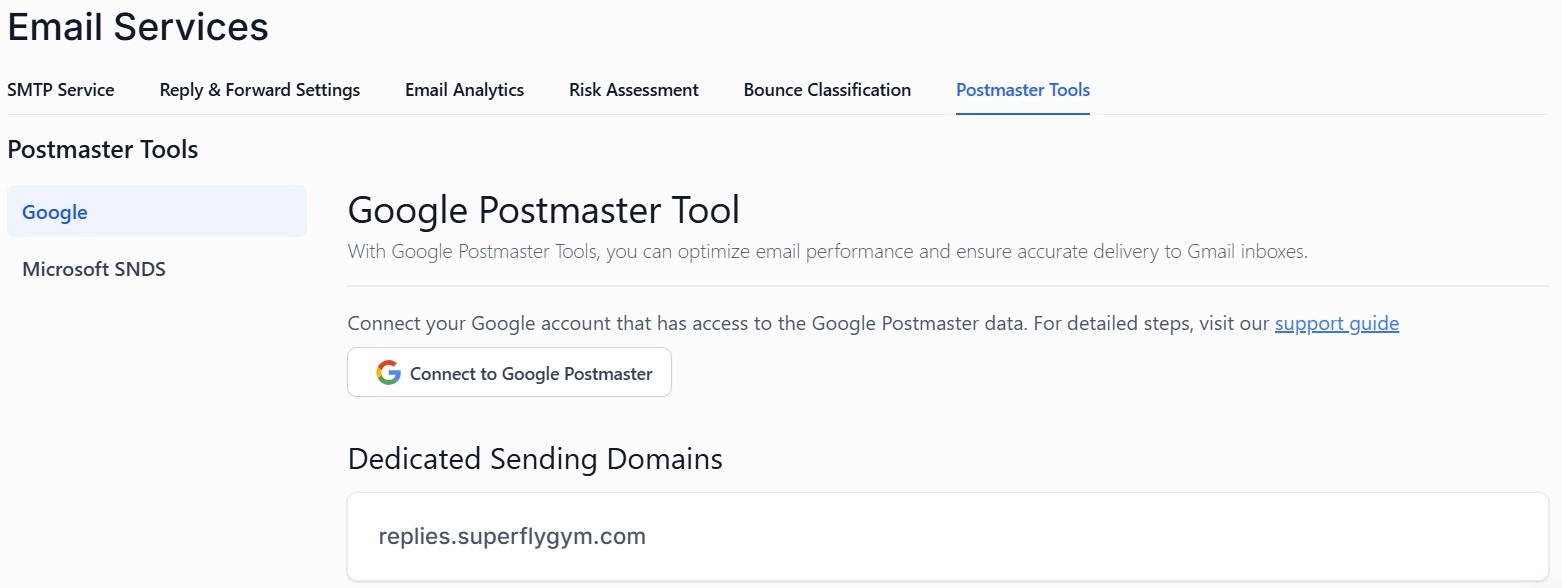
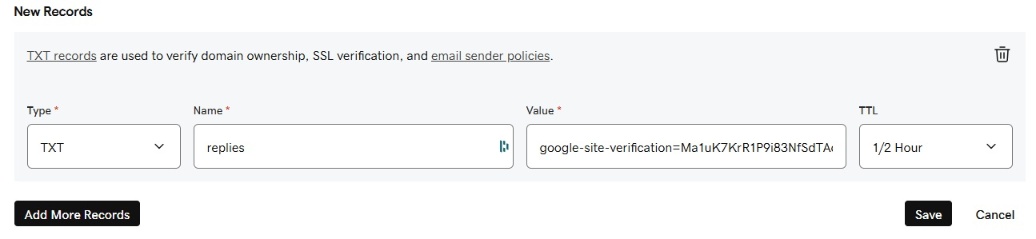
3. Log in to your domain provider dashboard to access your DNS records, and create a TXT record using the information provided. Your sending domain will either be replies.mygym.com or emails.mygym.com — enter replies or emails as the Name (or Host) field to match.
4. Once the TXT record has been successfully added, return to the Google Postmaster pop-up and click Verify. When the verification is complete, click Done to exit.
5. Finally, go back to the Postmaster Tools page in SuperCoach CRM and press Connect to Google Postmaster (using your Google account). Follow the on screen instructions to enable access for Lead Connector.
Data might not be available immediately after first adding your domain. It can take some time for Google to start displaying results. If you're unsure how to add a TXT record, consult your domain provider’s help articles or contact their support team — here are guides for GoDaddy and Squarespace to get you started.
HOTMAIL SENDING ERRORS
Google Postmaster only tracks data related to how Google (Gmail and Google Workspace) receives and handles your emails. So a bounce from Microsoft addresses (like Hotmail, Outlook, or Live) won’t directly affect your domain reputation in Google Postmaster.
However, if the issue causing Microsoft bounces—such as poor list hygiene or spam-like content—also affects your Gmail contacts, then your Google domain reputation can be impacted indirectly. The systems aren’t connected, but the underlying behavior might trigger issues across multiple providers.
SENDING LISTS
Optimized Smart List
SENDING SMART LIST
We recommend creating a Smart List for your emails and newsletter to optimize deliver rates.
1. Go to Contacts and click on More Filters.
2. Select (or search) Tags. Choose Is Not and select Bounced. Click Apply.
3. Click on + AND and select Tags. Choose Is Not and select Unsubscribed. Click Apply.
4. Click on + AND and select Email. Choose Is Not Empty. Click Apply.
5. Click on + AND and select DND. Choose Is Not and select Enabled for Email. Click Apply.
6. If you have Email Validation enabled for your account, click on + AND and select Valid Email. Choose Valid and click Apply. If you do not have Email Validation enabled, then skip this step.
7. When complete, click Save as Smart List. Enter a name for your Smart List and press Save to finish.
You can also add additional criteria, such as tag is newsletter. Once created, this list can be copied and modified (select Smart List, add new criteria and press Save as New). If you want other team members to see a smart list, you must share it. Click on Manage Smart Lists and select Share Smart List. Click here for more information about creating and managing Smart Lists.
Unsubscribe
Unsubscribe Links
You must include an unsubscribe link at the bottom of any marketing email in order to be GDPR, CAN-SPAM, CASL and APP compliant. Creating an internal link keeps the contact's unsubscribe wishes within the system (without notifying your SMTP provider). We have already an unsubscribe trigger link to your account and marketing email template, along with an unsubscribe workflow.
DEFAULT SETTING
By default, to help you stay compliant, the system sends an unsubscribe link automatically when sending bulk emails. To customize this, go to Settings > Business Profile and go to the General section. If you are consistently using the unsubscribe link set up below, you can disable this setting.

Unsubscribe Link
UNSUBSCRIBE LINK
We have already setup an unsubscribe trigger link and workflow (as well as a branded email template with the unsubscribe link set up).
USING THE DND UNSUBSCRIBE LINK
You will need add the unsubscribe trigger links to any email communication (such email builder or workflow emails) where you have not use the branded template.
1. Navigate to the communication you wish to customize.
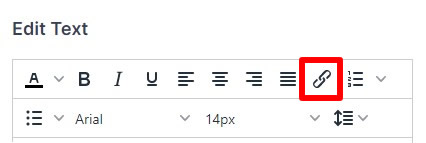
2. Add the required text (such as Click Here to Unsubscribe). Click the Link icon and select the DND Unsubscribe link from the Link List. Choose Target > New Window to open the confirmation page in a new tab.
DND UNSUBSCRIBE WORKFLOW
When a contact clicks on the DND Unsubscribe trigger link, this will update their DND settings in Contacts, mark all conversations as read, and add an 'unsubscribe' tag (DND stands for Do Not Disturb).
You can see the DND settings for a contacts at the bottom of the left hand panel of their contacts card. Once DND is set for email, you will no longer be able to send any type of emails to the contact.

SEASONAL MARKETING OPT OUT
We also have template workflows set up so that a contact can opt out from receiving the seasonal marketing emails. These templates need to be cloned and the filters need to be updated.
System Unsubscribe Trigger
SYSTEM UNSUBSCRIBE LINK
You can also use the built in unsubscribe link. Go to Settings > Business Profile and scroll down to the General section. If you are using the trigger link we have created, you should turn off the system link. If you would prefer to use the system link, you can press Customize to make changes.

Customized Unsubscribe Link
CUSTOMIZED CONFIRMATION PAGE
If you want to use our template with a different domain, we can clone our unsubscribe confirmation page to you account. If you want to create your own confirmation page, go to Sites > Funnels and create a basic page to confirm that the contact has been unsubscribed.
CUSTOMIZED DND OPTIONS
If you want the contact to be able to opt out from specific emails list, you could create a form in Sites > Forms > Builder and add a custom field with the email options available. if you want contacts to have the option to unsubscribe from specific lists. Click here for more information about forms and click here for more information about custom fields.
In Automations > Workflows, you then create a different workflow for each form response. Use Form Submission as the trigger and filter to the different options. Add the required workflow actions such as Remove from Workflow or Add/Remove Tag. Click here for more information about workflows.
CUSTOMIZED TRIGGER LINK
You might also want a contact to be able to opt out of a specific upcoming email sequence. To do that, first go Email Marketing > Trigger Links and create a trigger link. Click here for more information about trigger links.
In Automations > Workflows, create a workflow and use Trigger Link as the trigger. Add the required workflow actions such as Remove from Workflow or Add/Remove Tag. Click here for more information about workflows.
Double Opt-In
Double Opt-In
Double Opt-In Systems serve multiple purposes. First and foremost, it is used in the EU and required by GDPR. This means that once a lead opts in, they must confirm the opt-in to continue receiving information. Using a double opt-In system for new newsletter signups also helps to validate their email address and improve sending rate.
CREATE A THANK YOU PAGE
In Sites > Funnels or Sites > Websites, create a thank you page. Click here for more information about funnels.
CREATE A TRIGGER LINK
Go Email Marketing > Trigger Links and create a trigger link. Click here for more information about trigger links.
SEND TRIGGER LINK
1. Click on Automation > Workflows and click the green + Create New Workflow button in the top right of the screen.
2. Choose an option for the type of Workflow you wish to create, such as Start a Workflow from Scratch, and click the + Create New Workflow button again to enter the builder. Add a workflow name and press Save.
3. Click Add New Workflow Trigger and select an action that will trigger the opt-in message, such as Form Submitted.
4. Click the + to add a new event to the workflow and choose Send an Email. Write your email and include a trigger link for the person to confirm their opt-in.
5. Add any other required steps.
6. Press Save and toggle on Publish.
OPT-IN EMAIL WORKFLOW
1. Click on Automation > Workflows and click the green + Create New Workflow button in the top right of the screen.
2. Choose an option for the type of Workflow you wish to create, such as Start a Workflow from Scratch, and click the + Create New Workflow button again to enter the builder. Add a workflow name and press Save.
3. Click Add New Workflow Trigger and select Trigger Link Clicked from the drop-down menu. Add filter for the trigger link and select the opt-in link.Lesson Ending Section
4. Click the + to add a new event to the workflow. Choose one or more actions to occur such as Add a Contact Tag, Send an Email, Add to a Workflow.
5. Add any other required steps.
6. Press Save and toggle on Publish.

If you have a quick, system-specific "how-to" question, you can chat with our L1 Technical Support Team using the purple chat bubble in the bottom corner of the software. This team offers live chat 24/7, giving you instant access to help at any time of day.
If you have a more complex or outcome-specific “how-to” question, or a query about project requests, done-for-you resources, or Coach Catalyst, you can email our L2 Specialist Team at [email protected]. This team is available Monday to Friday, 8:00am – 1:00pm (EDT).
© 2026 SuperCoach CRM