
Custom Values
Created by: Emma Johnston
Last Updated: July 04, 2023
Custom Values/Merge Fields
Custom values are a powerful tool that will and are a great way to save time and maximize your system. They can be used to personalize communication (such as contact's name to an email). They can also be used to populate repetitive (and potentially changeable) information, such as your business name or contact information.
By using custom values, you can change information in one spot and it will update globally everywhere!
CUSTOM VALUES DASHBOARD
Click on Settings > Custom Values to view non-default custom values. You can search custom by name using the Search Box. You can change page in the bottom right corner.

EDIT AN EXISTING CUSTOM VALUE
To edit an existing custom value, click on the Edit icon. Change the name or value as desired and press Update. Editing a custom value will not affect the key. You cannot edit the system custom values.
DELETE AN EXISTING CUSTOM VALUE
To delete an existing custom value, click on the Trashcan icon. Press Delete in the popup window to confirm. You cannot delete the system custom values.
Creating a Custom
BRAND CUSTOM VALUES
We have already created several custom values for your business including social media information, brand colors, logo, favicon, review links and google maps information.
CREATE A CUSTOM VALUES
Some common merge fields are by default built into the system, such as contact name, email, phone number, etc.
To create your own custom values, go to Settings > Custom Values and then click on the blue + Add Custom Value button in the top right corner. Add a name and a value (for example, you might add Facebook as the name and the URL to your Facebook page as the value).
Using Custom Values
CUSTOM VALUES IN EMAIL TEXT
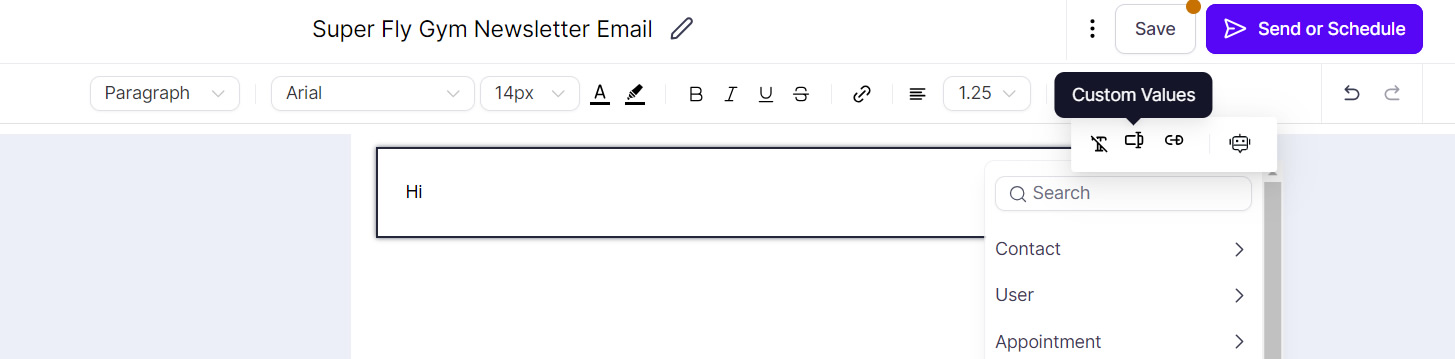
In Marketing > Emails, you can add custom values to the text and buttons. For email text, click on the Custom Values icon in the editing menu (on a smaller screen, you may have to click the ellipsis menu first (the three horizontal dots)). Use the dropdown menu and sub-menus to select the field. You can find self-created Custom Values at the bottom of the list. You can find custom fields at the bottom on the Contacts sub-menu.
CUSTOM VALUES IN CONVERSATIONS
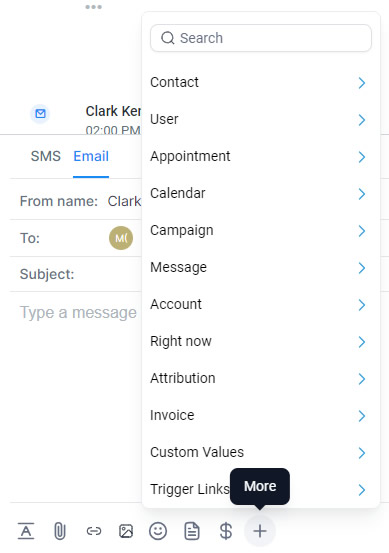
Navigate to the communication you wish to add a custom value to and click on the More icon. Use the dropdown menu and sub-menus to select the field. You can find self-created Custom Values at the bottom of the list. You can find custom fields at the bottom on the Contacts sub-menu.
TOP TIP: Remember to use the Contact menu, not the User menu, when creating personalized email. User name will add your name to the email, not theirs!
CUSTOM VALUES IN WORKFLOWS AND OTHER PLACES
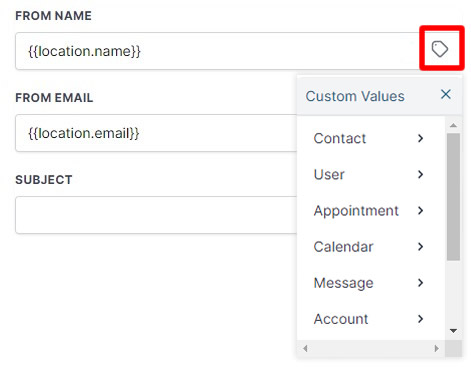
You can grab custom values from other places that are commonly used. If you see a tag at the end of a box, you can click on that to bring up custom values. For example, these can be found in workflows.
CUSTOM VALUES IN FUNNELS
You can use both standard and self-created custom values in funnels. In fact, you will see these a lot in the funnel templates. However, there isn't a quick add feature. You would have to grab the custom values key from elsewhere (such as an email) and then copy them into the funnel.
NOTE: Custom values for contacts will only populate if the system can identify the contact. For example, you can use custom values on a confirmation page that follows from a contact completing an order form or form, but you cannot add them to a landing page.
LOCATION CUSTOM VALUES
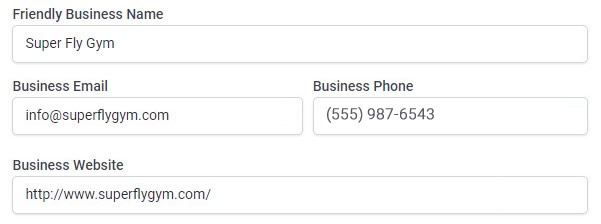
We recommend using the account custom values wherever your company name and contact details appear. That way, should anything change about your business, the information will update everywhere! These values are pulled in the Settings > Business Profile.
APPOINTMENTS AND MEMBERSHIP LOGIN DETAILS
Be aware that appointment custom fields and membership login details will only populate when used in workflow where the triggers are Appointment Book and Membership New Signup.
Automations
UPDATING CUSTOM VALUES
You can now update a custom value from a workflow.
1. Click on Automation > Workflows and click the blue + Create Workflow button in the top right of the screen.
2. On the next screen, select Start from Scratch. Once in the workflow builder, at the top of the page, you can rename a workflow using the pencil icon next to the title.
3. If required, add a workflow trigger.
4. Click the + to add a new event to the workflow and choose either Update Custom Value from the right-hand menu. Select the custom value from the drop down list. Enter a value or custom value in the New Value box. Press Save Action when complete.
5. Add any other required steps.
6. Toggle on Publish and press Save.

If you have a quick, system-specific "how-to" question, you can chat with our L1 Technical Support Team using the purple chat bubble in the bottom corner of the software. This team offers live chat 24/7, giving you instant access to help at any time of day.
If you have a more complex or outcome-specific “how-to” question, or a query about project requests, done-for-you resources, or Coach Catalyst, you can email our L2 Specialist Team at [email protected]. This team is available Monday to Friday, 8:00am – 1:00pm (EDT).
© 2026 SuperCoach CRM