
Phone Number
Created by: Emma Johnston
Last Updated: June 11, 2024
Phone Numbers
PHONE OVERVIEW
You can have a dedicated phone number within SuperCoach CRM, which can be used to send and receive text messages and to make or receive phone calls, either through the Lead Connector app or directly from your desktop. This number can be used for things like manual text messages, appointment reminders, and automated nurture sequences.
If you’d like to send text messages through the system, you’ll need to have a phone number set up within your account. You can’t use your personal number for this.
PHONE REGISTRATION
For more information about phone costs, click here. You’re charged for sending and receiving text messages (per message segment) as well as for incoming and outgoing calls.
PHONE REGISTRATION
Before adding a phone number to your account, please contact the Level 2 Specialist Support Team at [email protected], as each country has slightly different registration requirements. For example, if you’re based in the United States or sending messages to US contacts, you’ll need to register your business to ensure it’s A2P 10DLC compliant.
Please note that any messages sent from unregistered phone numbers will be blocked by carriers, but you’ll still be charged for the attempted send.
ADDING A NUMBER
Phone Numbers
ADD A PHONE NUMBER
1. Click on Settings > Phone Numbers > Manage Phone Numbers, click on the blue + Add Number button and select Add Phone Number from the drop-down menu.
2. Choose a country from the dropdown menu.
3. If you want your number to match to specific area, click on Filters, add the are code and select Match To First Part of Number. Click Apply.
4. From the list of numbers that show up, choose the one you want and click on Proceed to Buy to finish.
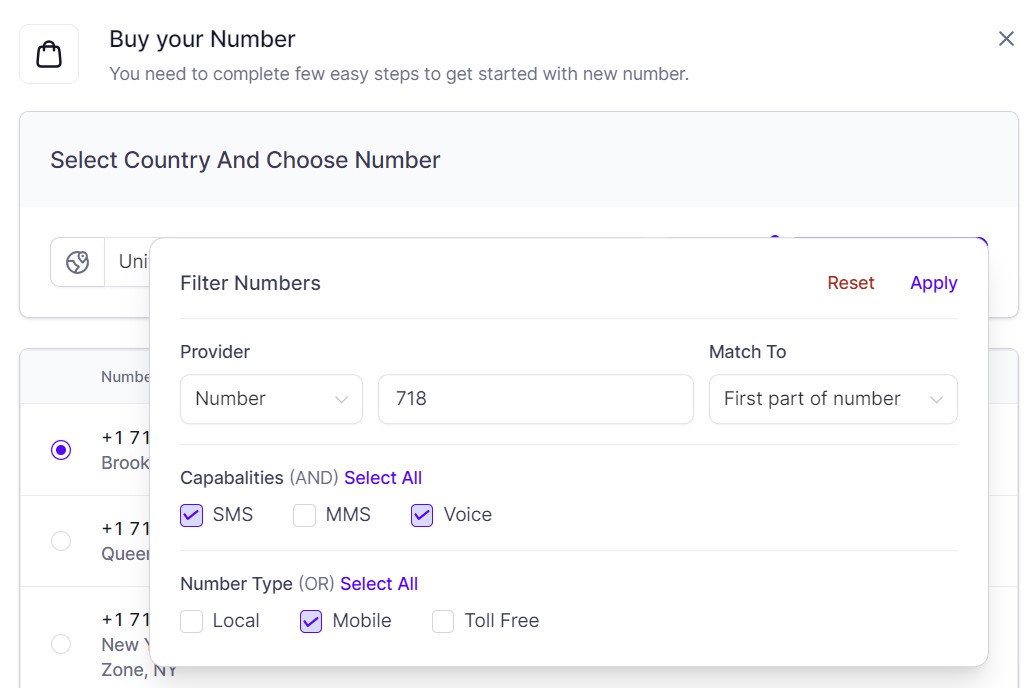
Some area codes can become unavailable for a period of time, in which case, you would need to search with a different area code. You can always repeat your search at a later date to check for availability.
You can also use the filter to search for other criteria, such as matching to any part or the last part of number. You can also search using text if you want the digits to match up to a phrase.
DELETE A PHONE NUMBER
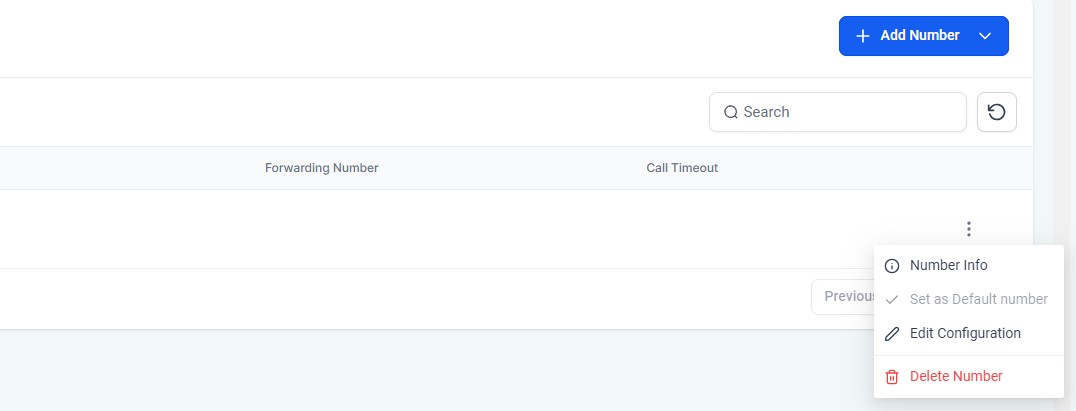
1. Click on Settings > Phone Numbers > Manage Phone Numbers, click on the ellipsis menu (three vertical dots) for the phone number you wish to delete and select Delete Number.
2. Click the Delete icon on the right side. Type Delete in the box and press Confirm Delete.
3. If you no longer require the number, type Release in the second box and press Confirm Release.
Text MESSAGES
Sending SMS Messages
SENDING A MESSAGE
Whether are you on desktop or using the Lead Connector app, you can send a text message to a particular contacts in Conversations or Contacts. Click here for more information about Conversations and click here for more information about Contacts.
BULK MESSAGING
On desktop, you can bulk send text messages in Contacts as a Bulk Action. Click here for more information on bulk actions.
AUTOMATIONS
You can create sequences of SMS messages (and emails) in Workflows. You can also create automated responses when a customer replies. Click here for more information about automated responses.
compliance
Sending Compliance
MESSAGE POLICY
When sending SMS messages, you need to adhere to the carriers messaging and filtering policies to prevent your messages from being filtered/blocked. Click here for more information on filtering. Click here for the full messaging policy. You should also check the sending guidelines for the country you are sending messages to and ensure your message does not contain forbidden content.
HYPERLINKS
You cannot send messages containing links shortened with public URL shorteners (such as TinyURL or Bitly). Messages with these links will be blocked and will not send.
If you need to include links, use a URL specific to your business. If you are based in the US or sending messages to US recipients, this is a legal requirement under A2P 10DLC. For businesses outside the US, it is strongly recommended to improve deliverability and compliance with best practices.
You can use URL Redirects to create business-specific URLs for SMS messages. Click here for more details.
EMOJIS AND LANGUAGE
We also recommend avoiding excessive capitalization, emojis, and unnecessary special characters, as they can affect message readability and may impact deliverability. Additionally, ensure proper grammar and spelling to maintain professionalism and clarity. Emojis also impact the segment character count. Click here for more details.
CONSENT
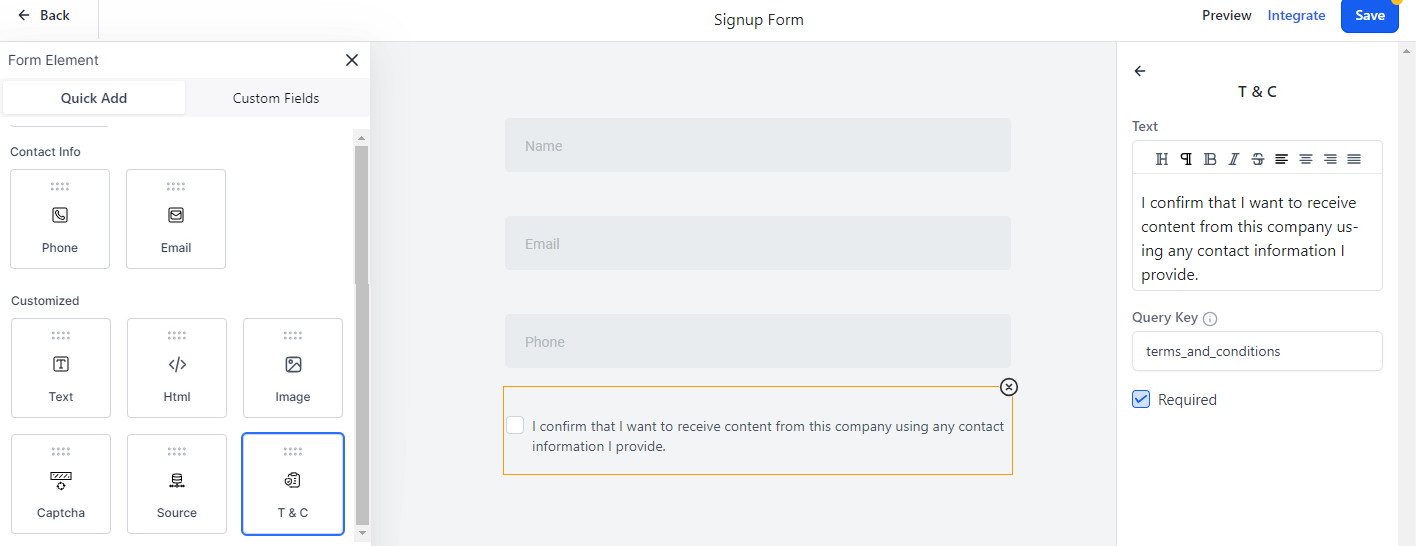
Ensure that you only send messages to mobile users who have provided consent to receive messages from you. If you are using a SuperCoach CRM form or survey to collect contact information, the system will automatically add a terms and conditions consent check box (but you can also add it separately if needed). You can edit/customize the wording in the right hand properties panel.
If you are sending messages to users repeatedly over a long period of time, you should check in with your recipients at least once every 18 months to ensure they still want to receive messages from you. Every message you send must clearly identify you as the sender, except in follow-up messages of an ongoing conversation.
OPT-OUT
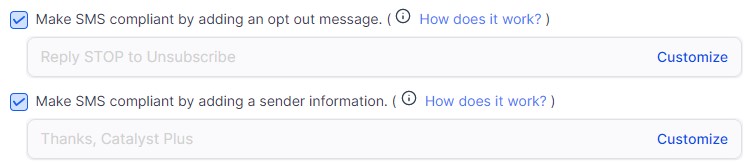
The end user should have the capability to remove the consent at any time so ensure that your messages clearly identify how to opt out. If you are contacting the same recipients multiple times per month, you do not need to provide opt-out instructions in every message, but you must do it at least once per month. The opt-out language you include in your messages must include a widely accepted keyword for opt-out, e.g. "Reply STOP to unsubscribe."
DEFAULT SETTINGS
By default, to help you stay compliant, the system sends Sender and Opt Out information automatically for messages sent as a bulk action or in a workflow. To customize this, go to Settings > Business Profile and go to the General section.
Compliance Rates
COMPLIANT MESSAGE ACTIVITY
A good opt-out rate is typically in the range of 0 - 1.0%. A high opt-out rate indicates that contacts receiving messages have objected, generated complaints or marked your SMS as spam.
A good error rate is typically in the range of 0—5.0%. A high delivery error rate indicates that SMS sent to contacts are no longer in service, are unreachable, or use a non SMS capable device such as a landline. This may also mean that external carrier filters are refusing to deliver your SMS due to bad sending behaviour in the past.
If you have a high opt-out rate (more than 1%) or high delivery error (more than 8%), your account will be restricted for 24 hours. If you have a very high opt-out rate (more than 2.5%) or high delivery error (more than 12.5%), the phone carrier will place a temporary restriction on your account.
Validation
PHONE NUMBER VALIDATION
Ensuring you are sending to a valid mobile number improves your delivery rate and decreases your error rate and risk of account restriction. Phone number validation costs $0.005 per validation and will only be triggered once per contact.
To enable Number Validation, go to the Settings > Business Profile. Under the General section, enable Validate Phone Numbers.
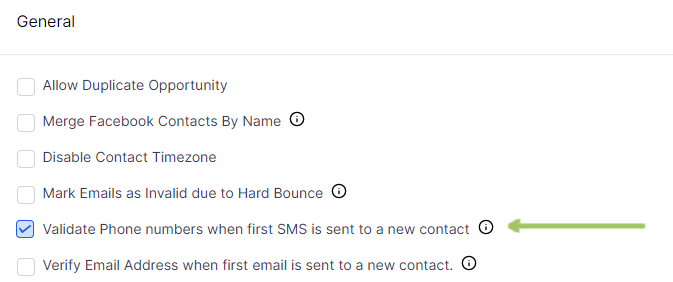
INVALID PHONE NUMBERS
The number will be validated when the first SMS is sent or a call is made to a new contact. If a number is invalid (such as the number is SMS incapable because it is a landline), temporary DND will be enabled for SMS messages. This will ensure that no future SMS communication is sent to this contact number.
Phone settings
Phone Settings
PHONE NUMBER SETTINGS
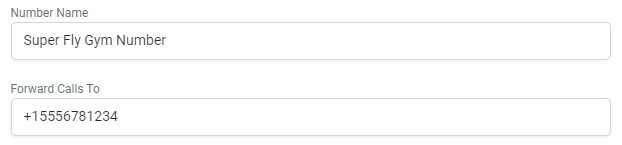
Click on Settings > Phone Numbers > Manage Phone Numbers, click on the ellipsis menu (three vertical dots) next to the number you wish to update and select Edit Configuration. Here you have the option to set up a name for the number, set up call forwarding, enable call connect feature, enable whisper message and enable call recording. Once complete, click Update to save your changes.
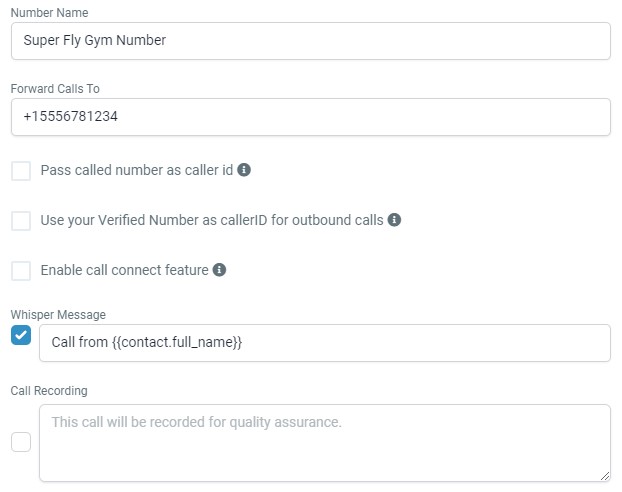
WHISPER MESSAGES
A whisper message is a short message, which only you hear on your end of the line when a call is connected with a lead. It can help you best serve your customers and have context for a call. You can custom values in your whisper message. You can add custom values, such as , to hear the name of the lead you are about to be connected with.
CALL RECORDINGS
You may want to record calls to be able to re-listen to them for quality assurance.
1. To listen to a call recording, go to Contacts and choose the contact you wish to listen to a recorded call with.
2. Within the contact record for that individual contact, the center panel of the contact page should display communication you've had with the contact. Recorded calls feature a play button, and you can click that to listen within the contact record. You will also see a stop button, volume button, and download button.
Phone Calls
Outbound Calls
MAKING OUTBOUND CALLS
On desktop, you can make a one time call by clicking on the green Call button in the very top right of the screen. Choose the phone number you want to call from (limited to the numbers you have set up in settings) and then type in the phone number you want to call and click Call.

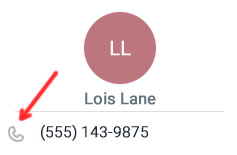
You can also initiate calls from the Conversations page or Contacts page. For Contacts, open the contact card for the contact you wish to call and click the green call button above the middle conversation section. For Conversations, You can make calls from the conversations section by clicking on the lead that you wish to call and pressing the call button under their name in the right-hand section.
APP CALLS
On the Lead Connector app, you can make a one time call by pressing the Call button on the Home screen. You can also go to the Conversations tab, select the contact and press the Call icon at the top of the page. Another option is to go to the Contacts tab, select the contact and click the call icon next to the phone number.
Inbound Calls
INBOUND CALLS APP
If you want to receive calls through the Lead Connector app, you need to enable this for the correct team member.
1. Go to Settings > My Staff and click on the blue Edit button next to the correct team member.
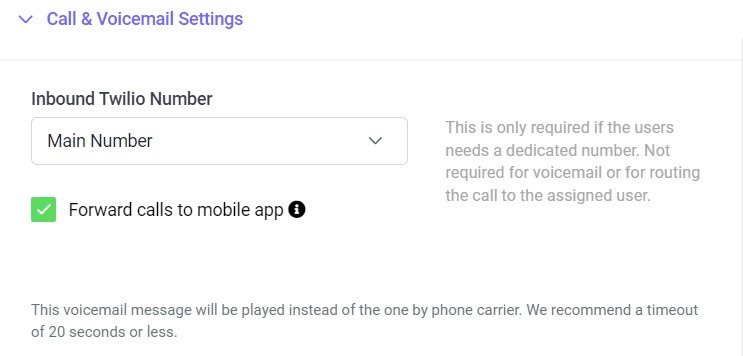
2. Expand the Call and Voicemail Settings section.
3. From the dropdown menu, select the Inbound Twilio Number.
4. Toggle on Forward Calls to Mobile App.
CALL FORWARDING
If you would prefer to forward incoming calls to another phone number, you can set up Call Forwarding.
1. Go to Settings > Phone Numbers > Edit, and click the Edit icon next to the number you wish to update.
2. Enter a forwarding number and click Update.
COMPANY PHONE
If you have not set up a specific Call Forwarding Number (and the lead is not assigned to a specific user), the call will be forwarded to the Company Phone (found in Settings > Business Profile).
Dedicated numbers
Dedicated Numbers
ASSIGNING A USER THEIR OWN PHONE NUMBER
Note: This is only required if a user/team member needs a dedicated number. It is not required for voicemail or for routing the call to the assigned user.
1. Click on Settings > My Staff > Team Management. Select the user (team member) and click on Edit. Scroll down to the Call & Voicemail Settings section and select an Inbound Number.
2. Ensure that in both Phone Number settings and User Settings the call timeout is less than 60 seconds. If you are also assigning a voicemail to the phone number, the call timeout will need to be less than 20 seconds.
Outbound Communication
OUTBOUND DEDICATED NUMBERS
If you have multiple phone numbers on your account, here is an overview of how the system selects which number to use when sending an SMS message or calling a contact.
Current User/Team Member has a SuperCoach CRM Number – If the current user/team member has a SuperCoach CRM number assigned to them (and are logged in), then the system will always use that number when sending an SMS message or placing an outbound call (even if they have been assigned to someone else). The reason behind this is that even though the Contact may be assigned to another user, the current user might be talking about something else. This makes it clearer to the contact/customer that they are talking to some different and it keeps messages grouped together.
Contact Assigned to a Team Member – If the current user does not have their own SuperCoach CRM number and the contact has been assigned to a different user (eg, through a campaign), then SuperCoach CRM will use the assigned user's number. If the assigned user has a SuperCoach CRM number, the system will use that. If the assigned user does not have an assigned SuperCoach CRM number, the system will use the Default outbound number selected.
Repeat Contact – If the contact gets contacted more than once, SuperCoach CRM will default to using whatever number was previously used to contact them. This rule applies unless they have since been assigned to a user and the user/team member has an assigned SuperCoach CRM number selected.
Contact Not Assigned – If the contact is not assigned to a user, the system will use the Default outbound number.
Click here for a flow chart running through these scenarios. When you click on Contacts and go to the conversation panel in a contact page, the icons on the right of a message help to indicate which phone number is used when sending SMS.
Inbound Communication
INBOUND CALLS/CALL FORWARDING
If someone calls your SuperCoach CRM and have multiple phone numbers on your account, the call is routed to one of three numbers:
Assigned SuperCoach CRM Number – If the SuperCoach CRM number being called is assigned to a specific user/team member, the call will forward to the number in the user's phone field.
To update the User Phone go to Settings > My Staff > Team Management, enter a phone number, and click Save.Assigned User – If the SuperCoach CRM number being called is assigned to a specific user but the lead is assigned to a user, the call will be forwarded to the number in the user's phone field.
To update the User Phone go to Settings > My Staff > Team Management, enter a phone number, and click Save.Call Forwarding Number – If the lead is not assigned to a specific user and there is an assigned Call Forwarding Number in the Phone Number settings, the call will be forwarded to the set Call Forwarding Number.
To update the Forwarding Call To Number, go to Settings > Phone Numbers and click on the Edit icon next to the phone number. Enter a forwarding number and click Update.Company Phone – If you have not set up a specific Call Forwarding Number for your SuperCoach CRM number and the lead is not assigned to a specific user via a user assigned campaign, the call will be forwarded to the Company Phone (found in Settings > Business Profile).
Click here for a flow chart running through these scenarios.

If you have a quick, system-specific "how-to" question, you can chat with our L1 Technical Support Team using the purple chat bubble in the bottom corner of the software. This team offers live chat 24/7, giving you instant access to help at any time of day.
If you have a more complex or outcome-specific “how-to” question, or a query about project requests, done-for-you resources, or Coach Catalyst, you can email our L2 Specialist Team at [email protected]. This team is available Monday to Friday, 8:00am – 1:00pm (EDT).
© 2026 SuperCoach CRM