
External Resources
Created by: Emma Johnston
Last Updated: February 15, 2025
Project Request / Upcoming / Previous / Bonuses / Instructions / Funnel / Form / Guides / Nurture Sequence / Giveaway Email
Content Engine (formally called Content Club)
Content Engine is a monthly subscription that provides marketing resources to help coaches generate leads. If you're subscribed, we can support you by branding the guide and setting up the funnel, automation, and nurture emails for the monthly Audience Builder resource.
SuperCoach CRM members can use discount code 'Content47' at checkout to get the first month for half price. This is NOT an affiliation code/link.
LATEST AUDIENCE BUILDER RESOURCES
Click below to request the funnel and automations set up. Please allow up to 28 days for this to be completed. You also need to factor in time after we have completed the initial setup to edit and test the funnel.
October 2025 The 5-Day Stress Reset - Coach Catalyst program, funnel, lead magnet workflow, giveaway email and nurture emails.
November 2025 Cravings Decoder - Form, lead magnet workflow, giveaway email and nurture emails.
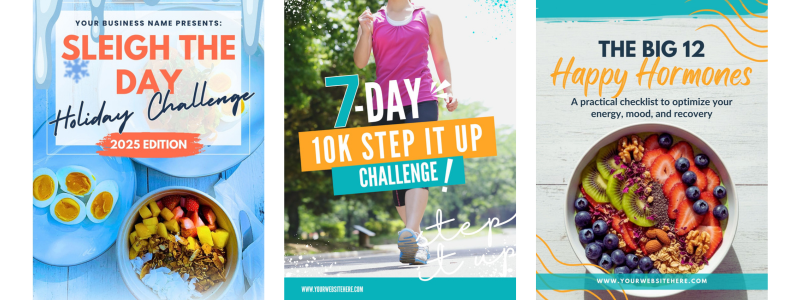
December 2025 Sleigh The Day Holiday Challenge - Coach Catalyst program, form, lead magnet workflow, giveaway email and nurture emails.
January 2026 7-Day Step It Up Challenge - Form, lead magnet workflow, giveaway email and nurture emails.
February 2026 Healthy Hormone Checklist - Form, lead magnet workflow, giveaway email and nurture emails.
ACCOUNT VERIFICATION
Before we can complete your first project request, you’ll need to send your Content Engine login details to L2 Support, so we can verify your access to the resources. If you have any issues with the Content Engine resources themselves, please contact the Fit Pro Essentials support team directly at [email protected].
Upcoming Content Engine Resources...
FUTURE AUDIENCE BUILDER RESOURCES
March 2026 Build a Better Breakfast - Form, lead magnet workflow, giveaway email and nurture emails.
April 2026 Quick Guide to Busting Plateaus - Form, lead magnet workflow, giveaway email and nurture emails.
May 2026 Grocery Store Survival Guide - Form, lead magnet workflow, giveaway email and nurture emails.
Previous Content Engine Resources
CONTENT ENGINE RESOURCES
We also have access to all previously released Audience Builder resources from Content Engine (dating back to July 2019). If you’ve used Content Engine in the past and would like to reuse a specific guide, just let us know and we can add it to your account.
These include a wide range of ready-made resources such as 5-day challenges, lifestyle lead magnets (covering topics like sleep, stress, food, shopping, habits, and nutrition), recipe collections, workout guides, and seasonal campaigns for the holidays and New Year. If there’s something you’d like to revisit or repurpose, we’re happy to help.
COACH CATALYST PROGRAMS
If you're running the 5 Week Sugar Detox Challenge or Spooktacular Sugar Detox, the bonus 5 Day Sugar Detox Challenge makes a strong complementary lead magnet.
As expected, the December and January resources support Thanksgiving, Christmas and New Year promotions.
HEALTH AWARENESS CAMPAIGNS
7-Night Relax & Recharge Routine (May 2024), Mini Morning Metabolic Booster Routine (Mar 2024), Good Morning, Good Night Guide (Sep 2021), and Supercharge Your Sleep (Jul 2019) are great for Sleep Awareness Month (March).
5-Day Stress Reset (October 2025), Mindful Breathing Guide (Aug 2022) and Mindfulness Workbook (Nov 2021) support Stress Awareness Month (April).
Brain Bingo Challenge (Sep 2024) is ideal for World Brain Day (July 22) or a lead magnet for the Coach Catalyst MIND Diet program.
EXTERNAL RESOURCES
The Plant Based Recipes (Sep 2022) works well as a lead magnet for Alicia Streger’s 30-Day Plant-Based Transformation, while the Hipnosis/Unlock Your Hips Guide (Oct 2024) pairs nicely with Ruston Webb’s mobility programs.
Content Engine Bonuses
CONTENT ENGINE BONUSES
If you’ve been a member of Content Engine for more than 8 months, you also have access to the bonus Hero Funnel Template. Let us know if you'd like it added to your account.
Content Engine Editing Instructions
We have completed your creating your Content Engine Audience Builder resources. We have set up your branded funnel, branded your client guides, create your nurture sequence and giveaway emails, and set up your workflow.
TASK CHECKLIST
Here a quick overview of the tasks you need to complete:
Task 1 - Edit all both pages in your funnel
Task 2 - Add your favicon and select the correct chat widget for your funnel
Task 3 - Create a subdomain/URL for your funnel
Task 4 - Edit form (if required)
Task 5 - Edit and download the Audience Builder guide from Canva
Task 6 - Edit the nurture sequence emails and link the Audience Builder guide
Task 7 - Edit the giveaway email and link the Audience Builder guide
Task 8 - Complete test form entry and final checks (at least five days before you launch)
Funnel
EDIT FUNNEL
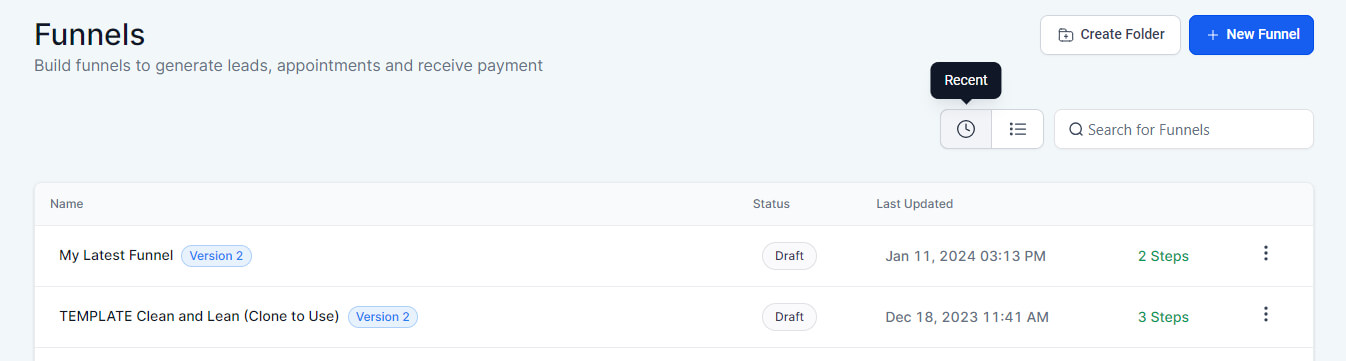
1. Go to Sites > Funnels, click on your Alicia Streger folder and open the relevant funnel. If you can't find the funnel, either click on the Recent tab or use the search box.
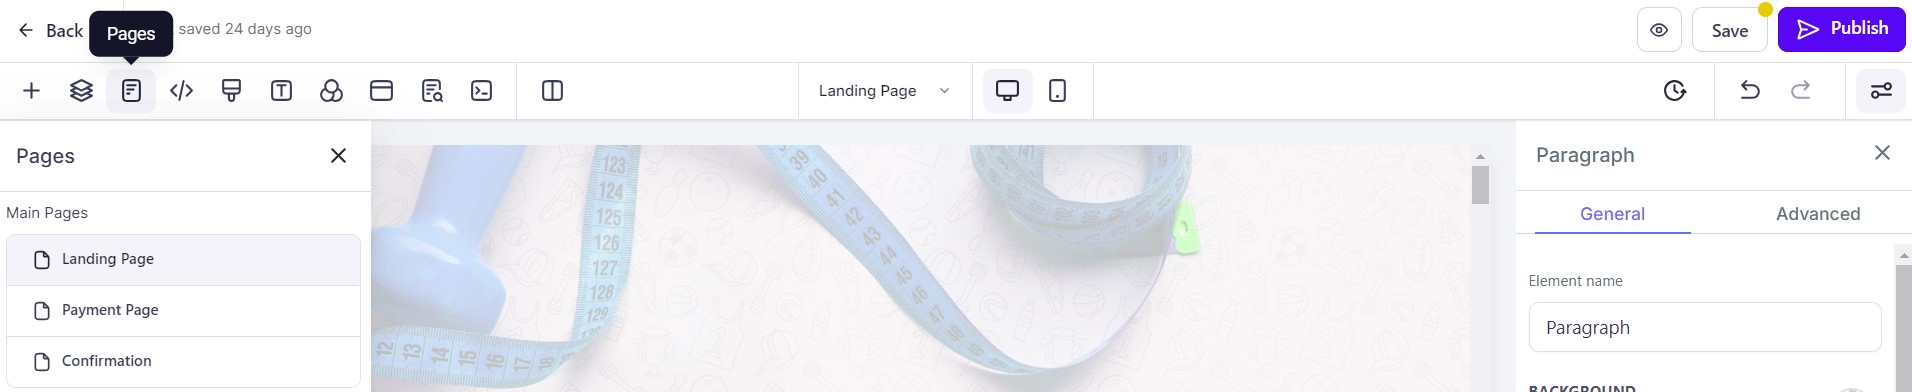
EDIT OPT-IN PAGE
2. Select the Opt-in page and click on Edit.
3. Edit the text and image as necessary. Although you can change the colors of the page title, you cannot edit the text. If needed, you can delete the title and replace it with a heading element.
If you do not see a form directly on the page, then you will need to open the pop-up window to make additional changes. Click here for instructions on how to edit a pop-up.
EDIT CONFIRMATION PAGE
5. Once complete, click on the Pages icon in the menu bar and select the Confirmation Page.
6. Edit the text and images as necessary and update the call to action button.
7. Press the Save button regularly while making changes and press Publish when complete.
Click here for more information about using funnels and click here for information about editing funnel elements.
Chat Widget and Favicon
ADD CHAT WIDGET AND FAVICON
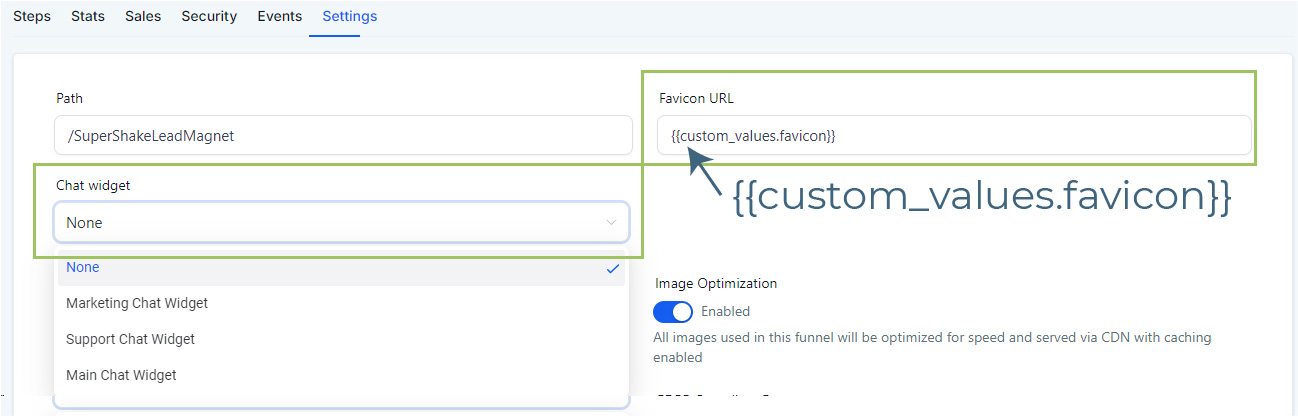
1. Go to the funnel dashboard and click on the Settings tab.
2. Open the Chat Widget drop down and select the correct chat widget.
3. In the Favicon URL box, type in custom_values.favicon surrounded by double braces/curly brackets (as shown in the image below).
4. Press Save when finished.
Click here for more information about creating different Chat Widgets.
Funnel URL
CREATE A FUNNEL URL/SUBDOMAIN
1. Go to Settings > Domains and click on the blue + Connect Domain button in the top right corner.
2. Enter your chosen subdomain (such as guidename.mygym.com or programname.mygym.com) in the Domain URL box and click Add Record Manually to continue (NOT the blue Continue button).
3. In the next window, click Verify Records to continue. There may be up to a 30 second delay while this processes.
4. Lastly, on the next page, choose the correct funnel and select the landing page.
Once created, you will only need the part up to the .com when sharing the link (as highlighted in the image below).

REUSING SUBDOMAINS
If you have run a particular challenge/program before, you can use the same domain again. The easiest option is to delete the domain and readd it using the instructions below. This will clear the domain from the previous funnel and ensure the default page is set to the new funnel.
MARKETING EMAILS
If there are marketing emails for the program you are running, go to Settings > Custom Values and add the URL. For more information, go to the Marketing Emails help article for your challenge/program.
Form
EDIT FORM
1. Go to Sites > Forms > Builder, click on your Alicia Streger folder and open the relevant form.
2. Edit the form as necessary (such as changing the colour of the button).
3. Press Save when finished.
Click here for more information about forms.
Canva Document
ACCESS CANVA DOCUMENT
If you have requested a branded lead magnet guide and email header, we will send you an invitation email with the Canva access links. You can also accept the invitation directly in Canva. Click on Notifications at the top of the Canva homepage (bell icon) for more information.
DOWNLOAD CANVA DOCUMENT
Once you have completed any edits that you want to make to the documents, you will need to download them as a PDF for clients to access. You can refer to the Content Club Google Doc for instructions on what changes need to be made.
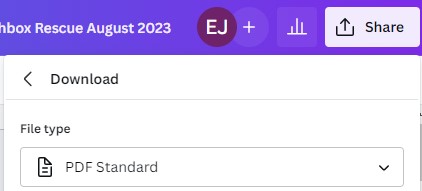
1. In the Canva desktop editor, you can either select File > Download from the menu bar or click on the Share button in the top right corner and select Download.
2. Select PDF Standard as the file type.
3. Select the pages required and press Download.
Nurture Sequence
We have already set up the required automation/workflow so that when the contact fills in the form, they are automatically sent the lead magnet email followed by the nurture sequence.
You will need to link your lead magnet to the nurture sequence. You will also need to edit the copy (you can refer to the Content Club Google doc provided for instructions on what content needs to be edited). You can replace the header images for the emails using the image that we have shared with you in Canva.
EDIT EMAIL #1
1. Go to Automation > Workflows, click on your Alicia Streger folder and open the relevant workflow.
2. Open the Delivery Email #1 step. If needed, change the subject line for the confirmation email.
3. Hover over the template preview and click on Edit. This will open a pop-up window where you can edit the email.

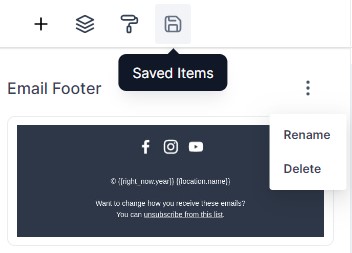
4. Update the wording as required, change the button color, and replace (or delete) the header image. To edit the appearance of the text, click on the text and the editing toolbar will appear at the top. To add your company footer, click on the Saved Items tab and drag your footer to the bottom of the email (and delete the existing footer).
5. Delete the email footer and replace it with your email footer (click on the Saved Items tab in the left-hand panel and drag your footer to the bottom of the email).
ADD PDF TO EMAIL #1
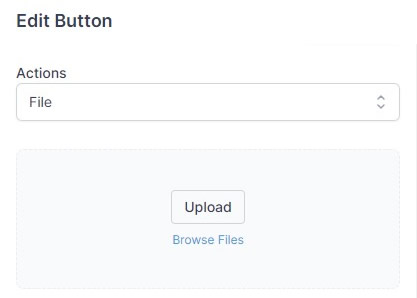
6. Click on the button and select File from the Actions drop down menu in the left-hand panel. Press Upload or Browse Files.
7. Either select your lead magnet PDF or click on Upload File (and then select the file). Double click on the file to return back to the email editor. We recommend creating a folder for your PDF resources to help keep your account organized.
8. Press Save when complete and then press the X in the top left corner to close the window and return to the workflow.
9. Press the Save button in the top right corner of the workflow.
Click here for more information on editing emails and click here for more information about the media library.
EDIT EMAIL #2
1. Open the Email #2 step. If needed, change the subject line for the confirmation email.
2. Hover over the template preview and click on Edit.
3. Update the wording as required, change the button color, and replace (or delete) the header image.
4. Click on the button and repeat the steps above to add the PDF.
5. Delete the email footer and replace it with your email footer found in the Saved Items tab in the left hand panel.
6. Press Save when complete and then press the X in the top left corner to close the window.
7. Press Save Action to finish and return to the workflow.
EDIT EMAILS #3 - 5
1. Open the Email #3 step. If needed, change the subject line for the confirmation email.
2. Hover over the template preview and click on Edit.
3. Update the wording as required, change the button color, and replace (or delete) the header image.
4. Delete the email footer and replace it with your email footer found in the Saved Items tab in the left hand panel.
5. Press Save when complete and then press the X in the top left corner to close the window.
6. Press Save Action to finish and return to the workflow.
7. Repeat these steps Email #4 (testimonial email) and Email #5 (call to action email). These emails usually require the most edits.
8. Save the workflow regularly while making changes. When complete, toggle on Publish.
EMAIL #5 OPTION
For Email #5, rather than having a different CTA email for each Content Club nurture sequence, you may prefer to always use the same template. The advantage of doing this is that each time you change your offer, you can then update that single email and all of the workflow will still lead to that latest offer.
To do this, create a CTA email. Then, each time you edit each nurture sequence, swap the Email #5 template for that email.
OTHER AUTOMATIONS
By default, the nurture sequence is set up so that the emails are sent daily. You can change this by adjusting the wait step timings in the workflow as required. You can also add additional action step to the workflow as desired.
Click here for more information about workflows.
PREVIEW THE MARKETING EMAILS
We recommend previewing the emails as you edit them, so that you can see what the emails will look like when viewed on different devices. You can do this by clicking the Preview button at the top of the email editor pop-up.
Once you have completed all of the edits, we also recommend pressing Test Workflow at the top of the workflow to send yourself sequence so that you can check the appearance of the emails. You can then push/walk yourself through the workflow so that you can receive all of the emails without need to wait. Click here for instructions.
TESTING
Once you have completed your edits, you will need to test the funnel! Open the funnel, complete the opt-in form and check the automations run as expected. If there are any problems, email [email protected].
Giveaway Email
EDIT GIVEAWAY EMAIL
1. Go to Marketing > Emails, click on the relevant folder for the lead magnet and open the Giveaway Email.
2. Click on the button and select URL from the Actions drop down menu in the left-hand panel.
3. Update the wording as required, change the button color, and replace (or delete) the header image.
4. Delete the email footer and replace it with your email footer found in the Saved Items tab in the left hand panel (just drag and drop the email footer element to the bottom of the email).

ADD THE LEAD MAGNET PDF
5. Next, click on the button and select URL from the Actions drop down menu in the left-hand panel. You can either just add the URL link so that the recipients can download the PDF, but you won't be able to track that, or you could send them the link to the opt-in page if you want them to go through the nurture sequence.
SAVE OR SEND
6. When complete, press Save Template and then press Back to exit.
7. To send the giveaway email, click on Actions > Create Campaign.
Click here for more information about sending emails.
TRIGGER LINK
Alternatively, you could create a trigger link (that directs contacts to the confirmation page) so you can track clicks and a workflow (that fires when the link is clicked and tags contacts).
1. Go to Marketing > Trigger Links > Links. Press the blue Add Link button.
2. Enter a name for your link and paste in the URL to the PDF. Press Save.
3. Next, open the giveaway email and select the button.
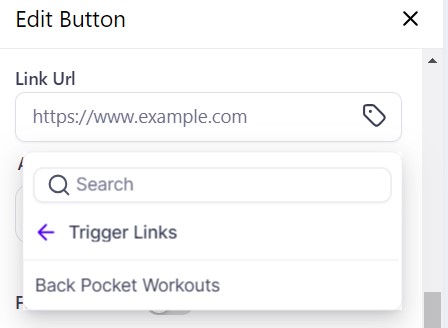
4. In the left-hand panel, click on the tag icon in the Link URL box. Select Trigger Links from the dropdown list and then select the correct link.
You can then create a workflow using Trigger Link Clicked as the trigger, so that you can automated follow-up actions, such as tagging the contacts. Click here for more information about using trigger links and creating automations.
Optional Extras
INSTAGRAM LINKS PAGE
Don't forget to update your Instagram links page with your latest lead magnet!
1. Go to Sites > Funnels and select your Instagram Links funnel.
2. Clone an existing button and edit the button text and URL at the bottom of the left hand panel.

If you have a quick, system-specific "how-to" question, you can chat with our L1 Technical Support Team using the purple chat bubble in the bottom corner of the software. This team offers live chat 24/7, giving you instant access to help at any time of day.
If you have a more complex or outcome-specific “how-to” question, or a query about project requests, done-for-you resources, or Coach Catalyst, you can email our L2 Specialist Team at [email protected]. This team is available Monday to Friday, 8:00am – 1:00pm (EDT).
© 2026 SuperCoach CRM